Nov 14, 2012
28
reviews
Rate & Review

The Perfect Bird: How to Roast the Best Thanksgiving Turkey

This fail-proof roasting method produces the tastiest, juiciest Thanksgiving turkey
By
Print Save Recipe
The Perfect Bird: How to Roast the Best Thanksgiving Turkey Enlarge Image Credit: Todd Coleman

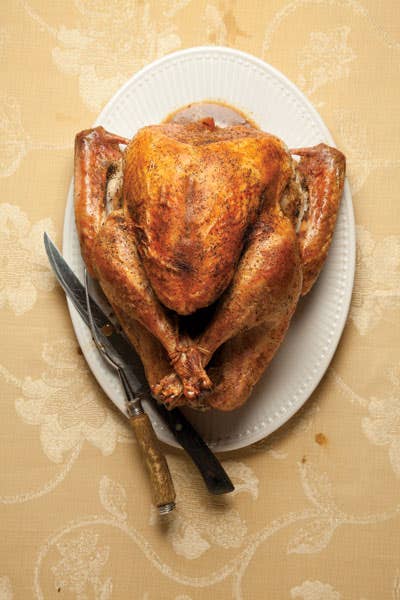
As the so-called kitchen professional in my family, I used to be expected to come up with newfangled takes on the Thanksgiving turkey each year. I've brined it, smoked it, fried it, dry-rubbed it; but eventually I (and everyone else around the table) tired of elaborate seasonings and complicated preparations. What we really craved was just a fantastic roast turkey—and this recipe produces exactly that. Follow these steps and you'll have tender legs, juicy white meat, burnished skin, and lots of gravy. In fact, it's the single best technique for roasting a bird that I know and the only one I use anymore when it comes to this special meal.

To start, I shop for a fresh, humanely raised bird, ideally not more than 15 pounds; the gargantuan, industrially raised fowl sold by the truckload around the holidays are bland (at best) and, because they're so big, impossible to cook evenly. One 13- to 14-pound fresh turkey will generously feed 10 to 12 people (for more guests, buy a second turkey). Bring your bird home at least two days before Thanksgiving so you have ample time to presalt, a simple step that keeps the turkey juicy and intensifies its natural flavors.

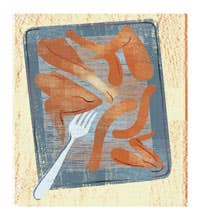
  1. Begin with the gravy: You'll want plenty of it, so I recommend buying and roasting turkey parts, which will be used to make the gravy's deeply flavorful broth. You'll need five to six pounds of turkey parts —ideally a mix of necks, wings, and legs — to make enough gravy for 10 to 12 people. Ask your butcher to chop the parts into four-inch pieces; smaller pieces are best because the skin and collagen release more easily from the bones, adding flavor and body to the broth. Pat the parts dry with paper towels, arrange them in a single layer in a large flameproof roasting pan (I use the same one I use for the turkey), and roast them in a 450-degree oven, flipping them with tongs after 30 minutes, for an hour total, until nicely browned.


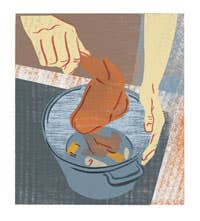
  2. Transfer the roasted parts to a four- or five-quart saucepan. Don't worry if bits stick; you'll capture them when you deglaze the pan. Place the roasting pan over your largest burner (you can use two burners if that's a better fit), turn the heat to high, and add two cups of water. Bring to a boil, scraping the bottom with a wooden spoon to dissolve any cooked-on drippings, and then pour the liquid into the saucepan. Add enough additional water to the saucepan to just cover the turkey pieces; any more can result in a diluted broth. Depending on the shape and size of your pot and turkey parts, you'll probably need about seven to eight cups of water total. Bring to just below a boil over medium high heat, and immediately lower the heat to a very gentle simmer. Skim any foam or scum that rises to the top, and add one large coarsely chopped carrot; one large coarsely chopped yellow onion; one coarsely chopped rib of celery; one-half teaspoon of kosher salt; one-half teaspoon of whole black peppercorns, and one bay leaf. It's awkward to skim once you've added the vegetables and seasonings — since they tend to float to the surface — so I don't bother. As long as you don't let the broth boil aggressively, it will be clear. Continue to simmer, uncovered, until it has a sweet, rich turkey flavor, two and a half to three hours. When the broth is done, set a fine-mesh strainer over a heatproof bowl. (If you don't have a fine-mesh strainer, line a colander with a double thickness of cheesecloth.) Strain the broth, pushing gently on the solids to extract as much liquid as you can but not so hard as to mash the vegetables—this will cloud the stock and give it a murky flavor. Let the broth sit on the counter until it cools to room temperature, and then cover and refrigerate for up to four days. Once the broth has completely chilled, remove the layer of surface fat. You can freeze this broth for up to six weeks. In fact, if I'm traveling by car for the holiday, I'll freeze the broth in plastic tubs and use them as ice packs in my cooler.


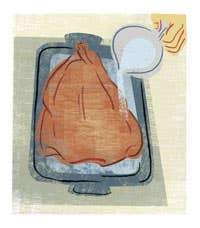
  3. Presalting is the key to a juicy bird. Remove the giblets from the turkey, and refrigerate them for later use (except the liver, which you can discard or save for another use). Then pat
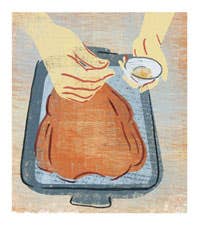
the turkey dry with paper towels. Sprinkle two tablespoons of kosher salt and one teaspoon of freshly ground black pepper liberally all over the turkey, spreading a little in the cavity and being sure to season the back, the breasts, and the meaty thighs. If you've never pre-salted before, this may look like too much salt, but it's not. As the turkey sits in the refrigerator, the salt will gently permeate the meat, improving the waterholding ability of the muscle cells so that, when cooked, the meat stays juicy yet does not become overly salty. In fact, when you pull the turkey from the fridge after its salt treatment, the skin will be taut and dry with no trace of salt. Arrange the turkey on a wire rack over a rimmed baking sheet, and refrigerate uncovered (this dries the skin, which helps it turn crisp during roasting) for one to two days.


  4. I am a firm believer in not stuffing the turkey: It roasts more quickly and evenly when its cavity isn't filled. I've probably tested every single roasting method out there, from roasting at very high heat to flipping the bird to distribute its juices; none of them surpasses this one, which requires placing the turkey in a very hot oven, then roasting it at a moderate temperature the whole way through. Remove the turkey from the refrigerator about two hours before roasting to take the chill off; this also helps it cook more evenly. Heat the oven to 450 degrees.
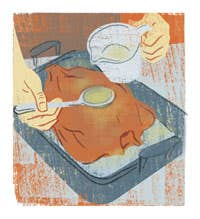
    Tuck the wings behind the neck, and tie the tips of the drumsticks together with kitchen string. Arrange the turkey breast-side up on a rack in a sturdy roasting pan. Pour one and a half cups of your homemade turkey broth into the pan, and slide the turkey into the oven, immediately lowering the heat to 350 degrees. Then let it do its thing, rotating the pan after about one and a quarter hours, for two and a half to three hours total. Meanwhile, combine the remaining turkey broth with the giblets in a two-quart saucepan over medium heat. Simmer gently, partially covered, until the giblets are tender, about 45 minutes. Remove the giblets (saving them to add to the gravy later, if you like), and keep the broth warm.


  5.  
  6. For the prettiest, most evenly bronzed bird, baste by spooning pan drippings over the breast every 45 minutes. If you notice the breast or drumsticks getting too dark, cover them loosely with foil during the last 30 to 45 minutes of roasting. Alternatively, if the legs aren't browning —which can happen if the sides of your pan are too high — you may want to flip the turkey so it roasts breast-side down for about 35 minutes and then finish it breast-side up.


  7. The first hint that the turkey is ready will be the tantalizing aroma that fills the kitchen; you can count on its cooking for about 13 minutes per pound.
    To be sure, pierce the meaty part of a thigh with a sharp knife, and check that the juices run mostly clear with only a trace of pink—don't wait for them to become completely clear, a sign that the turkey is overdone. To doublecheck, insert an instant-read thermome ter into the thigh, careful not to hit bone; it should read 170 degrees.


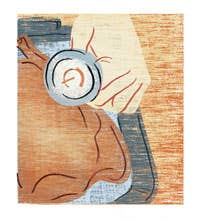
  8. When the turkey is done, grab both sides of the roasting rack with oven mitts to lift and tilt the turkey, and let the juices pour from the cavity into the pan. Set the turkey aside, tenting it very loosely with foil, to rest for at least 30 minutes while you tend to making the gravy.
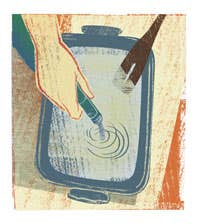
    (This resting period allows the proteins to cool and firm up, so the turkey better retains its juices when carved.) Pour all the liquid from the roasting pan into a heatproof bowl or 1-quart glass measuring cup, and set it aside. Set the roasting pan over two burners at medium-high heat, and add three-quarters of a cup of dry white wine or dry vermouth and two tablespoons of brandy. Bring to a boil, scraping with a wooden spoon to dissolve any flavorful cooked-on bits, and return the reserved liquid to the roasting pan. Boil, stirring often, until the liquid is reduced by nearly half, about eight minutes. Turn off the heat, and set aside.


  9. Once the liquid from the roasting pan has settled, spoon off and transfer the surface fat to a medium saucepan, measuring as you go, to make a roux for your gravy.
    You'll need about four tablespoons of fat, but every turkey is different, so if you're short add enough butter to make up the difference. Heat the fat over medium-low heat, and whisk in one-third cup of flour until smooth. Cook for about four minutes, until the roux has a light amber color, and then gradually whisk in the reserved pan drippings. Bring to a simmer, and slowly whisk in four cups of warm turkey broth. Let the gravy simmer and thicken, whisking occasionally, for about 15 minutes (or more for thicker gravy). Add more broth if needed to get the consistency you like. For a hearty giblet gravy, finely chop the neck meat along with the gizzard (after removing the gristle) and the heart, and stir this meat into the finished gravy. Season the gravy with salt and pepper to taste, and keep it warm as you carve the turkey. By now, your kitchen will likely be crowded with guests hoping to steal a taste of the big bird. Call everyone to the table, say your thanks, and enjoy your perfect roast.

Illustrations: Don Kilpatrick/Morgan Gaynin
The Perfect Bird: How to Roast the Best Thanksgiving Turkey

This article was first published in Saveur in Issue #142

Ratings & Reviews (28)

noAvatar
If I need to roast two 14-pound turkeys together in a large roaster, how does that affect the time?
noAvatar
Sounds great to me! I do this with chickens and add garlic to the salt. If I were to do this with turkey breasts, how would I change the recipe?
noAvatar
You don't have to rinse the salt off before roasting?
noAvatar
How long should the turkey should sit in the fridge during the salt treatment?
noAvatar
Our test kitchen director Kellie has the answers to all your questions:

@lorik Roasting two turkeys at once is not an ideal situation, but it shouldn’t affect the time (maybe an extra 30 minutes, give or take.) Make sure you rotate the bids and baste evenly. With 2 birds, you need to make sure they have enough room in the oven for hot air to circulate. Definitely try not to open the oven too often (the more you open the oven, the longer it will take to cook.) Save basting for the last hour of cooking.

@JOHNOHIO If you're cooking turkey breasts, you can use the same procedure except adjust the cooking time for however many pounds you are dealing with (will obviously be a shorter cook time).

@CSYKES@ARNOLDLUMBER.COM Nope, you don't need to rinces the salt off before roasting. The salt does double duty: dry curing to help seal in the moisture during cooking and to help season crisp up the skin.

@MONOPOD The turkey should sit in the fridge overnight (12-24 hours) depending on how early you prep the day before/when you serve the day of.
noAvatar
My turkey is a little over 17#. Should I salt it earlier - say 36 hours ahead?
noAvatar
Two questions. My turkey is a whopper: 24 lbs. How much salt do I use? And for how long should it be salted resting in the fridge? The original recipe says 1 - 2 days, and a response to a question says 12 - 24 hours. For a really big bird, what's the best way to go?
noAvatar
No matter the size of your turkey, you should salt at least 12 hours (and up to two days) before cooking, making sure that your turkey is completely defrosted before salting. A larger bird does not need a longer salting time. You will, however, need more salt for a larger bird. The skin should be well salted, so add more salt as needed to make sure all surfaces are rubbed with salt.
noAvatar
I've always roasted a turkey at 350 in the oven at 20 minutes a pound. A temperature of 450 is not too high? I roasted the wings and necks at 450 for one hour and some of the pieces burned. Thanks
noAvatar
What is the purpose of adding broth to the roasting pan? Wouldn't that added moisture take away from the crisping of the skin, and in fact sort of steam the skin? I do the dry salting when I roast chickens and I'm trying it for my turkey this year, but I don't understand the reason for the broth. Thanks
noAvatar
I'm doing my turkey this way, following Molly Stevens' recipe. I'm frustrated, though, that so many details have been omitted: When you put the salted turkey in the fridge, do you cover it? And then uncover it when you are going to leave it in the fridge for a while? How long for each step? Where's the answer to Mapper, above? What about the broth under the roasting turkey? I hope this will get to someone in time for some answers for tomorrow:). What's your recommendation for final temp before removing turkey from oven? Or what is your criterion for that? I've made turkeys for years, yet success is always questionable. I really want to learn how to insure a good one all the time:).My husband and I both love reading Saveur, because you cover so many subjects and so much territory.
noAvatar
I followed the recipe as well as I could. My only concern is that my 25 lbs turkey came up to temperature in only 3 hours. My thermometer reads 160 degrees in the breast and 170 in the thighs. It looks great and the juices run clear (no pink). Why did my turkey cook so fast? I expected nearly six hours of cooking.
noAvatar
Agree with Marian...was hoping to have found out whether the turkey was covered while sitting in fridge after you salt and for how long it sits before removing it and putting on rack in fridge.
noAvatar
Marian and Turquoise Cowboy, I will try to answer your questions, though I'm just a humble home cook! It does say in the recipe to keep the turkey uncovered in the fridge after salting, and explains that this "dries the skin, which helps it turn crisp during roasting." If this note is too late and you kept it covered in the refrigerator after salting it, I wouldn't worry...covering it will be fine, in my opinion. I've seen recipes online similar to this one, but where they cover the turkey in the refrigerator.
As for how long to leave it salted, see response by "Saveur Team on 11-11-22." And Mapper, I'm not positive, but I think the broth under the turkey is simply to have that wonderful flavor as a start to what will be the gravy. The drippings from the turkey will add to it and deepen the flavor more, making it rich and flavorful by the time the turkey is done. Happy Thanksgiving, everyone! My turkey is in the oven and lookin' good.
noAvatar
Mine was a big hit yesterday. Thank you!
noAvatar
Salt and pepper — who would have thought this would result in a perfect Thanksgiving turkey? I used table salt and covered the bird for two days before cooking it. No matter, this technique still worked extremely well.
noAvatar
This was the best turkey I've ever made and really quite simple. Basically salt & pepper the bird a couple of days before cooking and let it dry in the fridge. We just did a turkey breast and I've never had such a juicy bird. Thank you! What are your thoughts on adding herbs like thyme or rosemary? I'll probably try this recipe when roasting a chicken. What ratio of salt to lbs of bird is good?
noAvatar
Great recipe. EXCEPT that my 13 lb fresh turkey registered 190 degrees after only two hours. I've often found that turkeys (especially fresh ones) cook much faster than expected. My oven temp. is right on - I do a lot of baking and have a good thermometer. The turkey was still delicious. Next year, I'll use this recipe, but check the turkey much sooner. This recipe is a take on Judy Rodgers Zuni Cafe roast chicken with bread salad recipe. If you haven't made that yet, GOOGLE it. It's phenomenal when made correctly.
noAvatar
Thanks try146...I read it as 2 separate steps since it said "after the salt treatment...then put it on a wire rack...., so I covered it with cling wrap for the 'treatment' and then uncovered it for the day to really dry it out...end result was great turkey and crispy skin...as advertised. Instead of putting it on rack , I used the tip at back of magazine and had it sitting on carrots, peas and onions which made a fantastic gravy.
noAvatar
Any thoughts/comments on if the bird is kosher and therefore already salted? I was very happy with my results but would like to know if my guess about how to adjust was correct.

I followed the procedure but used less salt than called for, keeping the amount of pepper the same.

By the way, my fresh 12 1/4 lb bird also cooked very quickly - about 2 hours.
noAvatar
Turkey came out exactly as called for in the recipe. Juicy with a perfectly crisp bronzed skin. This is my first time to roast a whole turkey and still can't believe how tasty it came out to be. Mine was a 13 lb and took about 3 hours too cook.
My friends couldn't stop eating it! Made great leftover sandwiches. Thank you, this truly is the perfect bird!
noAvatar
Bird was very good, the gravy was excellent.
This turkey sounds great. HOWEVER, I stuff my turkey. Will the stuffing turn out salty?
noAvatar
I believe that adding liquid to the pan results in steaming the turkey rather than roasting it. The tried and true method I use is from "The Joy Cooking." Take the bird out of the refrigerator and have it at room temperature, then rub the exterior with softened unsalted butter. I stuff the bird with oranges, apples, celery and onion. Place the bird on a greased rack in the roasting pan, uncovered, breast side up, in a 450 degree preheated oven. Reduce the heat immediately to 350 degrees. After the first hour cover the turkey breast with a cheesecloth that has been soaked in melted unsalted butter. This will offset the fact that the legs take longer to cook than the breast meat. I do not stuff my turkey and cook it for 15 minutes per pound. I like to roast a turkey that is no larger than 17 - 18 lbs. It always turns out with a golden brown skin, perfectly cooked and moist-- both white and dark meat.
noAvatar
*** I don't like to tent with foil either, as this seems to "steam" rather than roast the turkey. The "Joy of Cooking" method is easy, fool-proof and delicious!
I made this recipe last year and I am doing it again this Thanksgiving. I have roasted turkeys for 25 years, and except for the year my late husband brined the turkey for 36 hours and then grilled it on a Weber grill this is the best turkey ever and a lot easier to do. The stock is so delicious that I used it in my stuffing. This year, I'm making a double batch and sharing it with my neighbor. She came over last year and fell in love with the aroma. The broth does steam the bird but this is a method that Jacques Pepin uses as well. He actually steams the bird and then roasts it. It is very healthy since there is a lot less fat and it is simply delicious. Thanks, Savuer. I have been a subscriber since your first or second year.
noAvatar
I followed the directions exactly. Bird was very salty. It didn't get crispy brown before the thermometer (checked in several spots to be sure) was at temp. Not impressed. I have had better results with brining, though cumbersome, and a cooking bag. I am glad no guests were with us, because I was not impressed with this. I have no idea what I could have done differently.
noAvatar
I used a fresh bird and had the same experience as some other posters. 13.5lbs and when I checked at 2hr.15min. the bird was already at 187F. in the thigh. Next time I will sacrifice the crispy skin (and it was nice and crispy) in favor of a brine which I feel imparts much more flavor.
The Perfect Bird: How to Roast the Best Thanksgiving Turkey 4 5 13 28

Your Rating & Review

Please log in to leave a comment. Not a member yet? Sign up here.