

The Bread Lover’s Guide to Raising Your Own Sourdough Starter
Essential info for filling your kitchen with the bubbly, sour-smelling, long-lasting basic building blocks of better dough
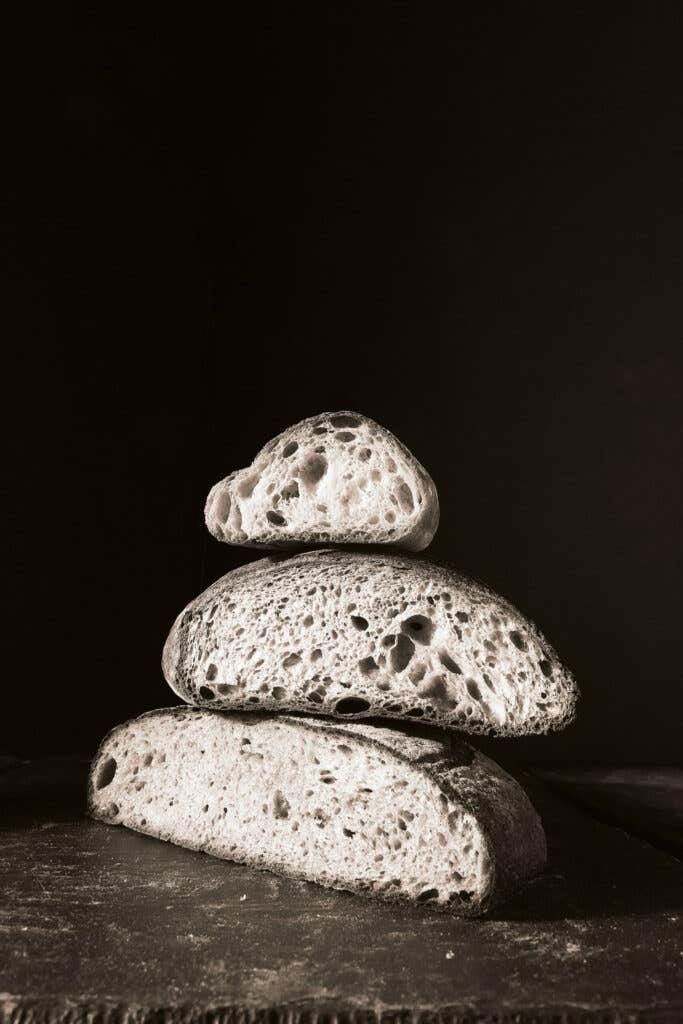
Baking an incredible loaf of bread falls, somewhat frustratingly, between couldn't-be-simpler and intimidatingly complex. For 30,000 years, we've known that making dough requires only flour and water, yet somehow it's taken mankind nearly that long to figure out what takes bread from the simple sum of its ingredients to the airy baguettes and chewy ciabattas we hold to impossibly snobbish standards today.
Spoiler alert: It's not fairy dust.
It is, however, a starter. A mixture of flour and water, pre-ferments—or starters—are called so because they're left out on our counters to ferment prior to mixing a full bread. Some are ready in hours. Others take days. But it's as simple as stirring and walking away.
The Background
At various moments in the last 6,000 years, the miracle of natural leavening was discovered. By the late Bronze Age, Egyptians were advancing architecture, clothing, and bread baking, the latter with pre-ferments, which led to softer, lighter, more voluminous loaves. It's from this time period that we have the first documented sourdough—a fermented dough made from wild yeast and bacteria, which produces natural acids lending it a sour taste.
As bread-baking rituals passed from Egypt to Greece and then throughout Europe, tricks and trends were applied to the art of wild leavening, most of which were short-lived. New flours were tested, fruits and their juices were added, and brewer's yeast was introduced to fast-track the process. Most purists believe, however, that these additions' microbes are rendered relatively null by the more adaptive bacteria floating around on wheat, containers, countertops, and most everything else. Which is why the classic combination of flour, water, and time has persisted.
It wasn't until the 1850s that Louis Pasteur, a French chemist and microbiologist pinpointed the science behind leavening. The gist is this: When flour meets water, a naturally occurring enzyme helps break down its starches into sugars. With enough time in a moderate temperature, wild yeasts and bacteria will help produce lactic and acetic acids, noticeably souring the dough. The yeast and bacteria also form gases which stretch and aerate the dough. The resulting starter will foam and bubble, and produce aromas of yeast and alcohol. The resulting bread will have a more open crumb, browner crust, and longer shelf life, plus the complex aromatic compounds we equate with “artisanal” flavor and finish.
The Essentials

Extending a starter's active fermentation time (or maturation) amps up the flavor and makes proteins as well as micronutrients like iron and zinc more readily available to us. The time needed for each starter's maturation varies, as does the bread with which each starter is ideally paired. Eventually, a starter may compose 15 to 50 percent of a final dough.
While pre-ferments are a mostly hands-off endeavor, they thrive best under certain conditions (like moderate temperatures) and sometimes need a little maintenance. Most famously, sourdough starters occasionally need to be “fed” with a mix of flour and water. (This may be why bread hobbyists often bestow cute names upon them, as they would to pets.)
But unlike in a hyper-controlled professional bakery, our home environments change constantly. And as a result, our starters evolve too. As unsettling as it may sound at first, a visit from a neighbor, an open window, or a nearby houseplant may introduce a new strain of wild yeast into the air and therefore into your starter. A heat wave or a polar vortex may temporarily boost or impede its growth. But this is normal. And as they change and mature, starters will go in and out of equilibria, gain a sense of place, and rise and fall. Some can be used indefinitely.
Learn to troubleshoot and rejuvenate pre-ferments with trial and error (not with the internet). You can feed them when the ritual works for you, or place them in the fridge (which stalls growth) when it doesn't. Trust your starter, and try not to worry: Humans have been doing this for a long time.
Four Starters to Try
The flour-to-water ratio—and whether or not yeast is manually added to the mixture—determines how quickly starters ferment and in what breads or batters they are used. They may vary from a runny batter to a thick, gloppy paste, and many will change in texture as they ferment. They are ready to use when they have risen fully, or—for quicker pre-ferments—when bubbles form on the surface.
Biga
Baker's yeast is usually added to this fairly stiff, short-rise, one-time-use pre-ferment (you mix biga once, then use it immediately after maturing). Ideal for Italian breads like ciabatta, biga introduces an open, almost cakey texture to bread by reducing its gluten strength.
Formula: Stir together flour and water in a two-to-one ratio by weight. Though the amount of yeast you add to a biga varies depending on what you are baking and how long you have allotted to ferment it, a good guideline is to yeast biga at no more than 1 percent of what will be the pre-ferment's final volume.
How to use: Mix, then let ferment at room temperature 12 to 24 hours prior to mixing into a final dough. Once ripe, use immediately.
Poolish
Highly hydrated and runny, poolish can be used quickly and produces a less elastic, more extensible dough and open crumb—ideal in baguettes and country-style breads. Poolish usually has a touch of acidity, resulting in a nuanced, nutty flavor.
Formula: Stir together equal parts water and flour, and add a small amount of yeast—depending on what you are baking, this will typically be no more than 1 percent of the final volume of the pre-ferment.
How to use: Poolish ferments for about 12 hours or longer, depending on temperature, recipe, and the amount of yeast you've added. It can be used at up to equal weight of the flour in the final dough, and is designed for one-time use.
Sponge
Sponge is a term that has various meanings in baking, but in this case we're talking about a heavily yeasted, single-use starter that's best in higher acidity doughs that require more strength. Many seasoned bakers prefer it for sweet doughs, such as brioche.
Formula: Stir together water and flour in a two-to-one ratio. Sponge is often heavily yeasted because it ferments for a shorter time.
How to use: Mix sponge and let ferment for two to 24 hours, depending on the yeast level. Sponge may make up to 50 percent of a final dough.
Sourdough
The original pre-ferment, sourdough starters (or “mothers”) have no added yeast and are designed for long-term feeding and use.
Formula: In a mason jar, stir equal parts water and flour (preferably whole wheat, organic, and freshly milled) by volume—about a quarter cup of each ingredient to start. Let stand at room temperature overnight with the lid ajar (or cover with cheese cloth). Stir in the same amount of water and flour the next day, and you should see signs of life like bubbling and rising. Repeat for three days. Not much may happen during days two through four, but don't give up.
How to use: After day five, use it in pancake or waffle batters. At 1 week and beyond, add to bread doughs, at up to a quarter of the final dough's weight.
Stephen Jones is a wheat breeder and the founder of the Bread Lab at Washington State University.
Keep Reading


Continue to Next Story
