
Hone Your Knife (And Sharpening Skills) With This Simple Method
Our test kitchen manager shows you how to achieve the perfect edge.
Sharpening a knife is like riding a bike. Once you’ve learned how to do it, muscle memory takes over, no matter how long it’s been. The most essential tool in the kitchen, a sharp knife makes just about all your tasks faster, more efficient and precise. Most importantly, a properly sharpened knife is also a matter of safety. A dull blade can slip or even get caught in thick-skinned vegetables, leading to accidents.
There’s no absolute timeline on how often you should sharpen your knives, which depends partly on the quality of the steel, but also on how often the knife is used. Professional cooks and butchers, sharpen as frequently as weekly or even daily. For the average home cook? Once every few months or so should do it. Ask yourself, is your favorite knife crushing a ripe tomato rather than slicing smoothly through its skin? Are tears streaming down your face while you hack into an onion? Then it’s probably time to sharpen that blade.
While professional sharpening services are a quick-fix, they aren’t always easy to find (and some pro sharpeners use a heavy hand and mechanized belts which can wear blades down over time). Knowing how to sharpen your own knives at home is a priceless skill which also allows you to invest in a good knife, because now you’ll know how to take care of it. Here’s how I like to do it.
Choosing Your Stone

Some people like to use an electric sharpener, or other gadgets to maintain a razor-sharp edge. An old-school sharpening stone, however, is not only gentler on your knife—it’s also more precise, portable, compact, and relatively inexpensive. Also called whetstones, these are available in different “grits,” ranging from 100 to 6000, or more—the lower the grit, the more coarse the stone.
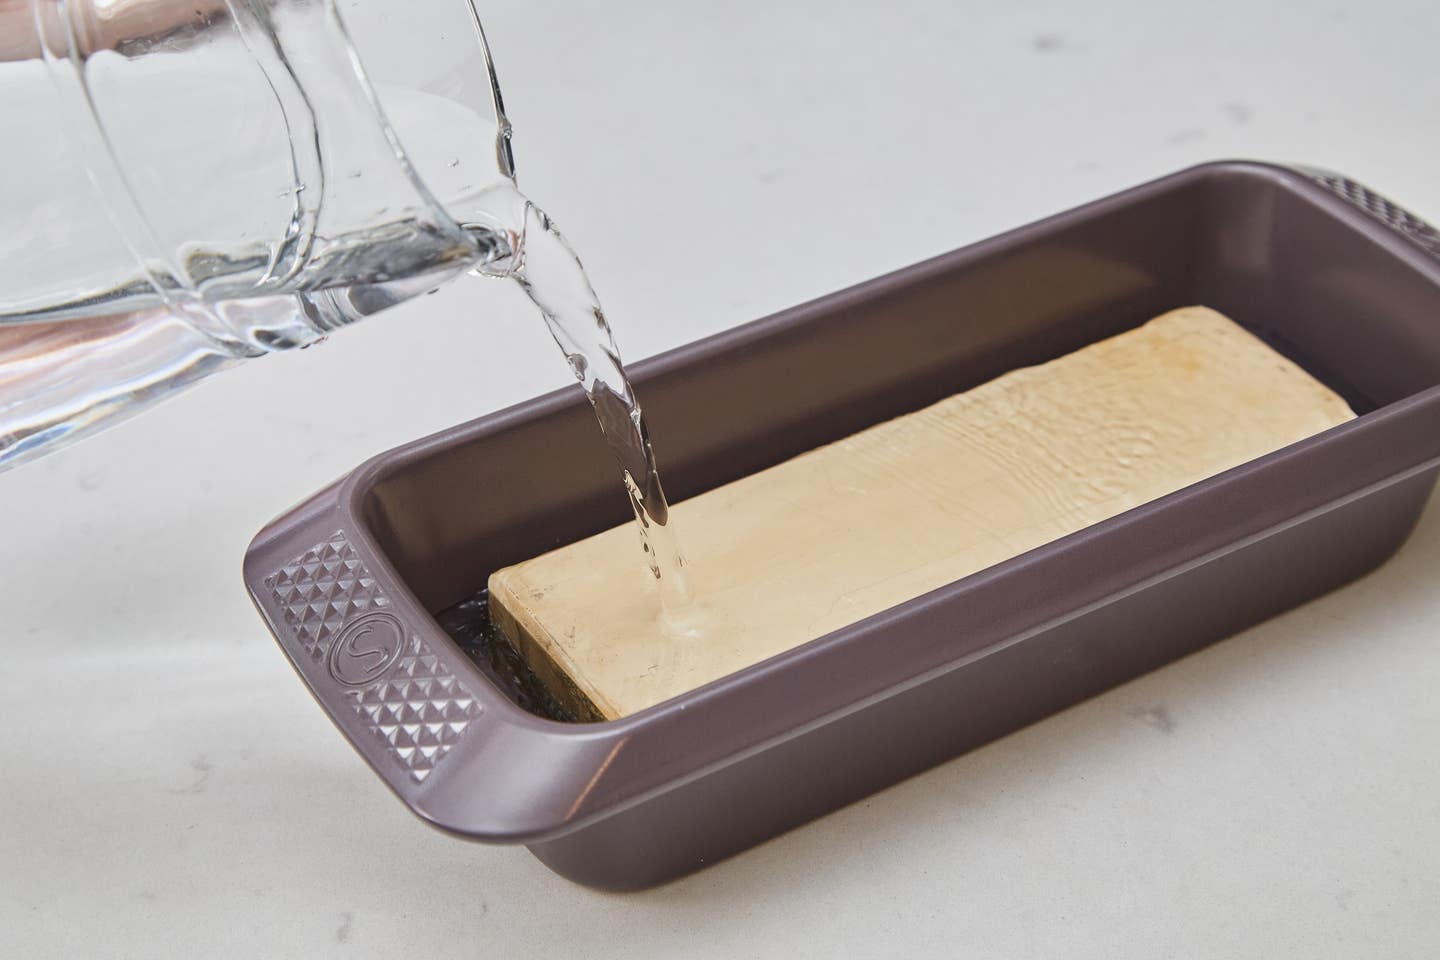
I like to use a double-sided stone, which has both a fine and coarse side. You’ll want to start with the coarser side to remove any dents or chips, then flip your stone over to finish sharpening on the finer side. Most stones found in the market need to be soaked in water to soften the grit; check the packaging details to see if you need to soak yours (typically 30 minutes is enough.)
Angle Up

Most Western-style knives are ambidextrous, with what is known as a 50:50 bevel, meaning it comes to a V-shaped, 45-degree edge. (Traditional Japanese-style knives like the deba, have a steep, one-sided bevel, designed for making extremely precise cuts.) For our purpose, maintaining that 50:50 balance as you sharpen both sides of the blade is crucial for creating a sharp edge. This is where practice makes perfect.
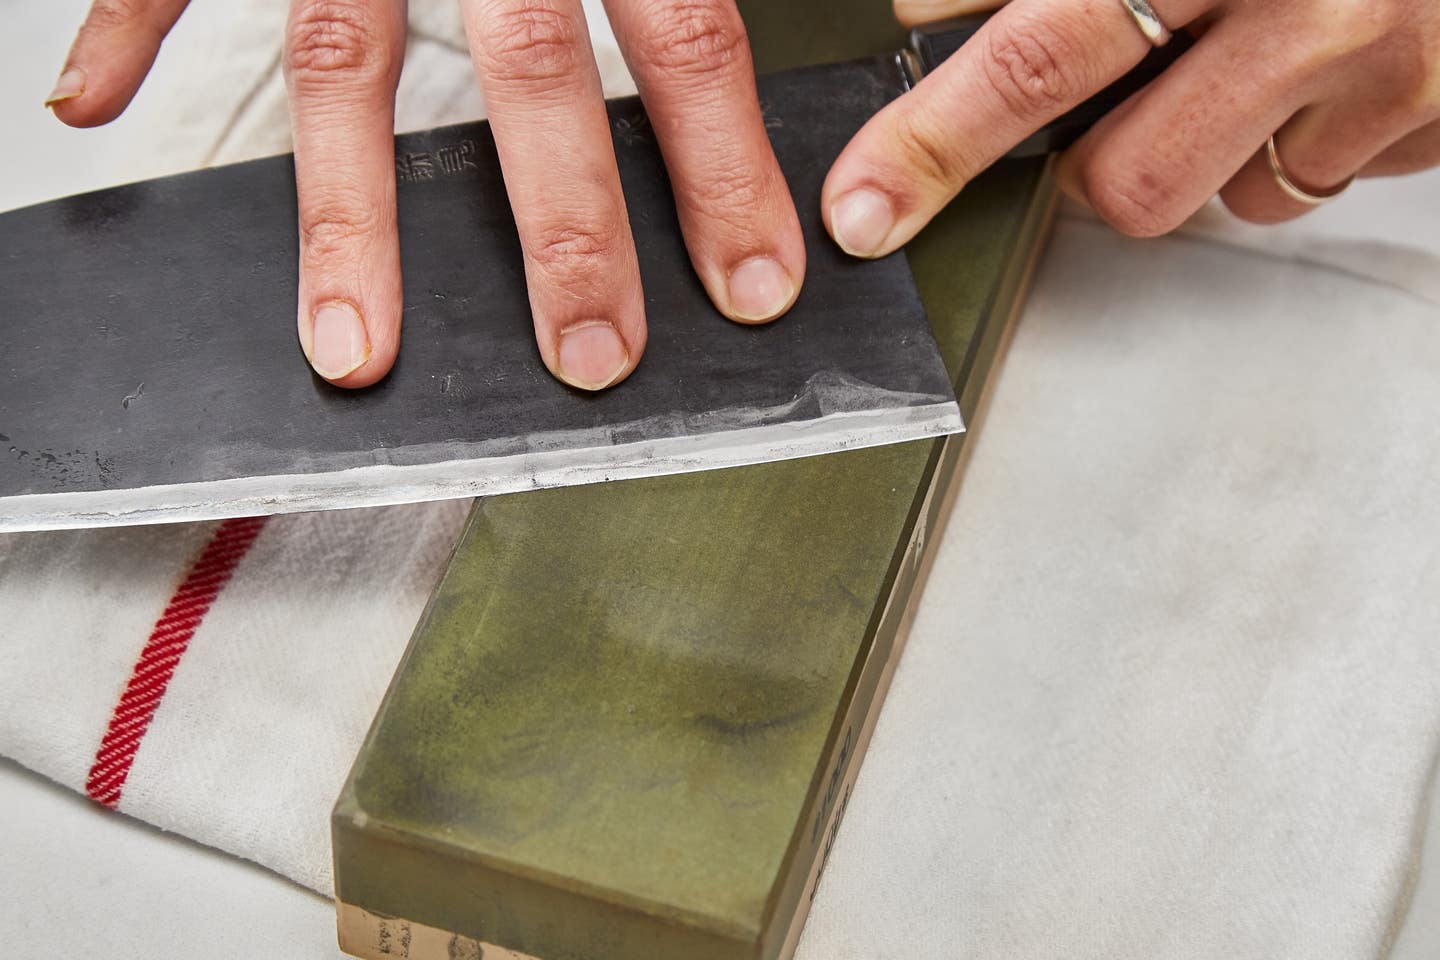
Soak your stone in clean, cool water for 30 minutes. Dampen a towel and place it on a clean work surface. Remove the stone from the water and position it vertically atop the towel with its coarse side facing up. (The towel will prevent it from slipping as you work.) Before starting, mentally divide your knife into three working sections: The heel, the center, and the tip. Also think of your knife’s sharpness: The duller it is, the more strokes you’ll need to make on the stone. For example, if it’s been bruising herbs instead of shaving them into ribbons, start with 75 strokes or more on each section of both sides of the knife.
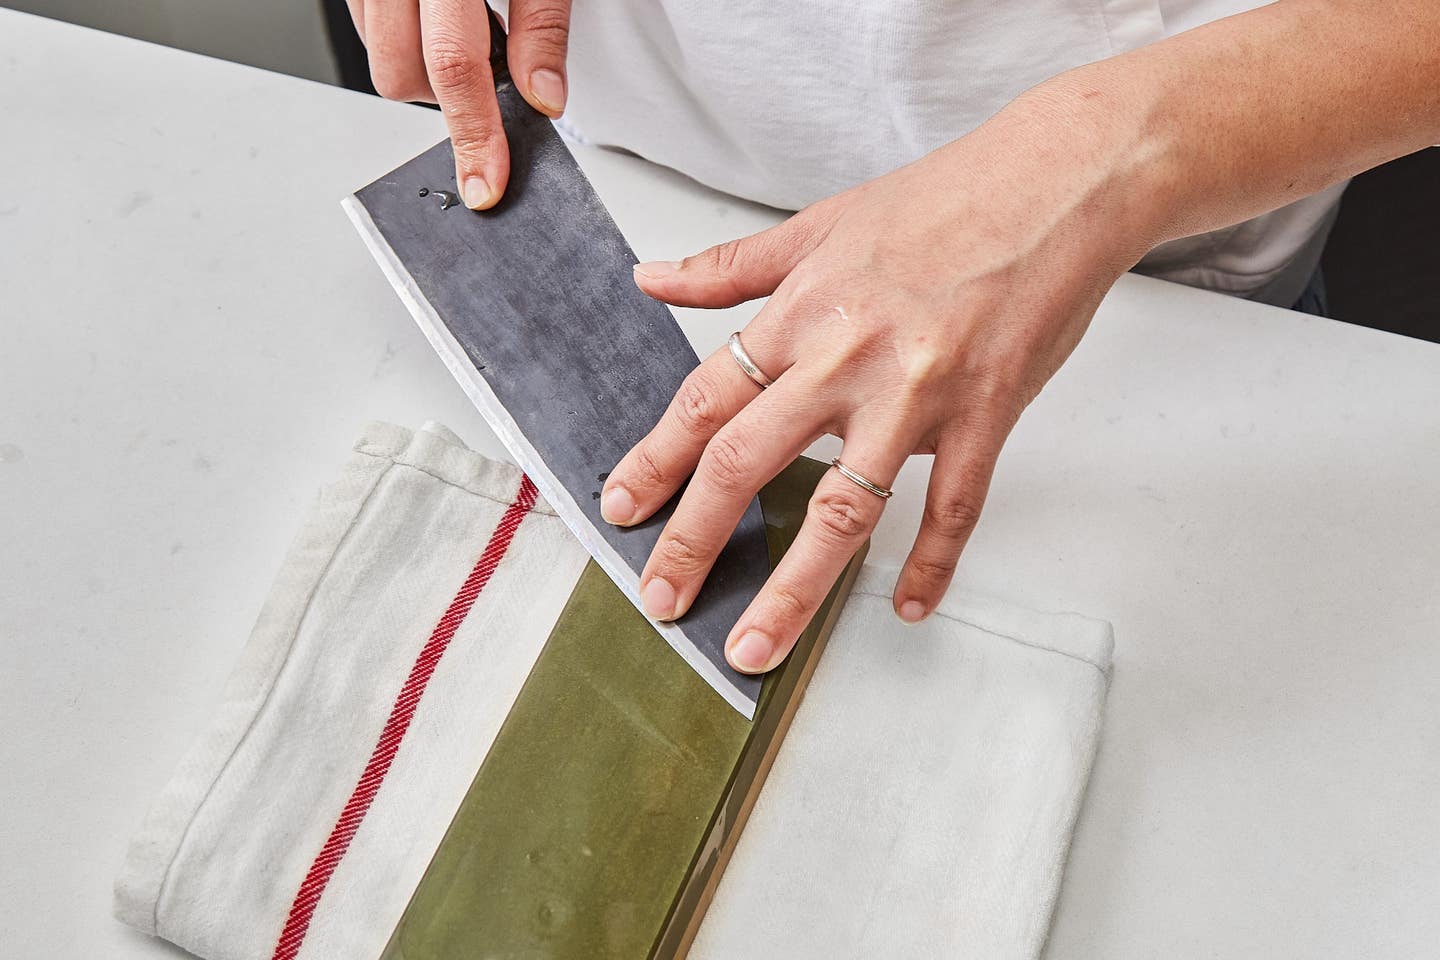
To begin, grip the knife in your dominant hand, with your thumb and index finger gripping the steel where it meets the handle. Then, with the blade facing away, place the tip section of your knife at a 45-degree angle at the bottom end of the stone closest to you. Place the fingers of your non-dominant hand along the sharp edge of the blade. Begin pushing the knife away from you, dragging it along the stone applying even, firm pressure. Once you get to the top of the stone, loosen your pressure, but keep contact with the stone as you pull your knife back down. Repeat this movement, gliding the blade away from you and back again. (Just make sure to keep track of the number of strokes, as you’ll repeat the same all along the knife and again on the opposite side.)
Work Your Core
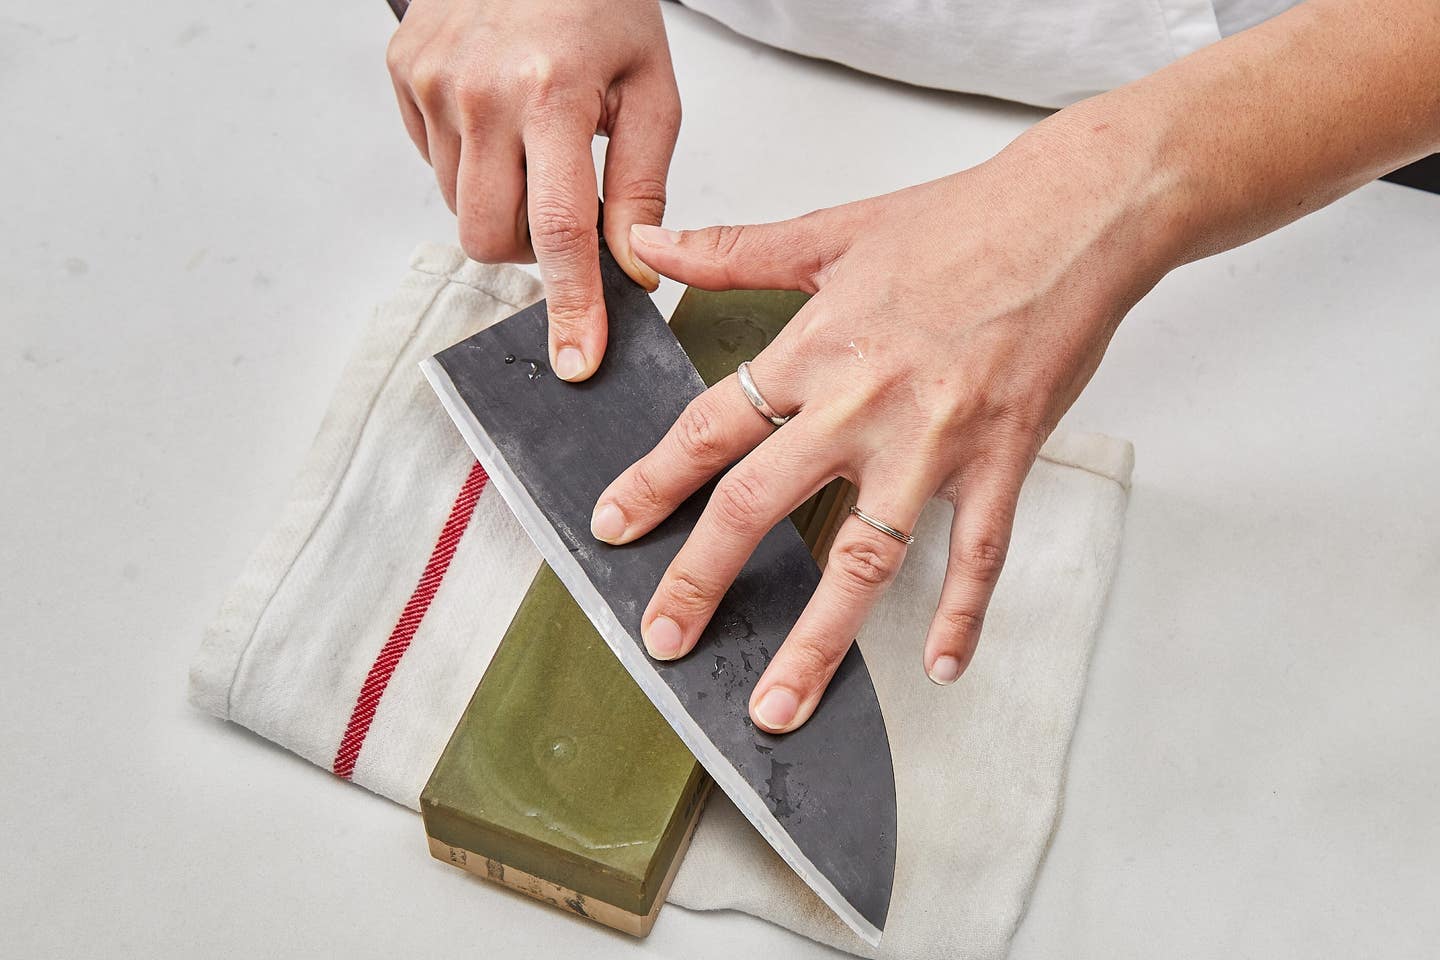

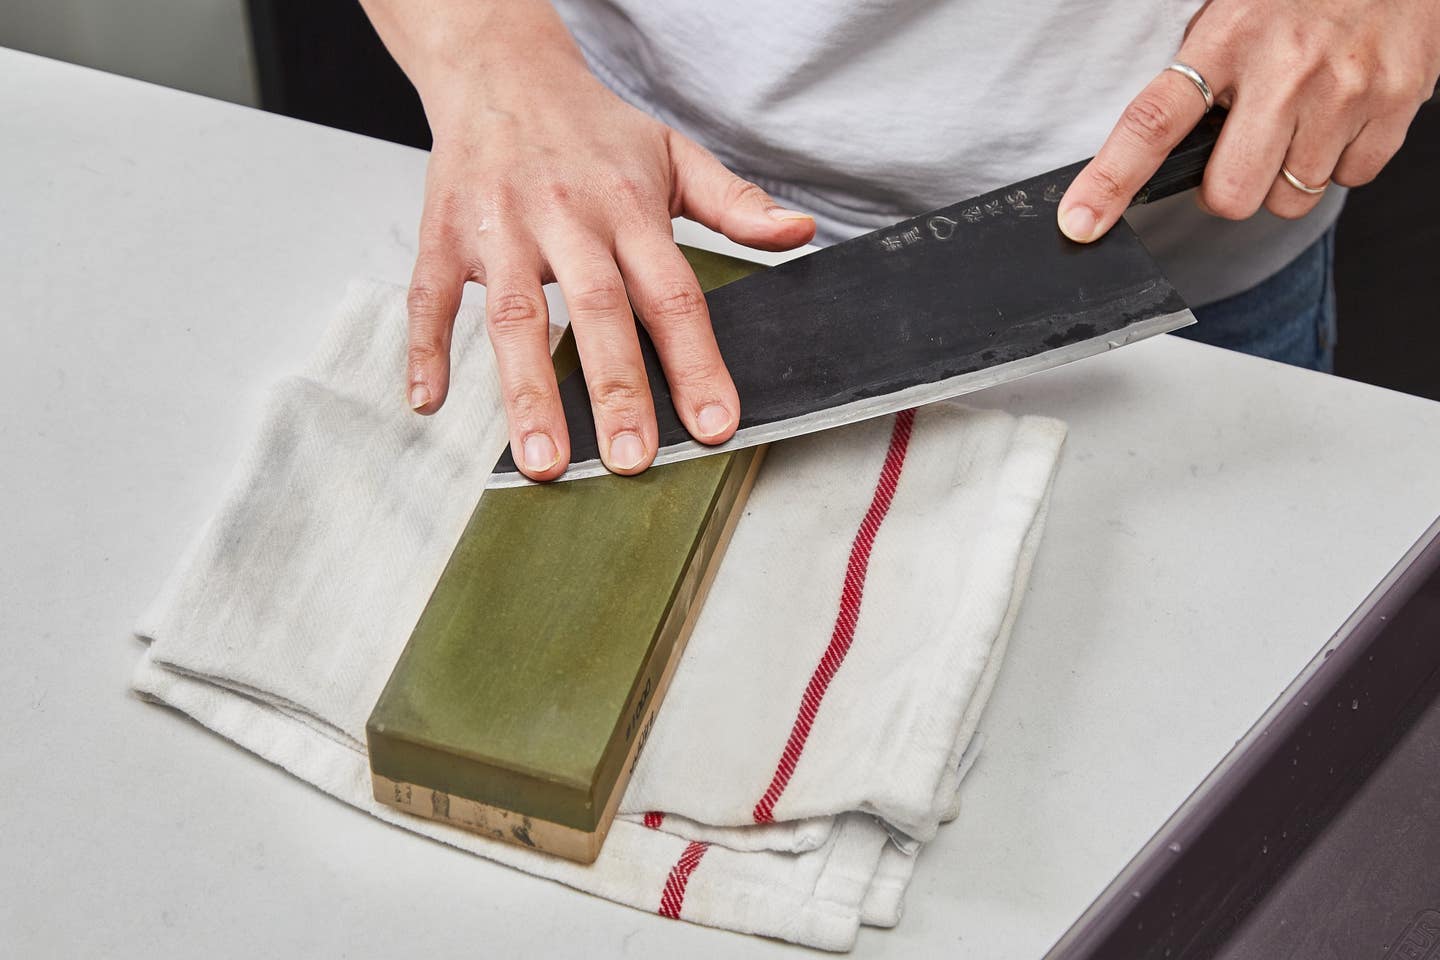
Once you’ve reached your intended number of strokes, you can test the tip by very gently running your thumb over it. If it’s getting sharper, it might snag at your skin, while a dull knife would just glide over. If you still find the edge dull, you can keep working on that section, again counting your strokes. Making sure to maintain the same angle, move the knife over so that the middle section of the blade is now in contact with the stone. Applying the same amount of pressure as before, continue sharpening your knife in long strokes. Repeat the same number of total strokes as you did before. Don’t worry if you’re not moving quickly; at this point, precision and control are key.
(If you are sharpening a very short knife, you may only need to divide the work into 2 sections, while longer blades like carving knives may need to be sharpened in four or more stages.)
Sharpen The Heel
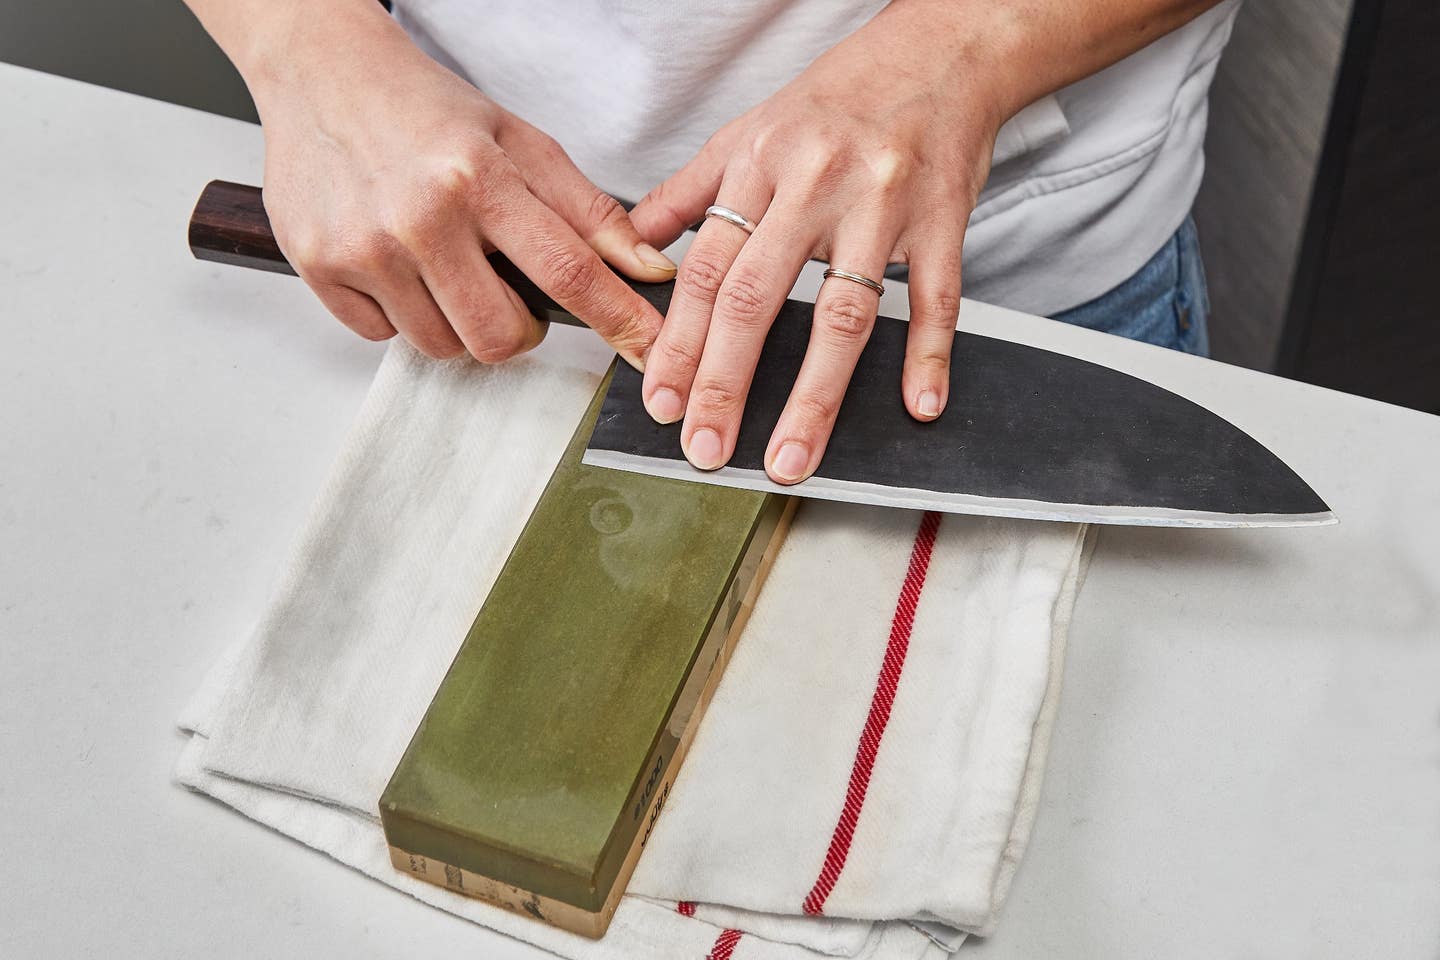

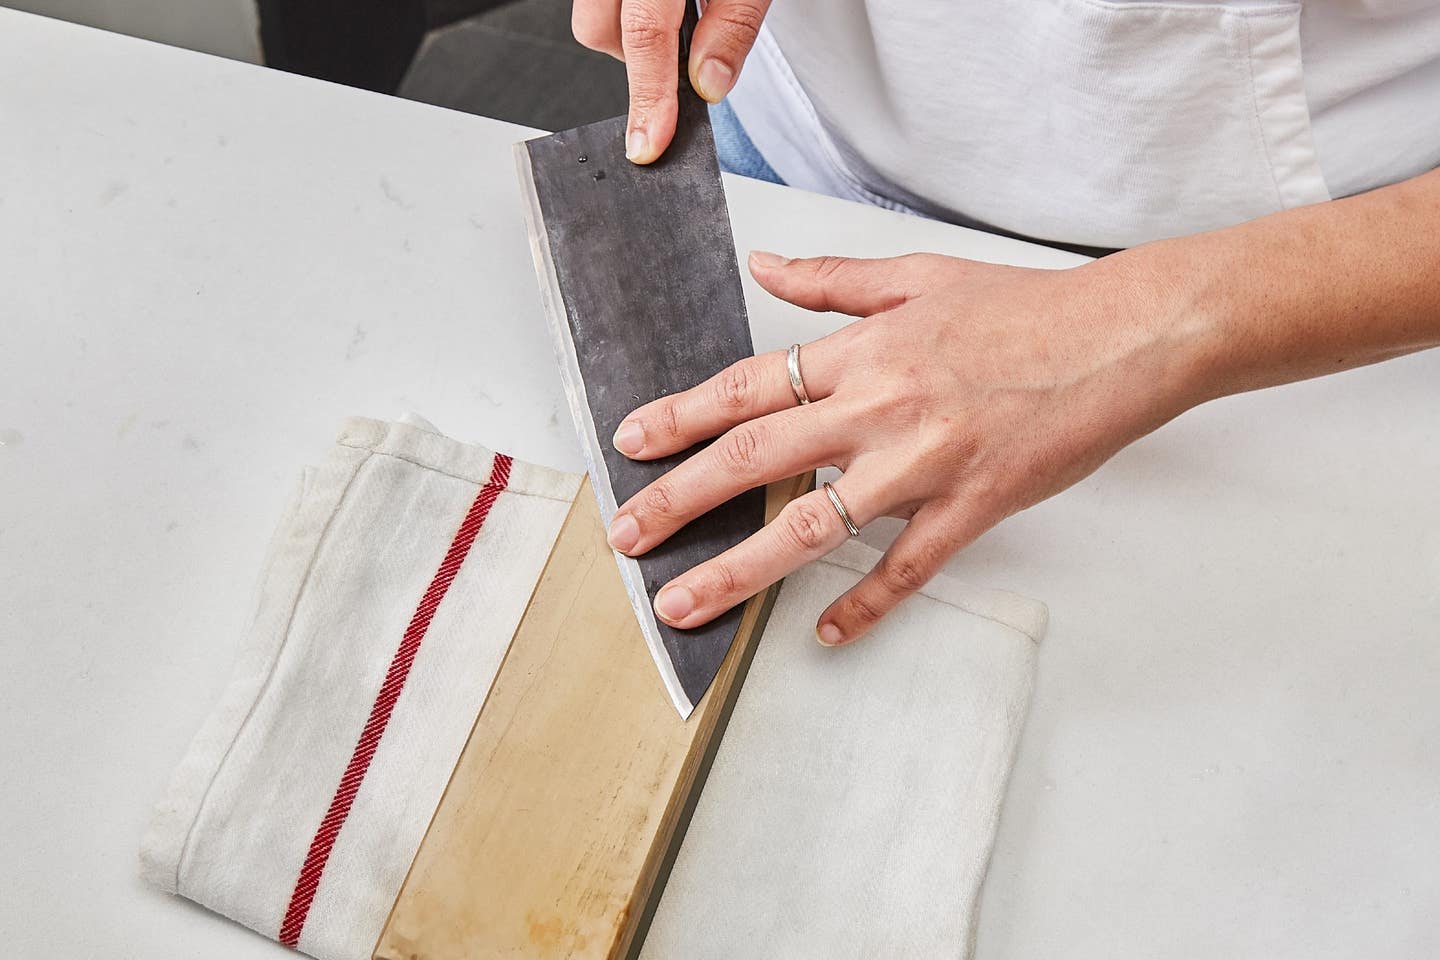
Depending on the width and shape of your blade, sharpening this last bit can be a little tricky. While maintaining a consistent angle, you now need to make sure not to bump the handle of the knife into the stone. Reposition your hand as necessary to continue sharpening, making sure to remember the fundamentals: the angle of the blade, the pressure against the stone, and a consistent number of strokes.
Moisturize Frequently


As you sharpen your knife, you may notice your stone beginning to get dry; it’ll feel unpleasant, like the blade is grinding versus gliding across the surface. When this happens, sprinkle on a few tablespoons of water. This will add lubrication that will make the sharpening easier and more gentle on your knife. The water also helps the stone to slough off some of its grit, creating a slurry of stone and metal which acts as a gentle abrasive, creating a finer edge.
Repeat On The Other Side

For the second side of the knife, the steps are the same, though sharpening with your non-dominant hand may take a bit more practice. Make sure to work slowly, making purposeful strokes and maintaining the angle and pressure you kept on the first side of the knife. In order to achieve that even bevel, remember to repeat the same number of strokes as you did on the first side. Once you’ve finished the second side, you can test your work by trying to slice into a tomato, or chop a scallion. If the knife is mashing the ingredient versus slicing into it, you need to take it through the stone again. Depending on the sharpness, it may require another 75 strokes, or fewer if it just needs a little more refining.
Refine The Edge

Once you have fully sharpened both sides of your knife and are happy with your work, flip the stone over to the finer grit and repeat the previous steps. This will polish and refine the blade to a razor edge. You’ve already done all the hard work on the coarse side, shaving away the blade to a sharp edge, so you won’t need as many strokes on this side. You’ll notice the knife glides a lot more smoothly here, and that the fine stone doesn’t release as much of a slurry as the coarser side. You can retest your knife’s edge by once again trying to slice into a ripe fruit or herbs. Once you’re satisfied, rinse your knife and stone. Pat both dry with a clean towel and set the stone aside at room temperature to dry completely before you put it away.
Hone the Knife
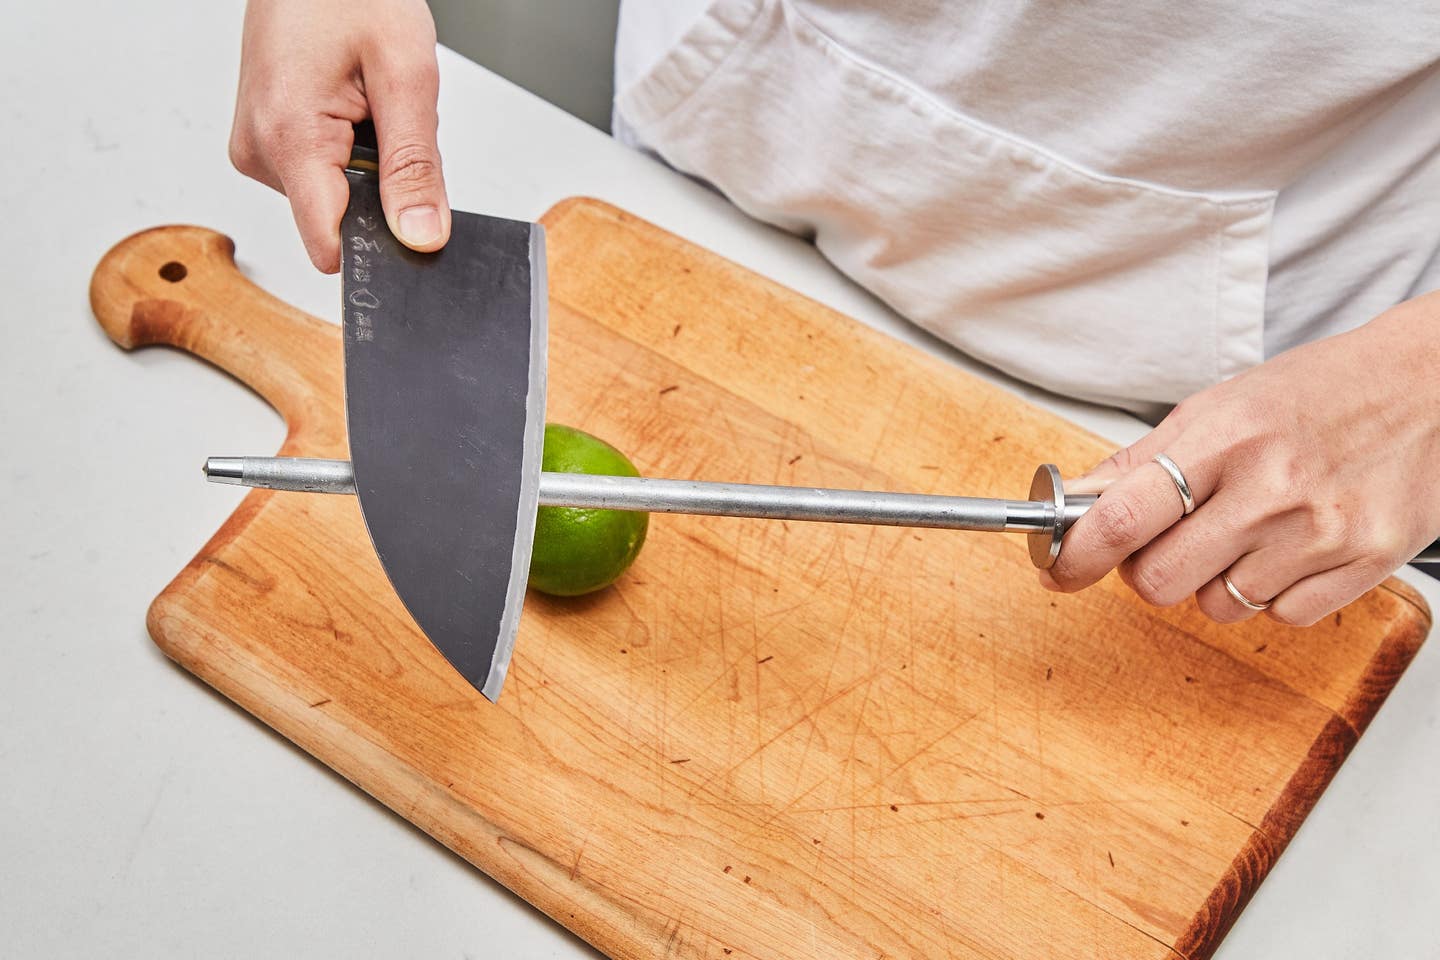

Use a sharpening steel, or a hone, right after you’ve finished sharpening your knife to further refine the edge of your blade. (A hone may also be used between sharpening sessions to quickly revive the edge). Choose a hone that’s long enough for the knives you’ll be using it on (11–12 inches should be suitable for most knives). Most hones are made of durable stainless steel. These are fine, but I prefer a ceramic steel, which is more fragile, but also more gentle on your knife.
To begin using a hone, hold the handle tight in your non-dominant hand; grip your knife in your dominant hand, with your thumb and index finger on either side of the base of the blade. With the blade pointed towards the handle of the hone, rest the sharp edge of the blade on the end of the hone at the same 45-degree angle you used on the sharpening stone. Using a slow downward stroke, slide the knife to the hilt of the hone. Five to ten strokes on each side of the knife is plenty here.
Once you’ve honed your knife, give it another rinse and pat dry. Your knife is now sharp, safe, and ready to use! Now that your knife is at its best, make sure to take care of it. Keep the edge free of nicks and chips by only cutting on wood or plastic cutting boards. Don't leave it sitting in the sink and take care to hand-wash and dry immediately after using. This will maintain the tool and lengthen its life, keeping work in the kitchen easy, efficient, and a true pleasure.
Keep Reading


")


Continue to Next Story
