Master Preserver Camilla Wynne Wants You to Stop Worrying and Just Can Your Jam
“We’re dispensing with the whole boiling jars brouhaha!”
Peak preserving season is upon us. Local fruit is at its best and most plentiful, practically begging to be simmered into jams and jellies, then put up in jars for the colder winter months. But perhaps you’re afraid of home canning—if so, you’re not alone. In order to avoid ruin, it is paramount to learn the hows and whys of what is happening when you seal up fruit in a jar. That’s the science. The magic comes once you understand the science and can begin to safely explore your creativity.
I’m a pastry chef and master preserver, and I’ve been teaching preserving workshops for a decade now. After we’ve dispensed with introductions, the first thing I ask my students is, “If you haven’t tried preserving yet, why not?” Some reply that it seems too complicated (it’s not). Others say you need all sorts of equipment they don’t have (you don’t). And some say it takes too much time (no way). But what I’m really waiting for is for someone to confess that they’re afraid of killing their friends and family. You are? Good! You should be, to some extent. There’s a potentially deadly toxin that can, under the right conditions, be found in canned food. It’s called botulism, and you’re wise to want to protect your loved ones from it (or really anyone at all).
The scary thing about botulism is that there’s no way of knowing if it’s present in a jar. It doesn’t look a certain way, it doesn’t have a smell, it doesn’t taste like anything, and it won’t sing you a siren song. Not only is this poison undetectable to the average person, it can also be fatal, in particular if you’re very young, very old, or immunocompromised. But even a perfectly healthy person can succumb if they don’t seek treatment soon enough. And either way you’re getting very ill. So at this point, I’m sure I’ve frightened you, but I don’t want you to be scared—just informed. We must press on!
What is Botulism?
Botulism starts out as an innocent bacteria by the name of Clostridium botulinum, which lives in the soil. So if I go out to the backyard and eat one of the loganberries from my garden that has fallen to the ground (it’s a new plant and we get very few, so I would definitely do this), it’s possible that I’m putting some of this bacteria in my mouth. Do I die? Not unless I choke! It’s only when this bacteria finds its ideal environment that it starts to produce the toxin that makes people sick.
Here are botulism’s three necessities:
1. A vacuum: Clostridium botulinum is an anaerobic bacteria, which means it needs an absence of air, a vacuum...like a sealed jar. Since we want to make shelf-stable jams, which must be sealed, that’s not great.
2. Moisture: Bacteria are just like us, they need water to live. So unless you’re making a jar full of rocks or adding a lot of sugar, we’re still checking all the boxes.
3. A low-acid environment: This is the most important factor in preserving. Botulism can only grow in an environment where the pH is above 4.6.
The good news here is that most fruit* is well below that pH, which means it’s high in acid, so when it comes to jams and jellies, we need have no fear of botulism whatsoever! (Of course, we can also preserve low-acid foods like meat, fish, soup, and vegetables, but this needs to be done in a pressure canner, which can achieve the very high temperatures at which botulism is destroyed.)
Are you still scared of botulism? No! At least, not in the context of fruit preserves. However, even if we know our ingredients are high in acid, there are still some other bacteria, along with their friends—yeasts, molds, and enzymes—that won’t kill you but can still ruin your day if you don’t sterilize properly. Bacteria can cause slime, yeast can cause weird carbonation and outright explosions, and mold can cause, well, mold. Following the correct canning procedures will either kill or halt any of these potential offenders, leaving you with happy, healthy, shelf-stable jams.
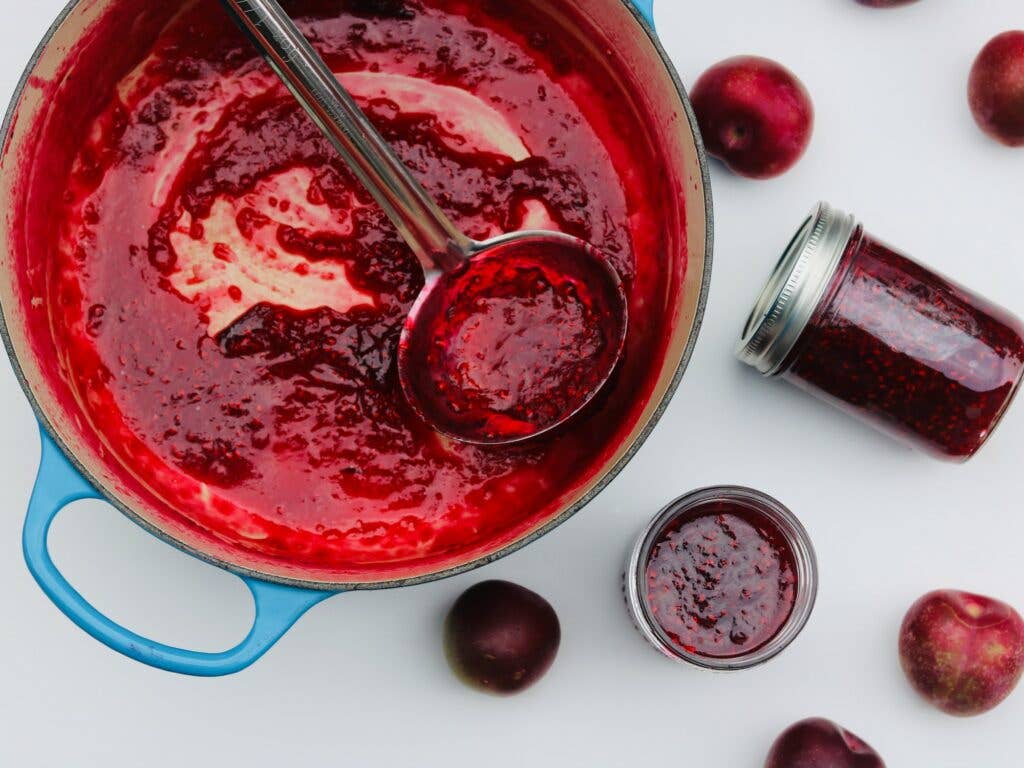
While there are several trustworthy websites on canning, the internet unsurprisingly contains a lot of misinformation; be wary and stick with recipes from trusted sources—as in those published in books after 1994 that seem to have a good foundation in science. (Find my Plum Raspberry Jam recipe here.) Then, once you’ve landed on a formula, use the following streamlined preserving process for high-acid foods.
How to Can Jams and Jellies
First off, just know that if you don’t feel like canning jam, you don’t have to. You can just store the finished jam in the refrigerator (in jars or even in Tupperware), where it will keep for many months. But if you’re anything like me, there’s no room in your refrigerator. Besides which, my method is nearly as easy and doesn’t take much in the way of special equipment. There is a lot of misinformation and contradictory information about preserving floating around in the world. My canning method looks different from what you usually see in North American books.
Personally, I don’t have the time to be messing around with the big pot of boiling water that canning often demands. That’s right, we’re dispensing with the whole boiling jars brouhaha! Hold up, though, you can only use this method for jams, jellies, and marmalades.
Let me explain. Most canning recipes require you to boil your filled jars in a pot of boiling water for a specific amount of time, which is how long it will take for the very center of the jar to attain 212 degrees Fahrenheit (100 degrees Celsius), at which point all bacteria, yeast, mold, and enzymes are killed or halted. This amount of time is determined through an algorithm that takes into account the size of the jar as well as the acidity, viscosity, and initial temperature of what’s inside it. This is the method you must follow when making canned fruit (like peach halves), pickles, salsa, chutney, fruit butter, and all that jazz.
The thing about jam, jelly, and marmalade, though, is they get so hot that they don’t need sterilizing if they go into hot sterilized jars right away. Don’t freak out!
1. Prep Your Fruit
Jam all starts with fruit. Prepare your fruit (hull, peel, pit, whatever) if necessary before weighing. My jam recipes all begin with a period of maceration. This is just the prepared fruit hanging out with the sugar and lemon juice for at least 15 minutes, and up to 1 week. Cover the bowl if macerating for longer than an hour or two, and refrigerate if macerating for more than 24 hours. The sugar draws juice out of the fruit in which it dissolves, so the jam is less likely to scorch initially.
1. Preheat your oven to 250 degrees Fahrenheit (120 degrees Celsius). Check that your oven is truthful by using an oven thermometer, so you know its real temperature to get that safe sterilization bang on.
2. Wash your jars if they’ve been sitting in the basement or if you just brought them home from the thrift store. I don’t wash brand new jars. I just inspect them for material contamination (broken glass, hair...and once I found a folded up $5 bill!). If that weirds you out, though, feel free to wash them, of course. Either way, place them upside down (to avoid material contamination—just in case your oven is infested with bats!) on a baking sheet and place them in the preheated oven at least 20 minutes before you’ll need them. Keep the jars on the cookie sheet throughout the process, so that you have a contained work area for easy clean up, and so the filled jars can be moved easily without disturbing them too much as they rest for 24 hours. Have ring bands and new snaps lids at the ready, but there’s no need to prepare them in any way (unless you’d like to wash the snap lids). I used to heat them in hot water for 5 minutes, but I stopped doing that in 2013 after I saw a press release saying it was no longer necessary, and I’ve never had a problem. Besides, the lids will be sterilized by the hot jam itself.
3. When the jam is ready to be added to the jars, either turn off the heat or turn the temperature down to low. For this method to be safe, the jam must still be above 194 degrees Fahrenheit (90 degrees Celsius) for the entire process. Have an instant read thermometer handy to double check. Remove the baking sheet with the jars from the oven—onto a wire rack or tea towel if you’re worried this might damage your countertop.
4. Fill the jars with jam, jelly, or marmalade to within ¼- to ⅛-inch of the rim. Use the measuring notches on the end of an air bubble remover or a regular ruler to check this if you like. The jam is hot enough that it will create a vacuum around itself and cause the jars to seal, but if they’re underfilled they may not seal. I like to ladle my jam into a 8-cup measuring cup and pour it into the jars, using a spoon to wrangle any big pieces of fruit if necessary; alternatively, you can also ladle it directly out of the pot and use a canning funnel to get the jam into the jars cleanly.
5. Wipe any drips off the rim with a clean wet cloth or paper towel, then screw on the lids as tightly as you can. Gardening gloves can be useful for this, as the jars are very hot, but I usually just grip the jar with a tea towel or the bottom of my apron (but it’s true I have asbestos hands).
6. Invert the jars for 1 to 2 minutes, then flip right side up (otherwise the jam will set upside down). Allow the jars to sit, undisturbed, at room temperature for 24 hours. Leaving them on the baking sheet is the easiest way to do this, but after a few hours they will be cool enough that you can transfer them to another surface if necessary.
7. Whether or not you heard the jars make that satisfying popping sound, check that they are sealed. The best way to check is to remove the ring band and then pick the jar up by the snap lid. Gravity doesn’t lie! If you’re feeling confident, you might also turn the jar upside down, which I call the Dairy Queen Blizzard Test. The vacuum is real. I carry jars around near and far with no ring bands and have yet to be sorry about it. In fact, leave that ring band off when you store the jar—it will prolong the ring band’s life by preventing rust, and on the off chance that something goes wrong it will be all the more apparent if the snap lid isn’t being held on. Just remember to put it back on when you give away a jar as a gift.
8. Put any unsealed jars in the refrigerator (it happens sometimes in spite of our best efforts). Label then store your sealed jars in a cool, dark, dry place like a cupboard, pantry or cellar.
*Certain fruits are not naturally “high-acid,” and should only be turned into jam using a tested recipe from a trusted source. These include white peaches, nectarines, melon, papaya, ripe mango, bananas, figs, and asian pears.
Camilla Wynne is a Toronto-based cookbook author, writer and recipe developer, and preserving teacher. Her new book, Jam Bake: Inspired Recipes for Creating and Baking with Preserves, teaches readers how to make incredible jams, jellies, marmalades and fruit butters, and how to use them in delectable pastries. This text is adapted from the book.
Keep Reading


Continue to Next Story