
A Step-by-Step Guide to Making Perfect Panettone at Home
The world’s best fruitcake starts with a slow rise—and lots of butter.
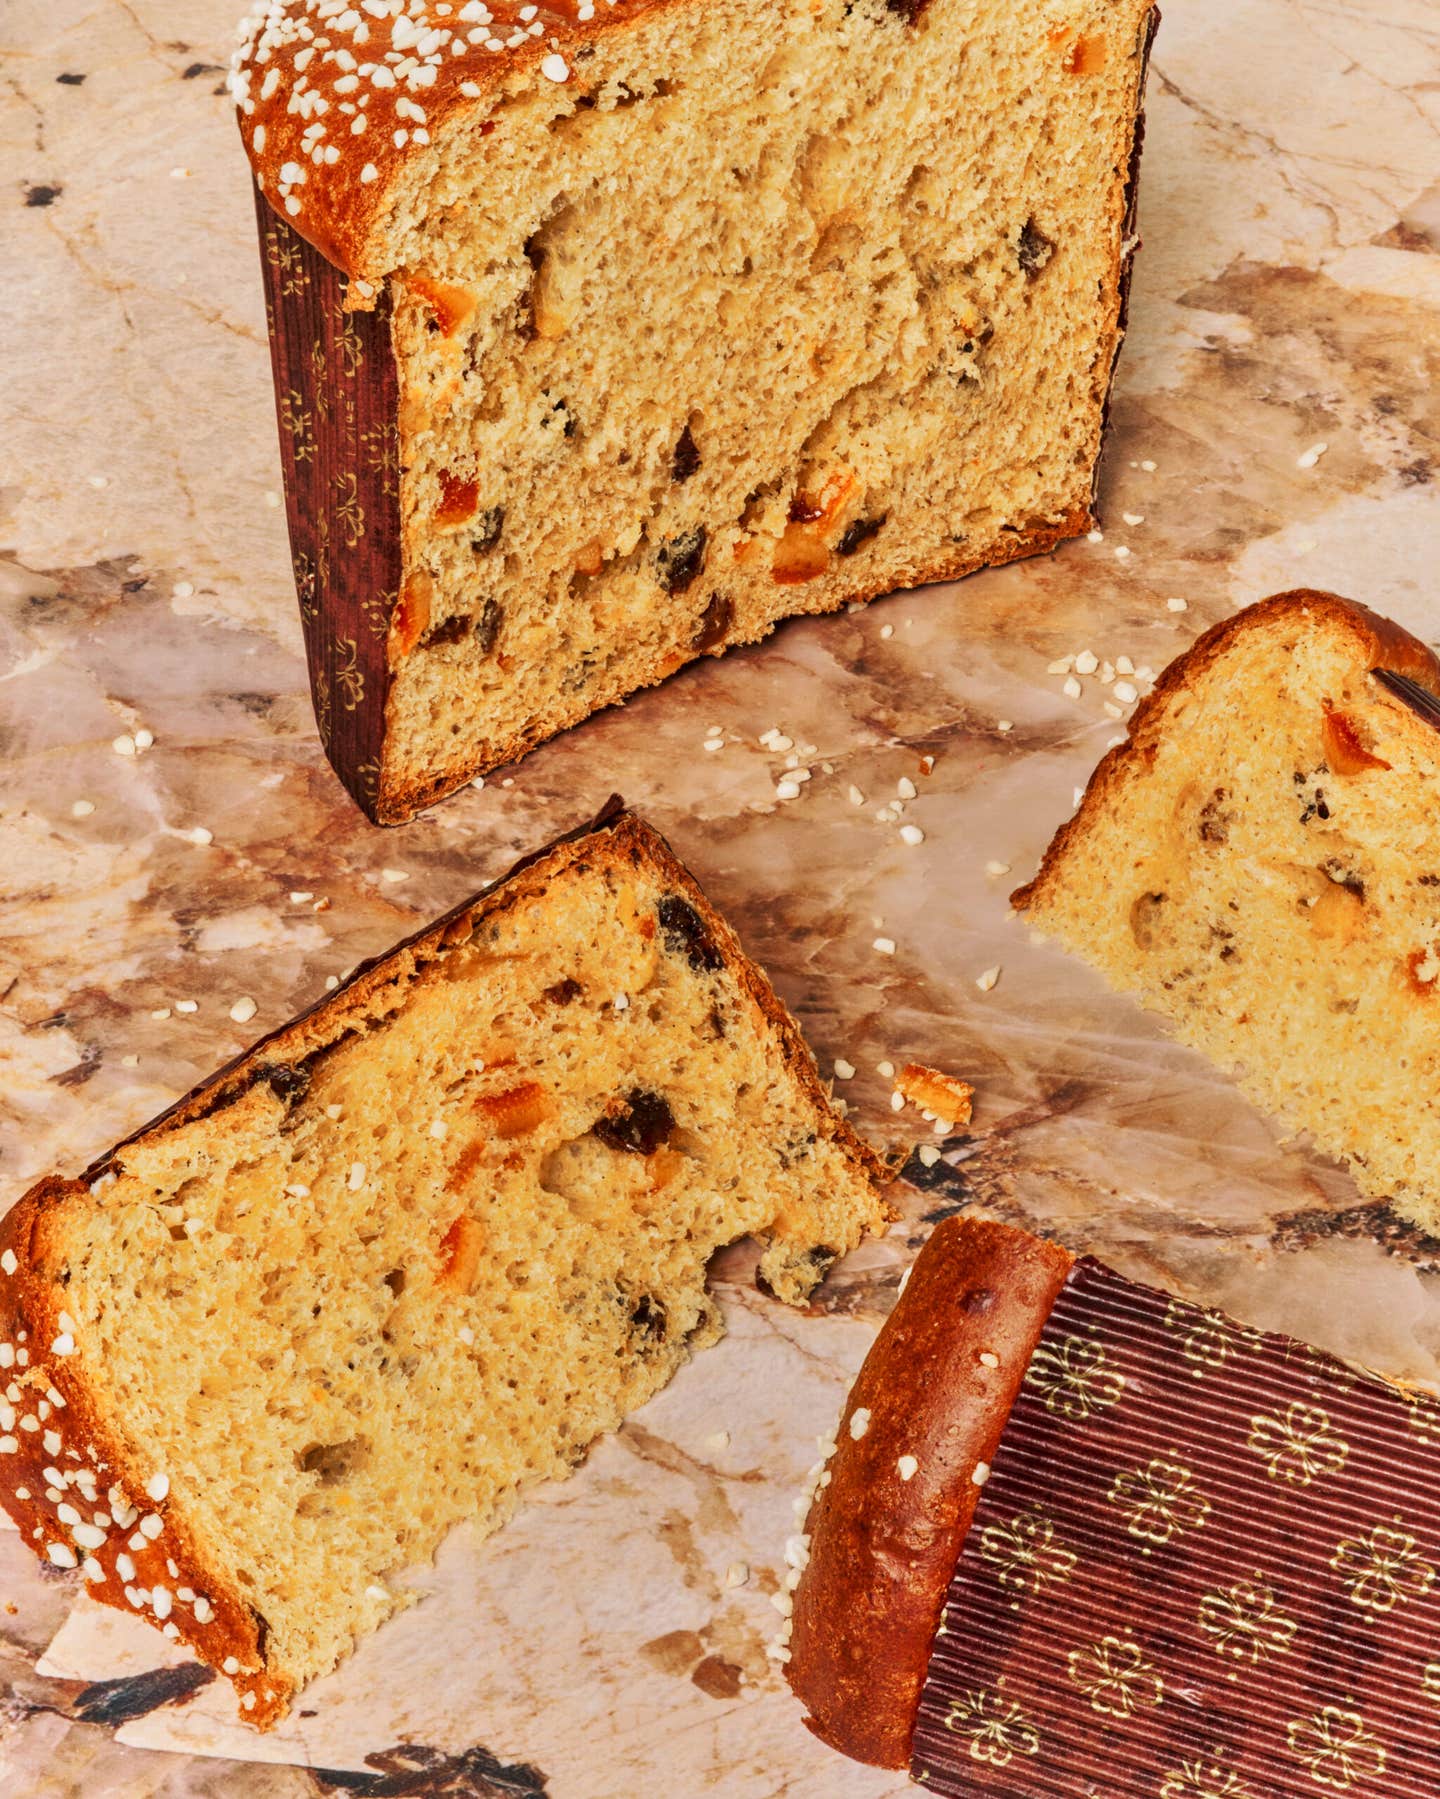
In my world, panettone is the king of fruitcakes. At first glance, it may not seem like a cake at all, but panettone walks the line between a tender, buttery cake, and the most enriched, yeasted dough you can imagine, with a depth of flavor you can only achieve from loving, slow fermentation. I say “loving” because there’s really no other way to describe the time and effort that goes into making panettone, but for those of us who sit eagerly by the oven door, watching with impatience and expectation as a magical transformation unfolds inside, there is no greater reward.
In Italy, the word “panettone” is regulated by the government, much like Champagne is in France, with strict requirements about its ingredients and methods. Butter, eggs, raisins, and candied citrus are nonnegotiable. As is the lievito madre (mother yeast), a stiff sourdough starter specific to panettone and other Italian grandi lievitati (literally “big leavened”). Building and maintaining a lievito madre is no easy task (believe me, I’ve tried!), requiring careful feedings multiple times per day and storage in very specific temperature ranges and environments. Best to leave that to the professionals and the nonnas! In its place, I’ve worked out a panettone recipe leavened only with commercial yeast that maintains the original’s best attributes: a pillowy-soft crumb, balanced sweetness, bursts of plump raisins, and bright pops of candied orange peel.
This recipe takes about a day and a half to make, but most of that time is hands-off. I think it’s helpful to start the process bright and early, so you aren’t mixing and baking into the night. Weigh your ingredients for best results.
Special Equipment:
- Two 5¼- by 3¾-inch (134- by 95-millimeter) paper panettone molds
- Fine-mist spray bottle
- 4 metal or sturdy bamboo skewers, 12–14 inches long (or long enough to span the diameter of your cooling vessels)
- 2 large pots, bowls, or containers at least 6 inches deep and 10 inches wide
Step 1: 8:00 a.m.—Make the biga
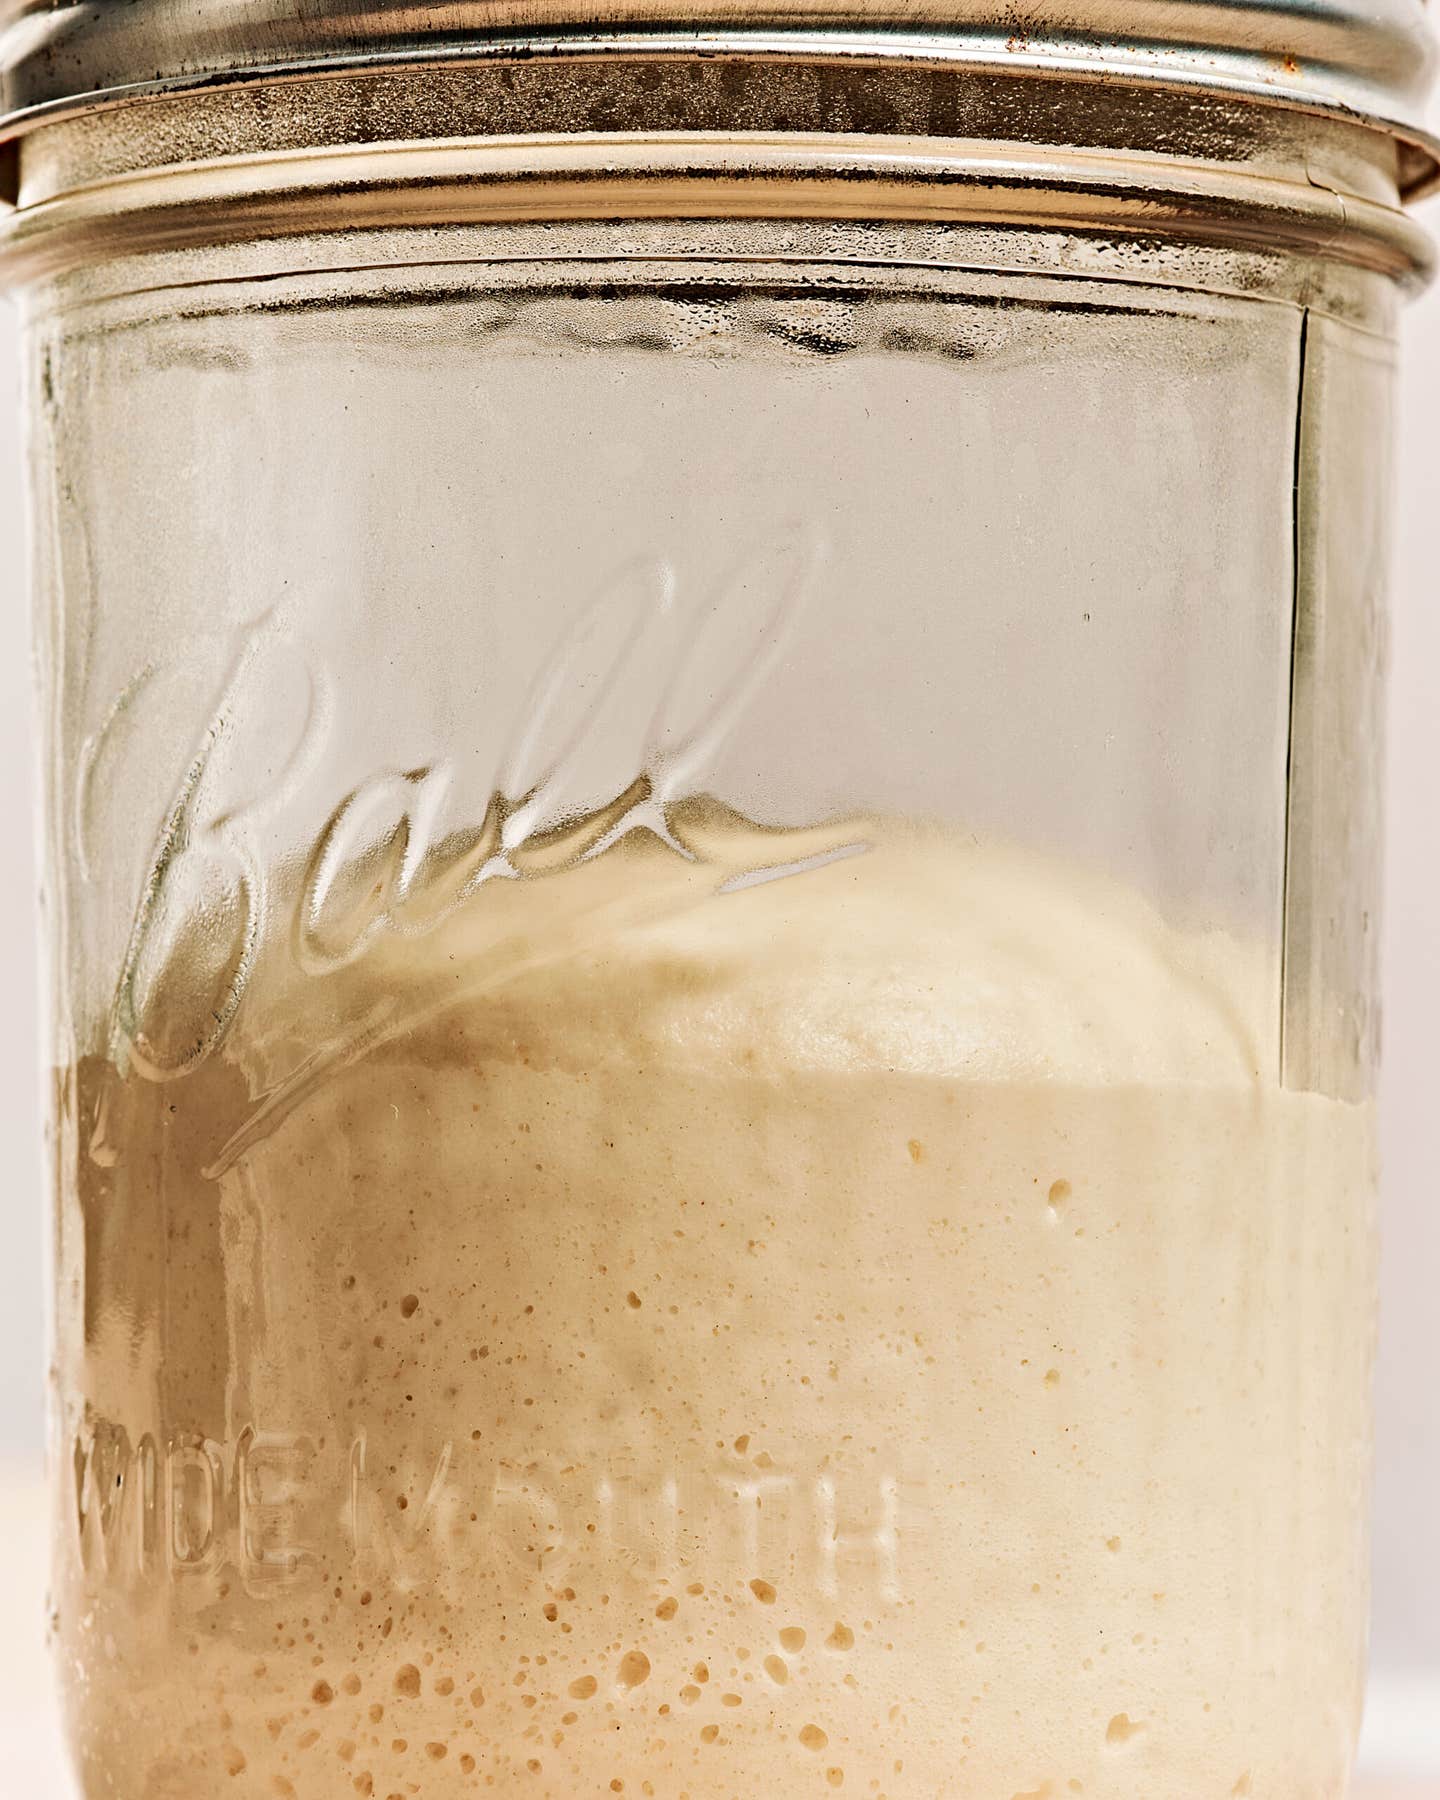

Since we aren’t relying on an active sourdough starter to raise this dough, making a biga (an Italian style of preferment often used in bread baking) helps build an active yeast colony and contributes to the depth of flavor in the finished product. It’s simple to make! Stir together the warm water, yeast, and bread flour until it comes together as a shaggy mixture, then knead gently until it forms a soft dough. Cover and set aside at room temperature until doubled, about 90 minutes, then refrigerate until you’re ready to make the first dough.
Step 2: 1:00 p.m.—Make the primo impasto (first dough)
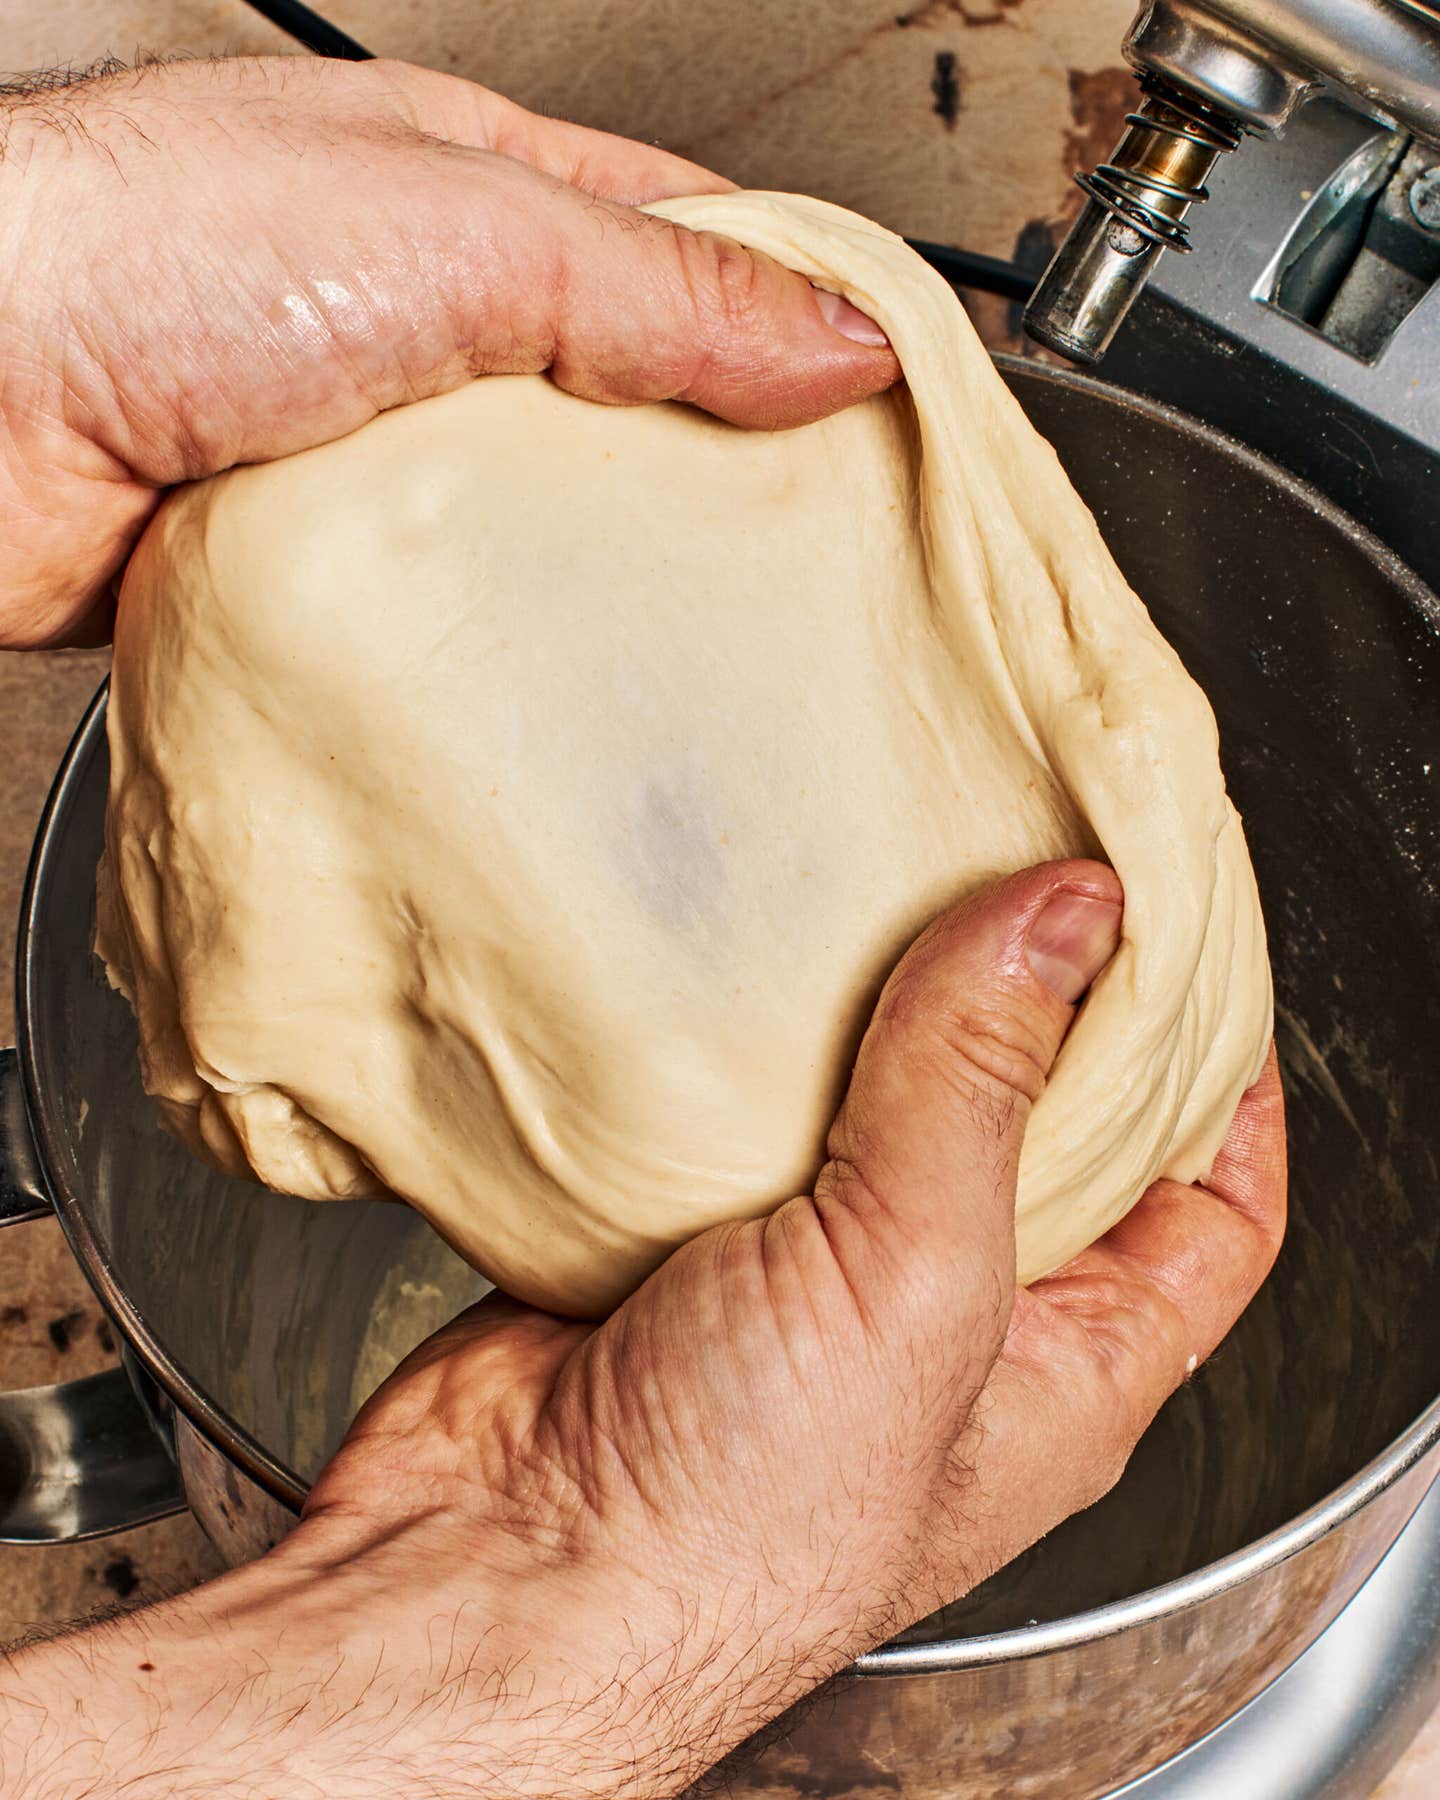

Panettone is traditionally made from two doughs, with a long fermentation in between, in order to make sure the yeast has enough time to multiply without the sugar compromising its health; too much sugar at once would kill the yeast and prevent the dough from rising. Make the first dough (primo impasto) in the early afternoon. Combine the biga, warm water, yeast, flour, and egg yolk and allow the mixture to hydrate. Then add the sugar, milk powder, and salt. Knead on low with the dough hook until the mixture forms a tight dough before adding the softened butter a little at a time. When you’ve kneaded all the butter into the dough, it will be soft, smooth, and elastic. You can test it by pulling what bakers call a “window pane,” stretching it between your fingers until it is translucent; the dough should stretch without tearing. When in doubt, knead a little longer.
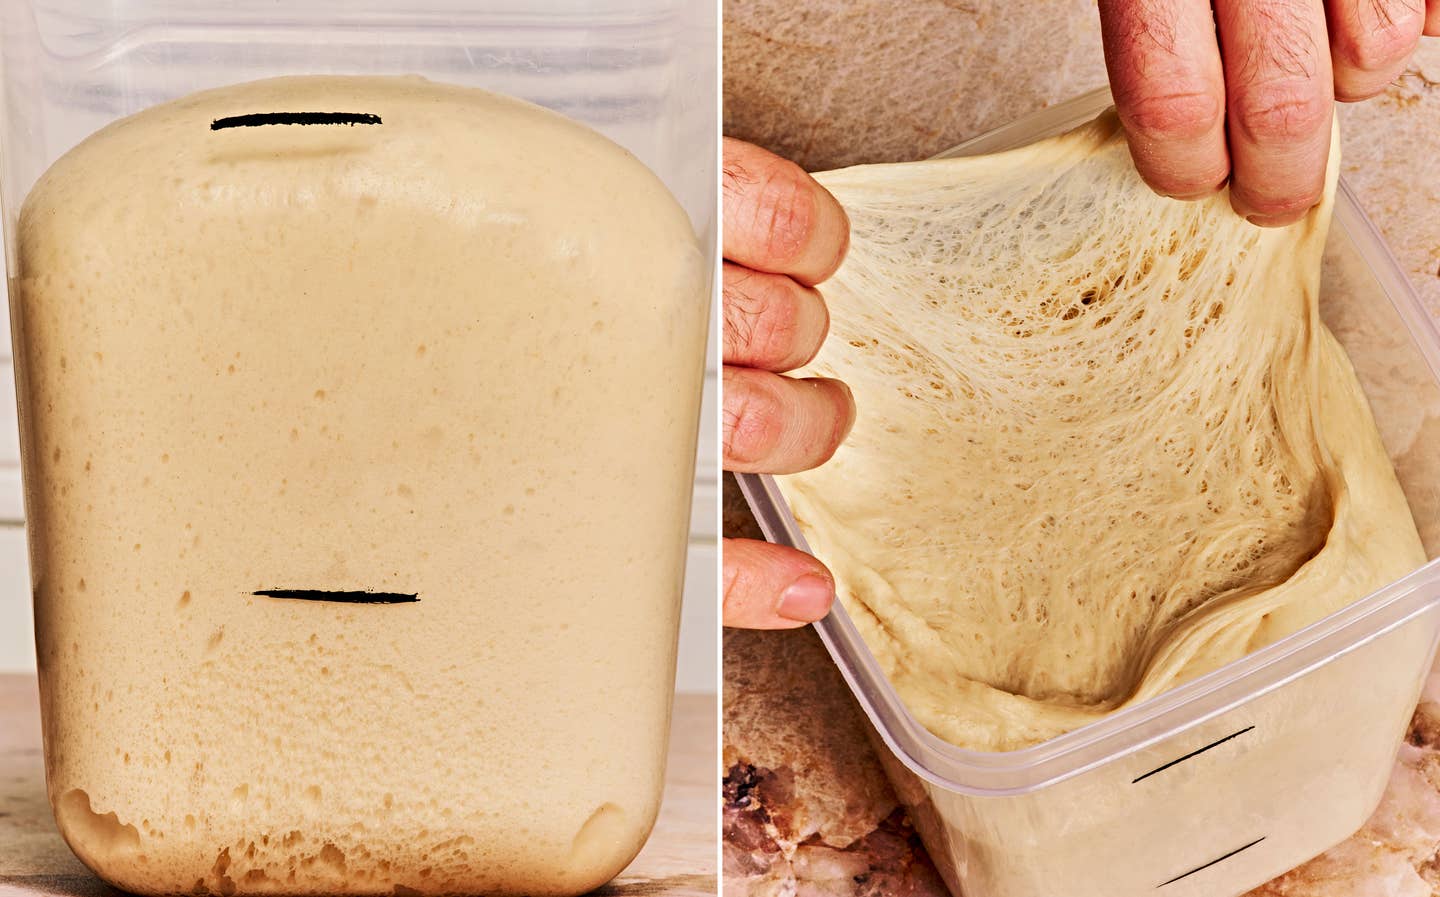

Form the dough into a ball and place in a 2-quart container in a warm spot, about 84°F, until tripled in volume, then refrigerate for about 1 hour to cool slightly before you make the second dough.
While you wait, combine the honey, orange zest, and vanilla for the aromatic mixture, and soak the raisins in hot water to plump them up.
Step 3: 4:00 p.m.—Make the secondo impasto (second dough)
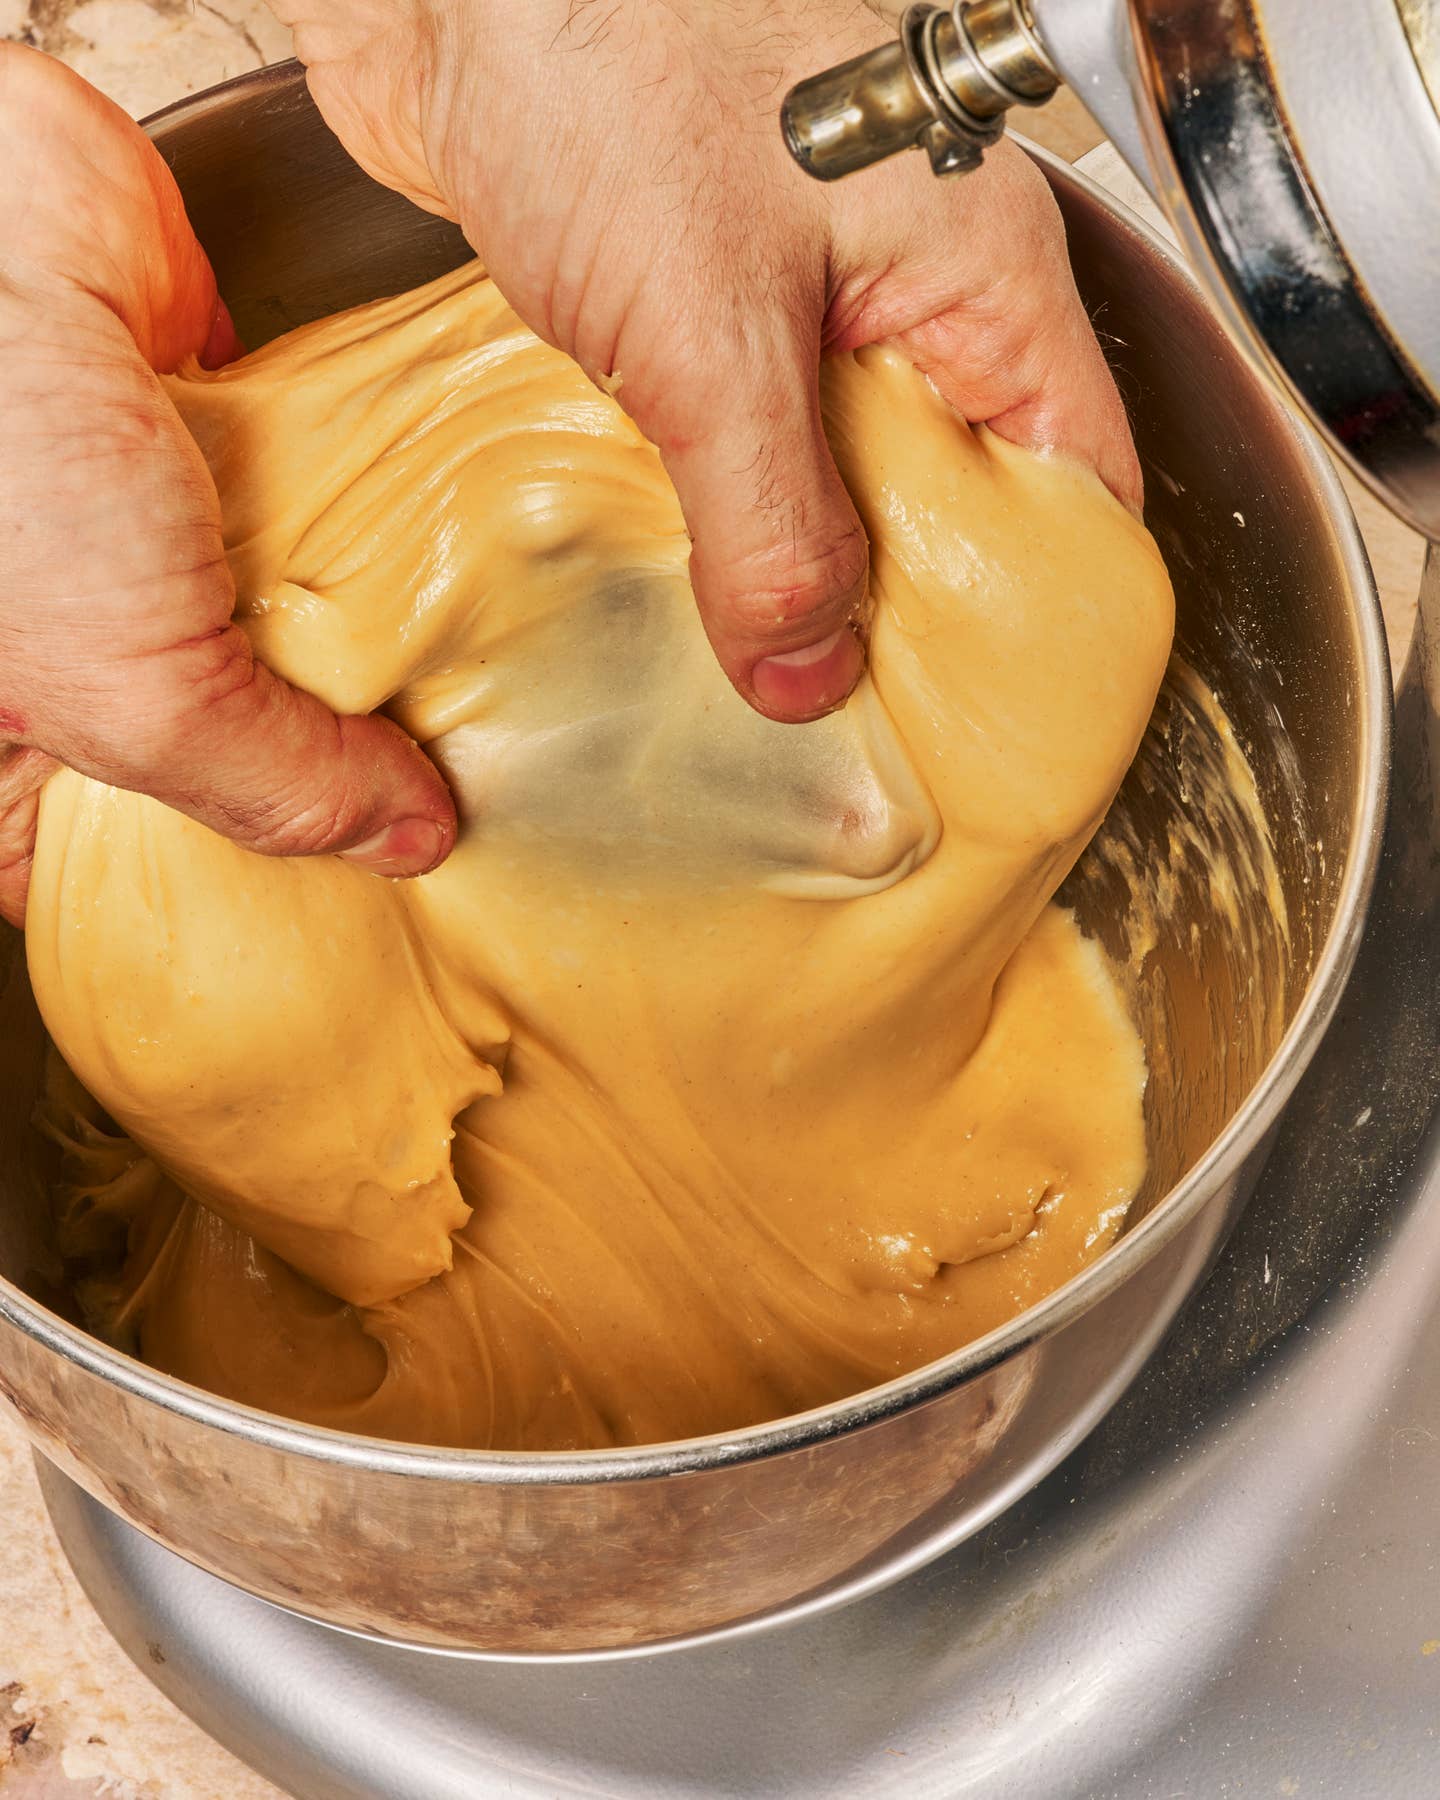

Return the first dough to the mixer bowl along with the cold water, yeast, egg yolks, flour, and vital wheat gluten. What’s vital wheat gluten, you ask? Panettone is typically made with a special type of extremely high-protein flour that enables it to absorb large quantities of butter, withstand long, slow fermentations, and rise exceptionally high. Since panettone flour is difficult to find, we’re adding a small amount of vital wheat gluten to conventional bread flour to increase its strength.
When the dough begins to come together, mix in the sugar a little at a time, then keep mixing until you once again have a smooth dough. Slowly begin adding the butter, kneading until the dough is soft and elastic. Check it by pulling another window pane. If you thought the dough was impressive before, you won’t believe how stretchy it is now.
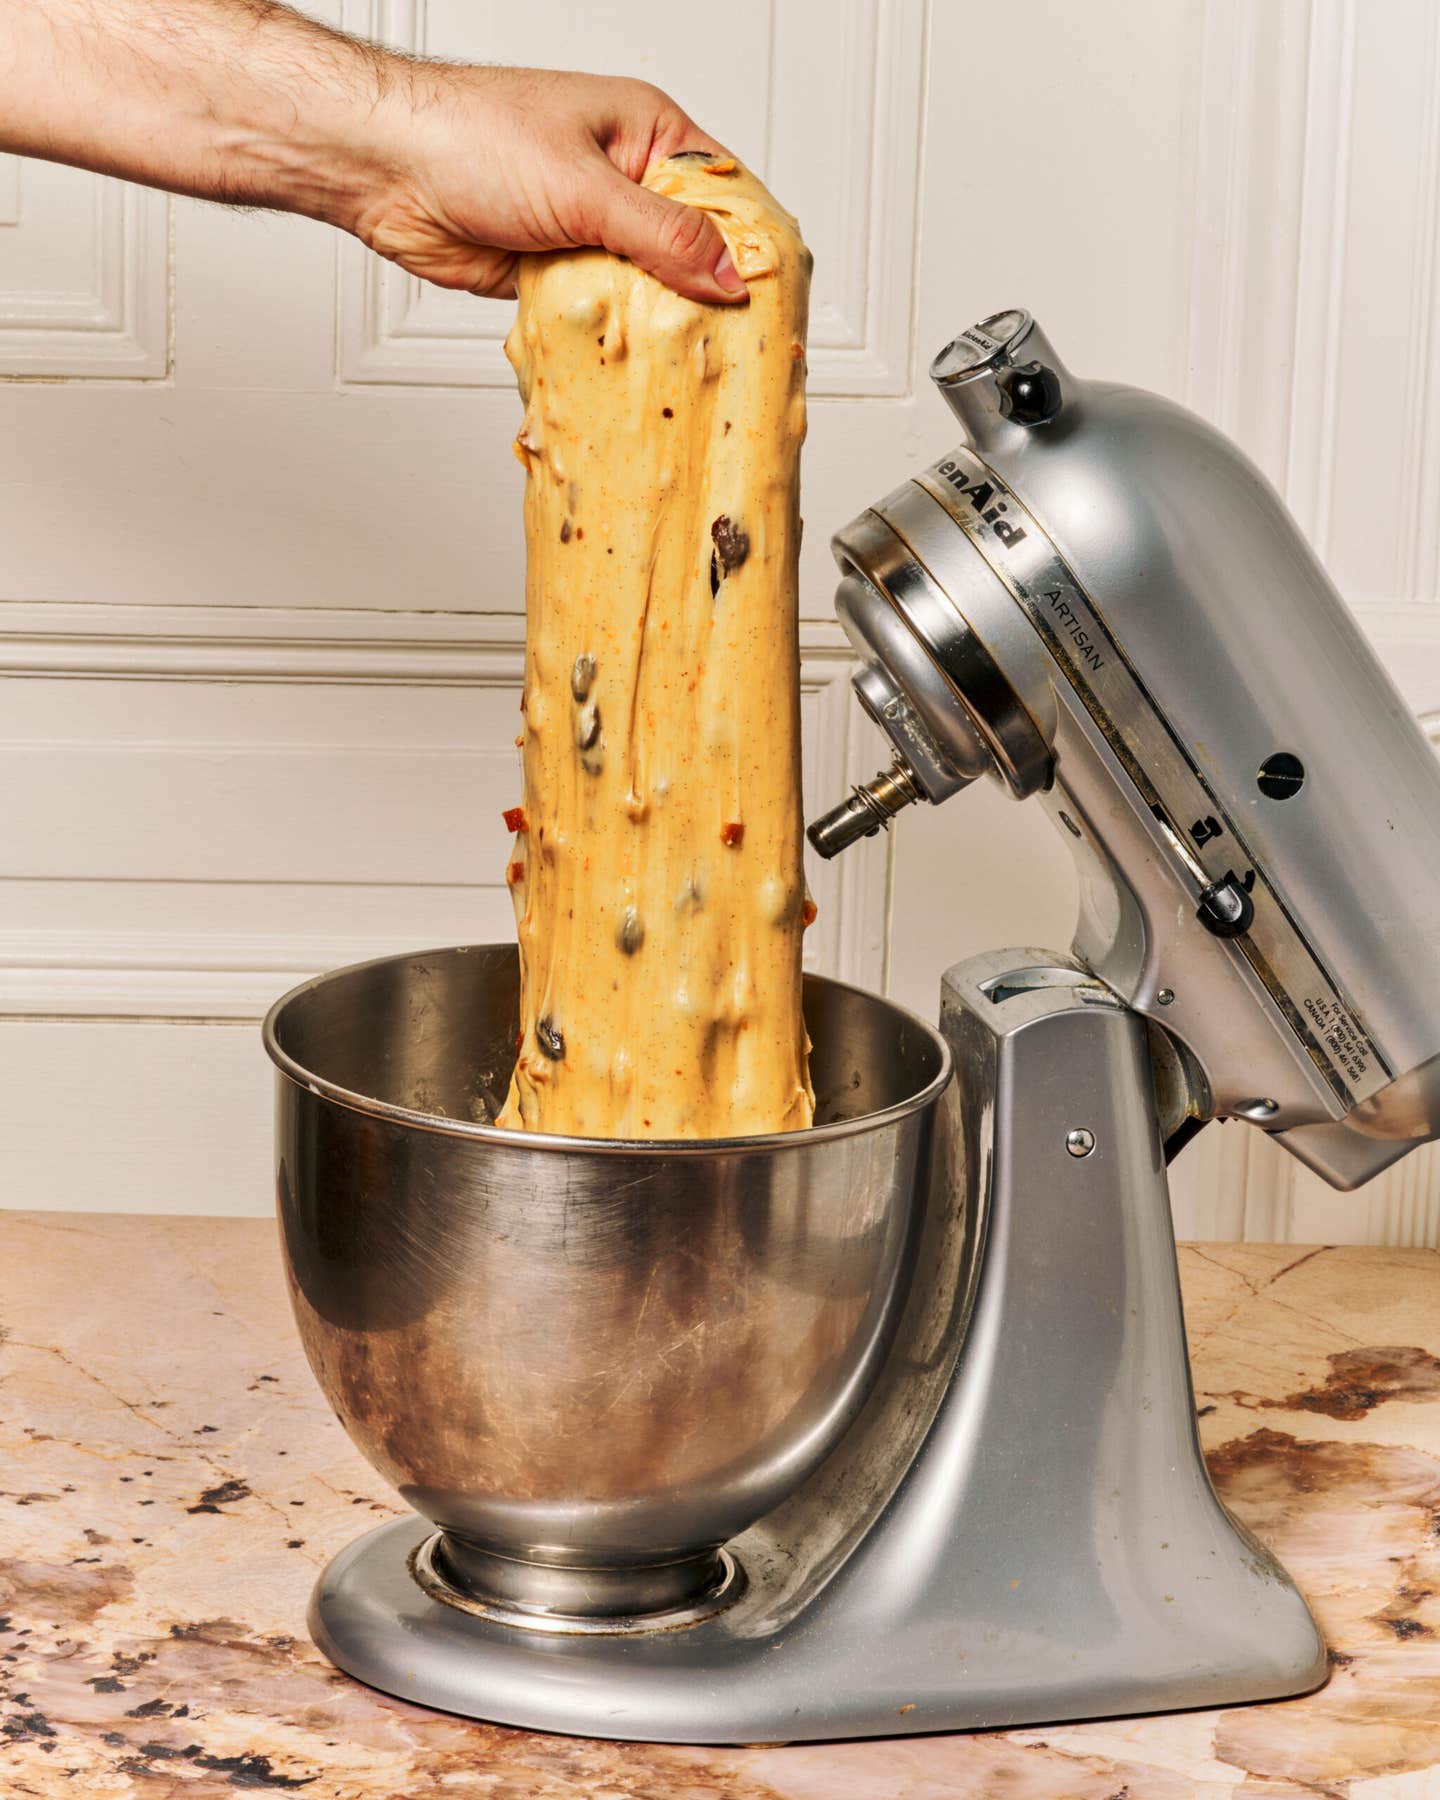

Knead in the aromatic mixture, followed by the raisins and candied orange, then transfer the dough to a lightly greased work surface and divide in half.
Step 4: 4:45 p.m.—Shape the dough
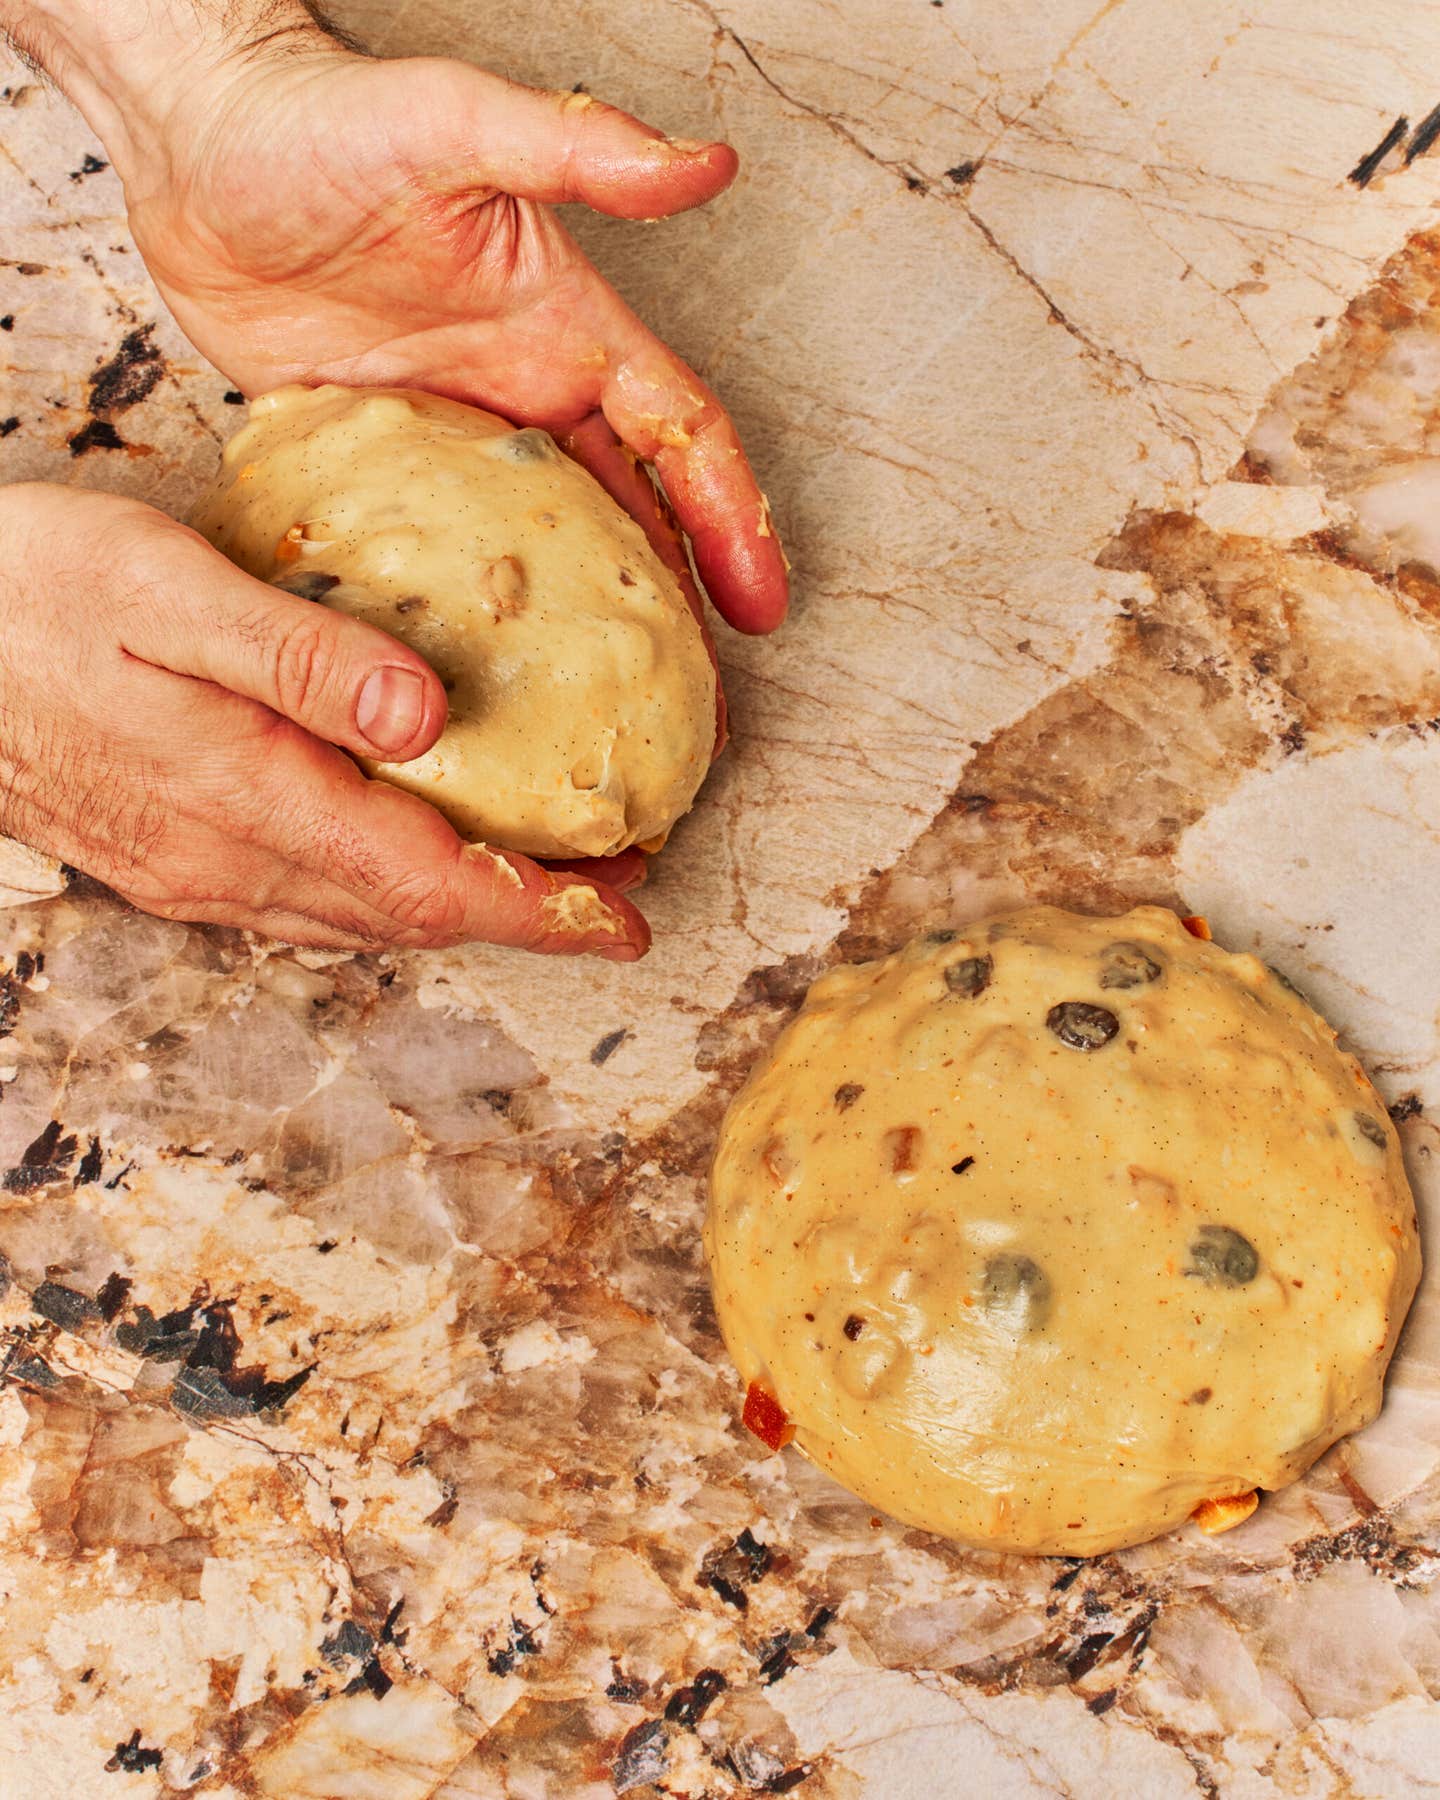

At first, the dough might seem impossibly soft, but shaping it into rounds will give it additional strength. Working with one piece of dough at a time, lift the side furthest from you off the work surface, letting it hang in the air. Lower the dough back onto the surface, allowing it to fold over itself as it lands, then gently rotate about a quarter turn. Pick the dough up from the side furthest from you once more and repeat three more times. The dough will elongate less each time you lift it, until it forms a tight mound. Use the edges of your hands, palms facing up, to gently rotate the dough along the work surface, rounding it and giving it tension.
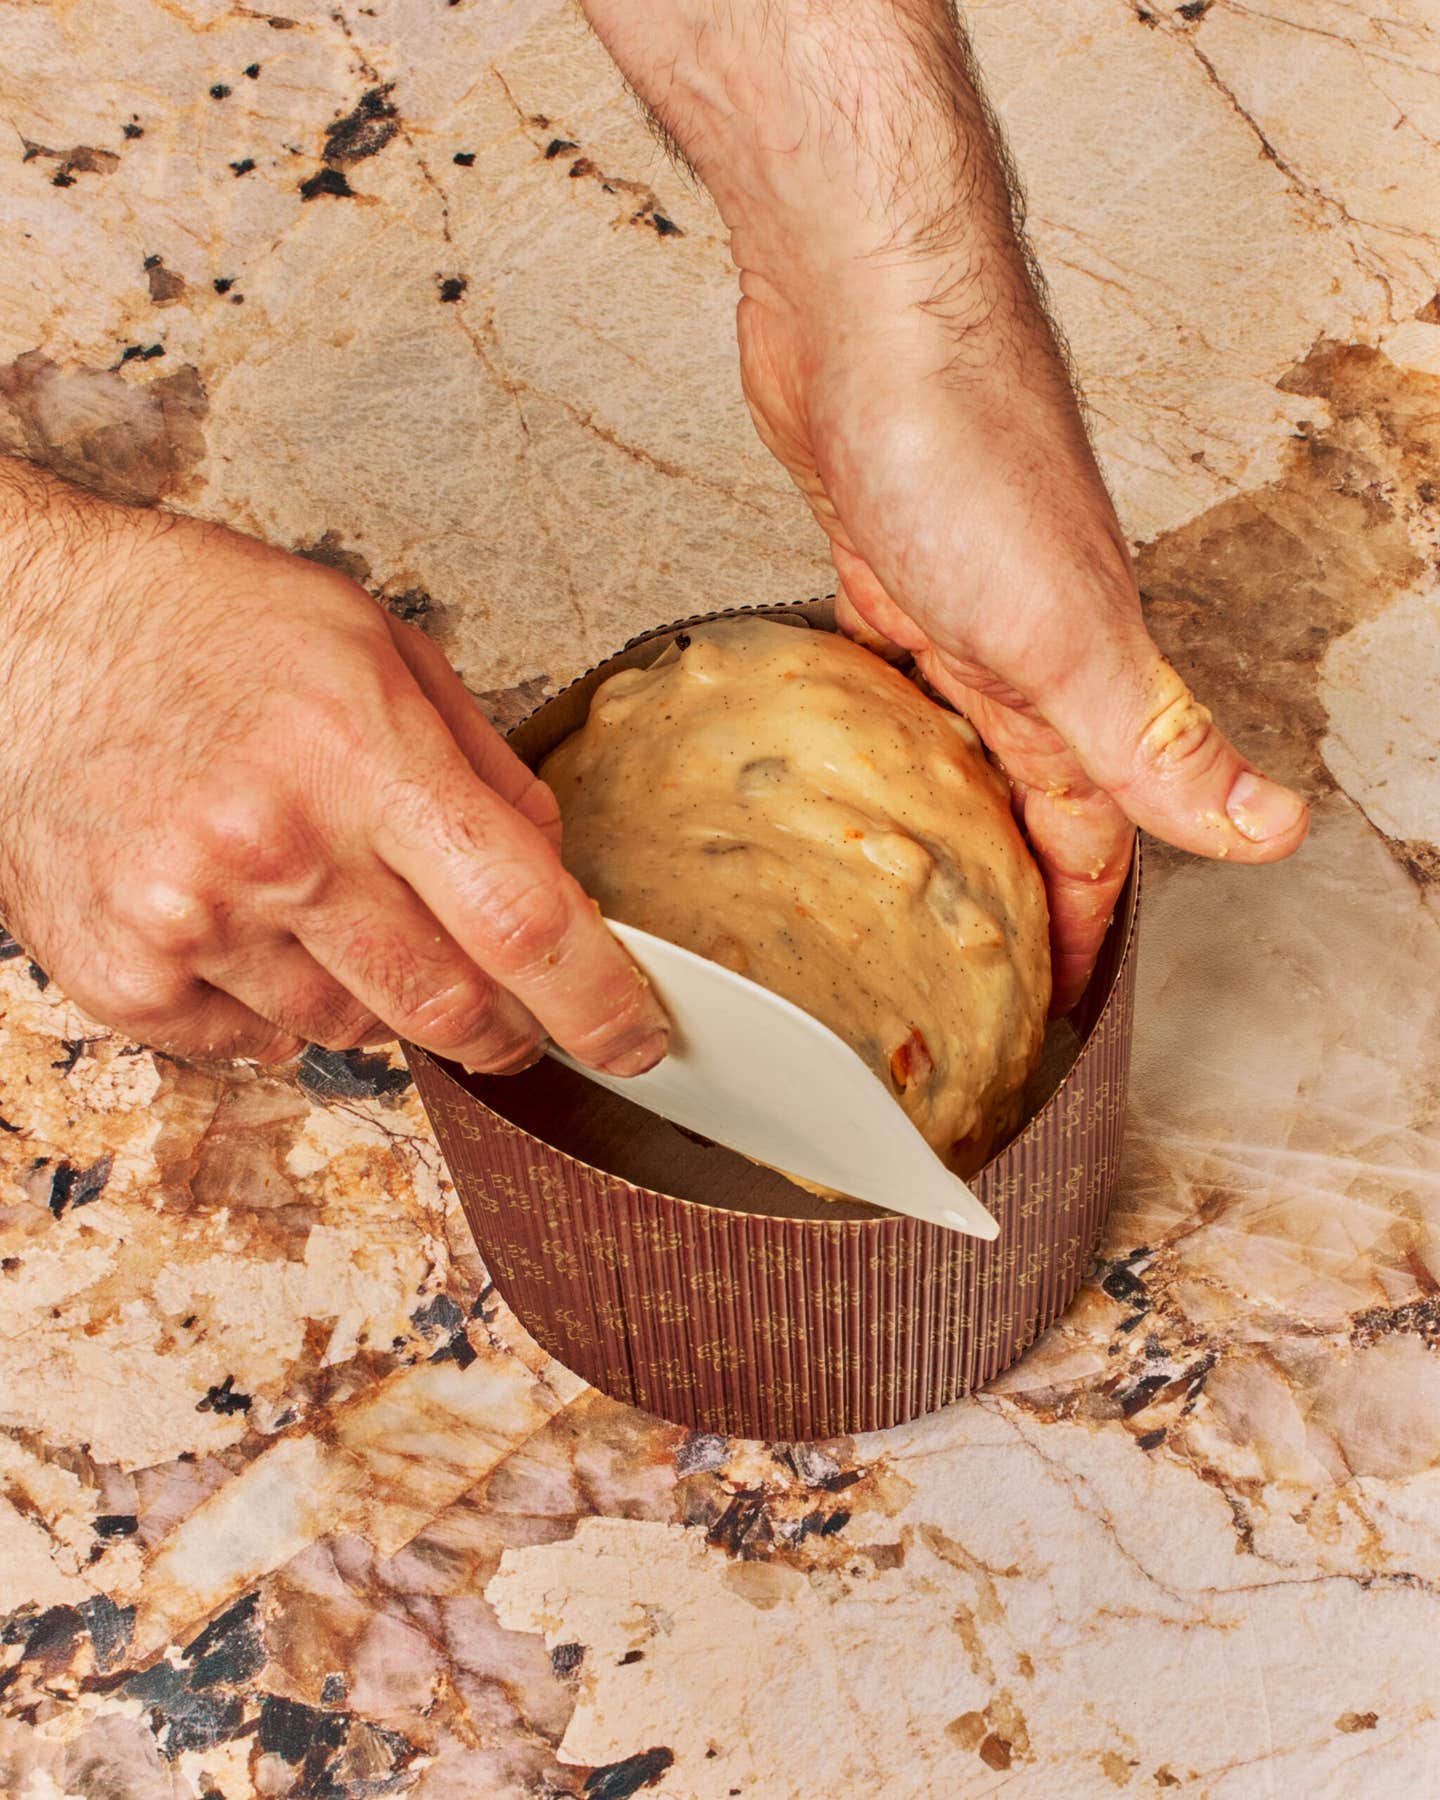

Without inverting them, slip the rounds into the paper panettone molds in one quick motion. Slide the molds into a large plastic produce bag and onto a small baking sheet, sealing the bag so the dough doesn’t dry out. Refrigerate overnight.
Step 5: 8:00 a.m.—Proof the panettoni

In the morning, take the panettoni out of the produce bag and place on a rimmed baking sheet. Proof the panettoni until the dough peaks roughly ½ inch above the top of the molds, about 6 hours.
Finding a good spot to proof your panettoni may be the hardest part of this recipe. You’ll need a fairly warm, humid spot, about 84°F, that can hold its temperature for around 6 hours. An oven with the light on or a bowl of hot water on the oven floor is a good option, but you’ll want to keep an eye on the temperature to make sure it doesn’t get too hot or too cold. Some ovens have dedicated proofing modes; just make sure it’s not too hot, and consider adding a bowl of hot water to keep the surface of the dough moist. In the past I’ve used a box with a heating pad or a large picnic cooler with a bowl of hot water. For the diehards, there’s always the Brod and Taylor Folding Proofer. Now that I have one, I can’t live without it!
If none of these options work for you, you can proof the panettoni at warm room temperature (about 78°F), each tented with a large produce bag, but it will take significantly longer for them to rise—possibly as long as 10 to 12 hours, depending on the exact temperature and humidity.
Step 6: 3:00 p.m.—Bake the panettoni
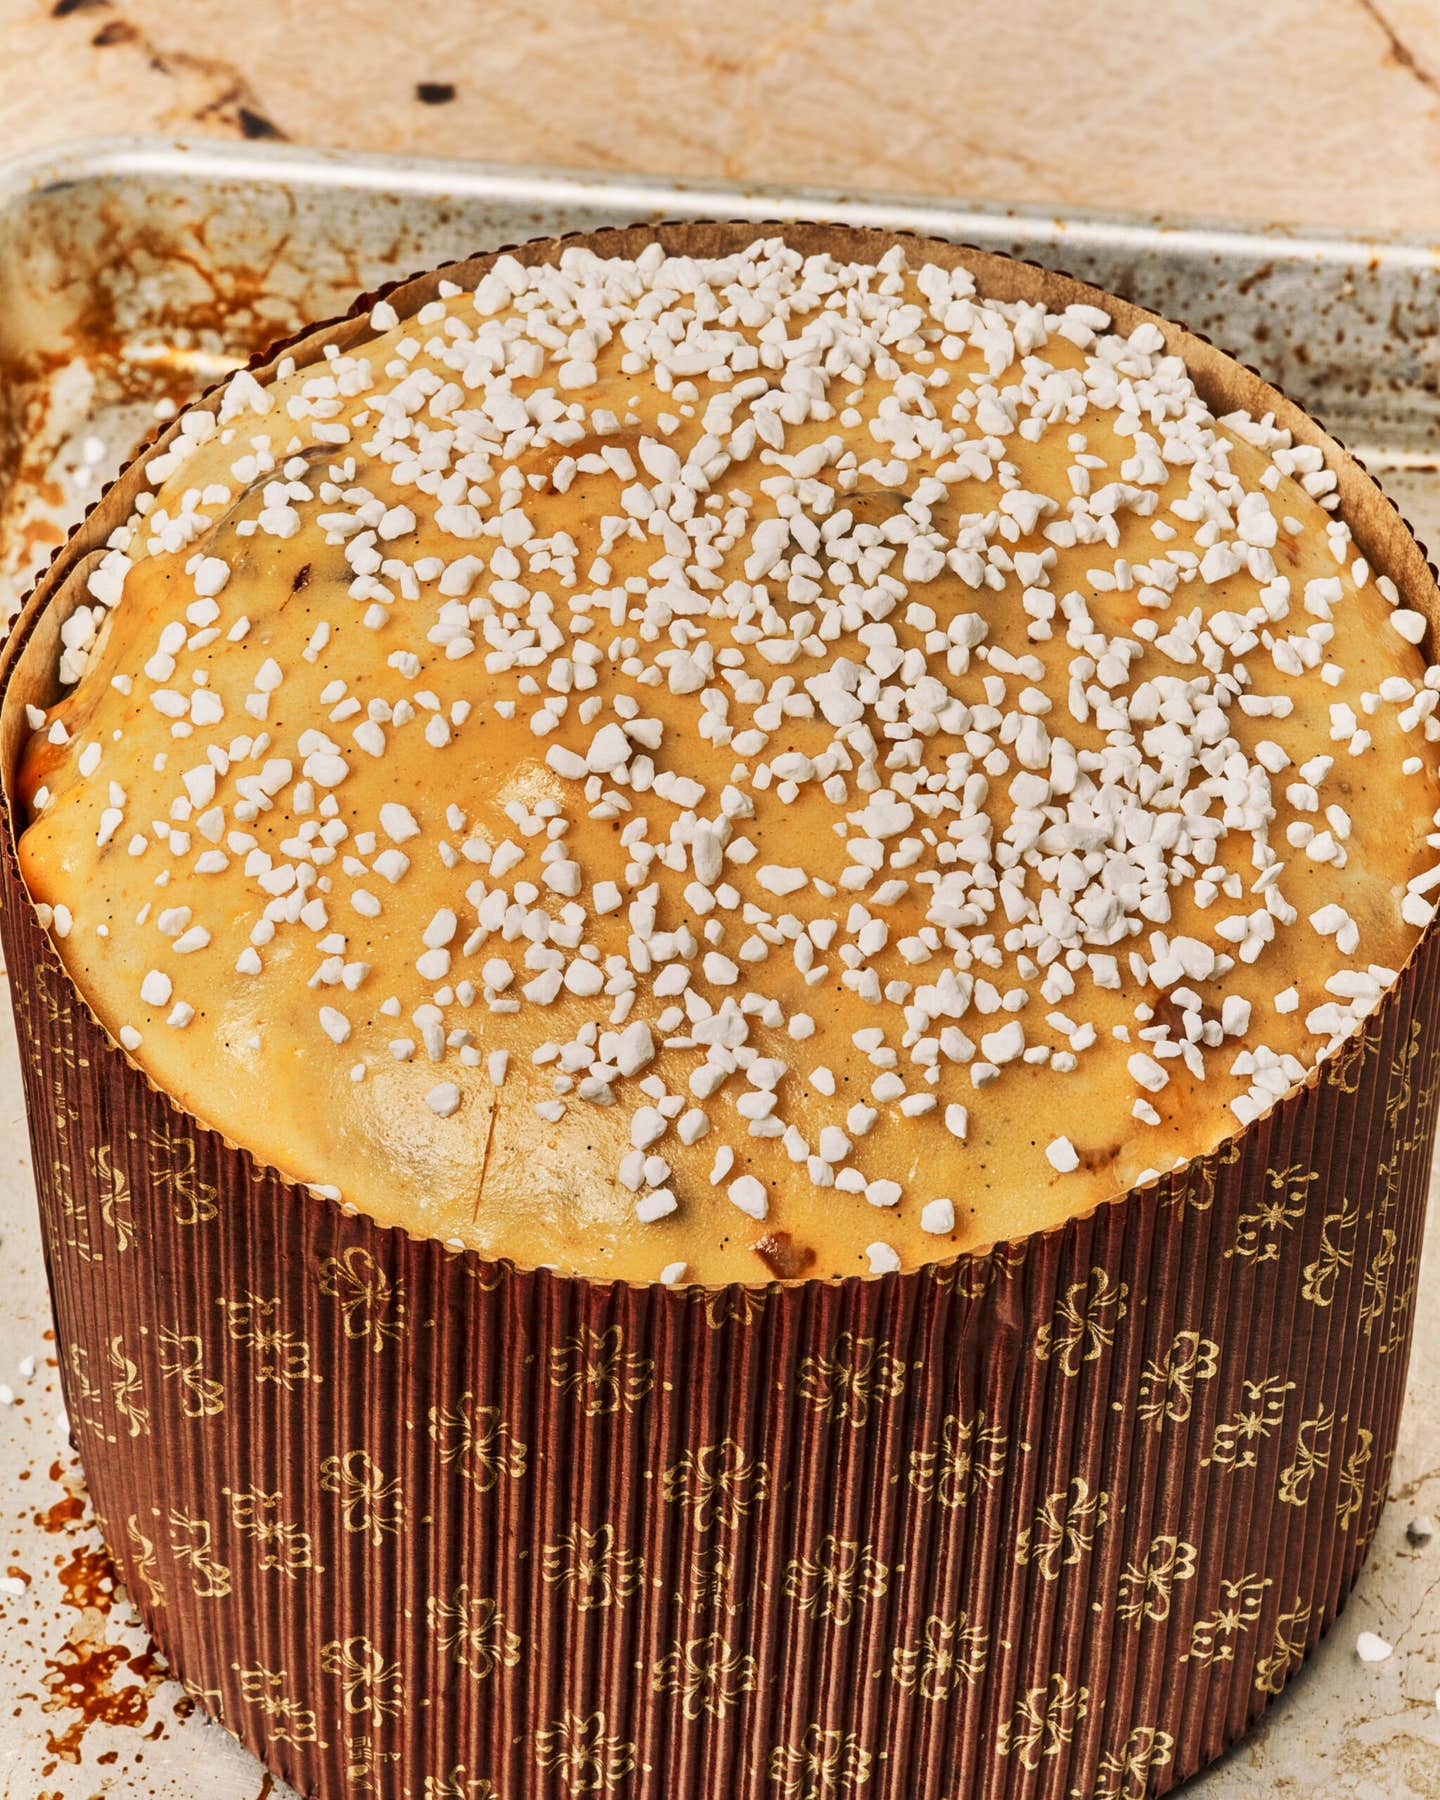

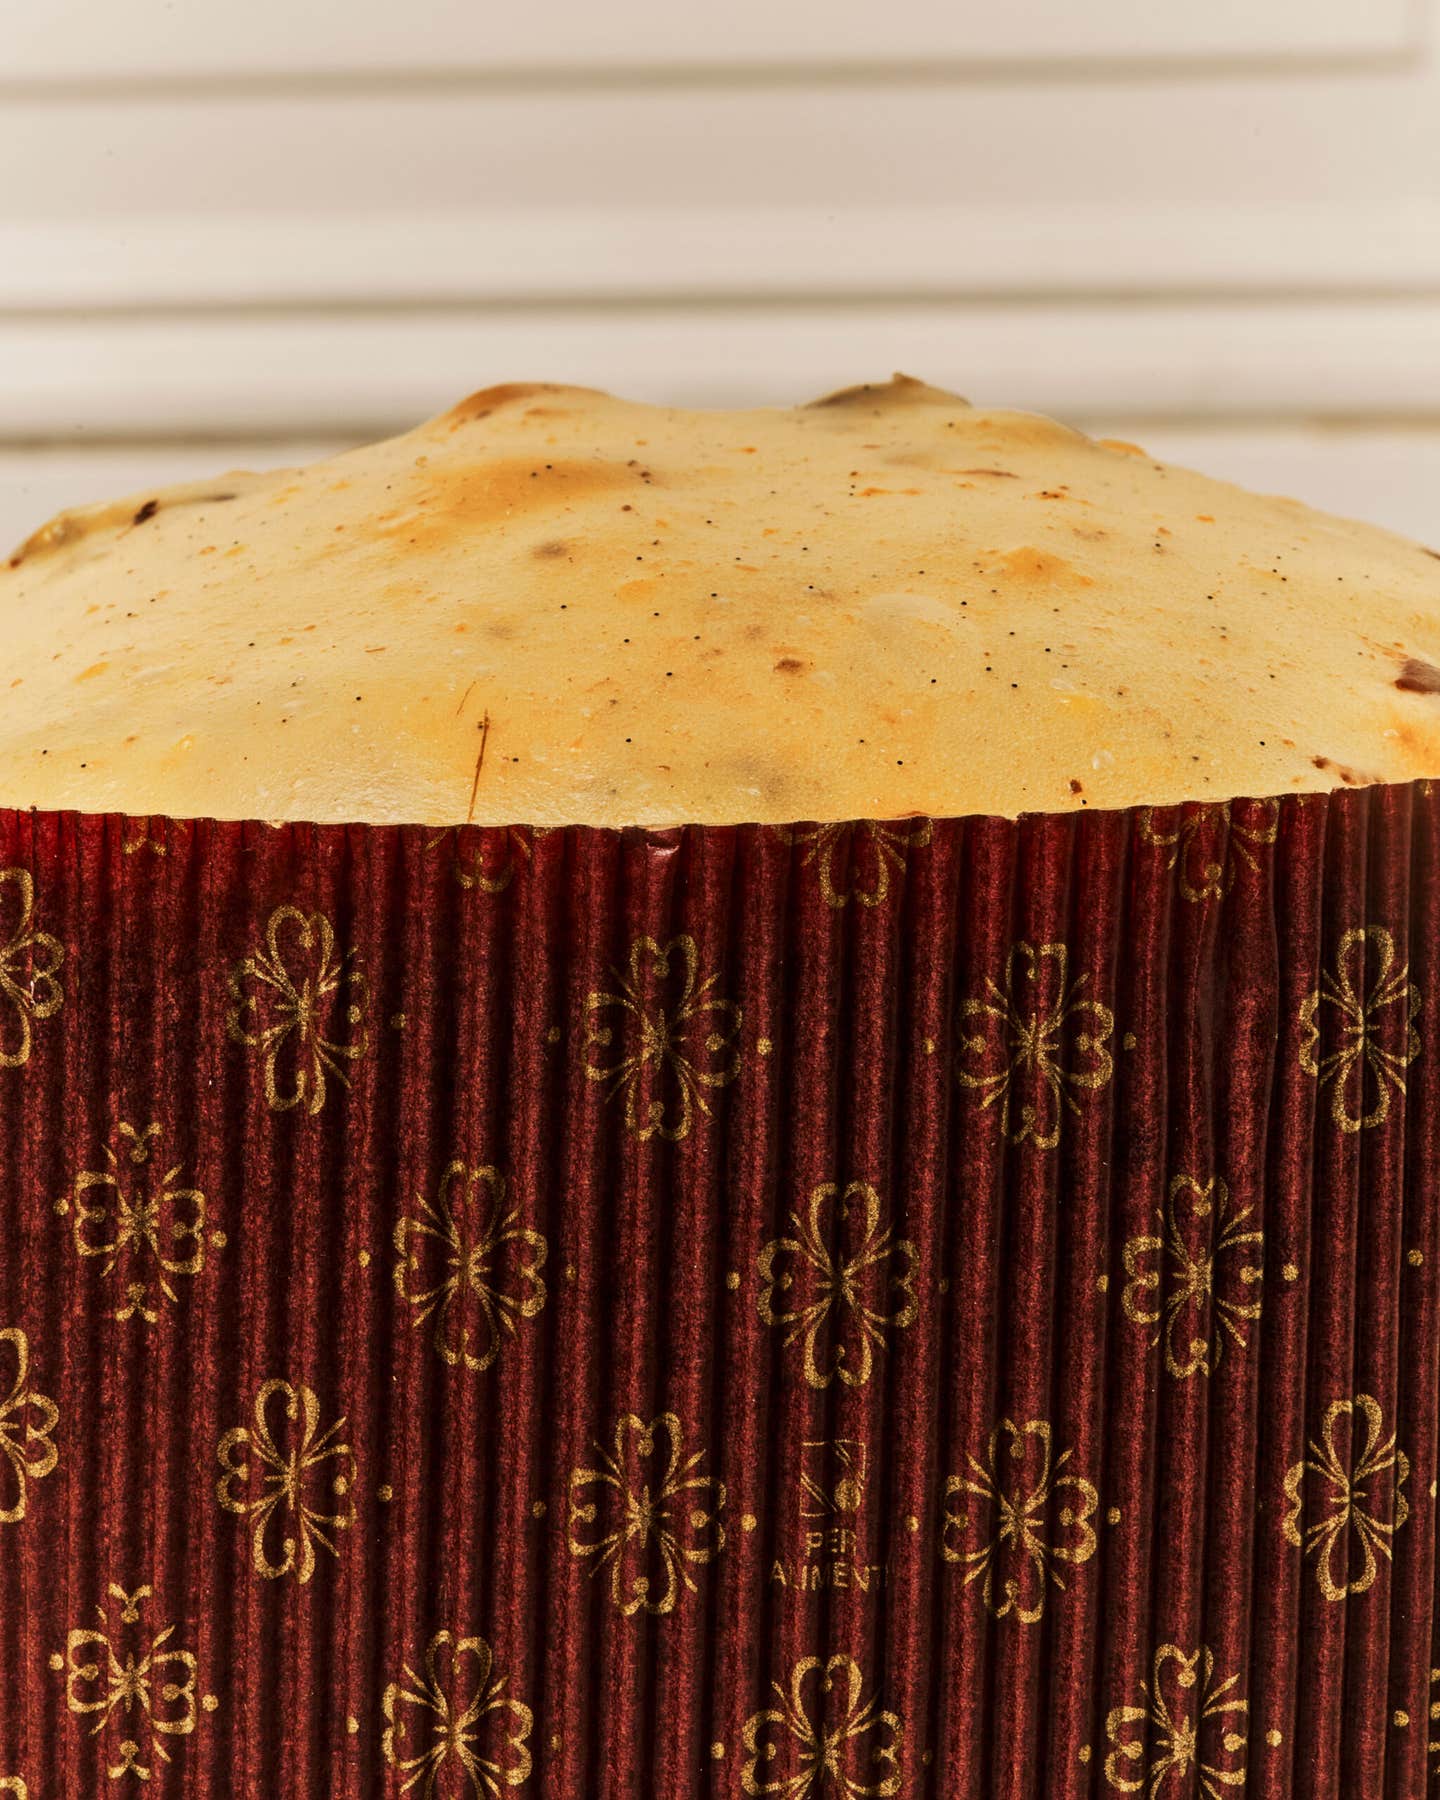
About 30 minutes before baking, position a rack in the center of the oven and preheat to 350°F. Lightly spritz the tops of the panettoni with water and sprinkle generously with pearl sugar.
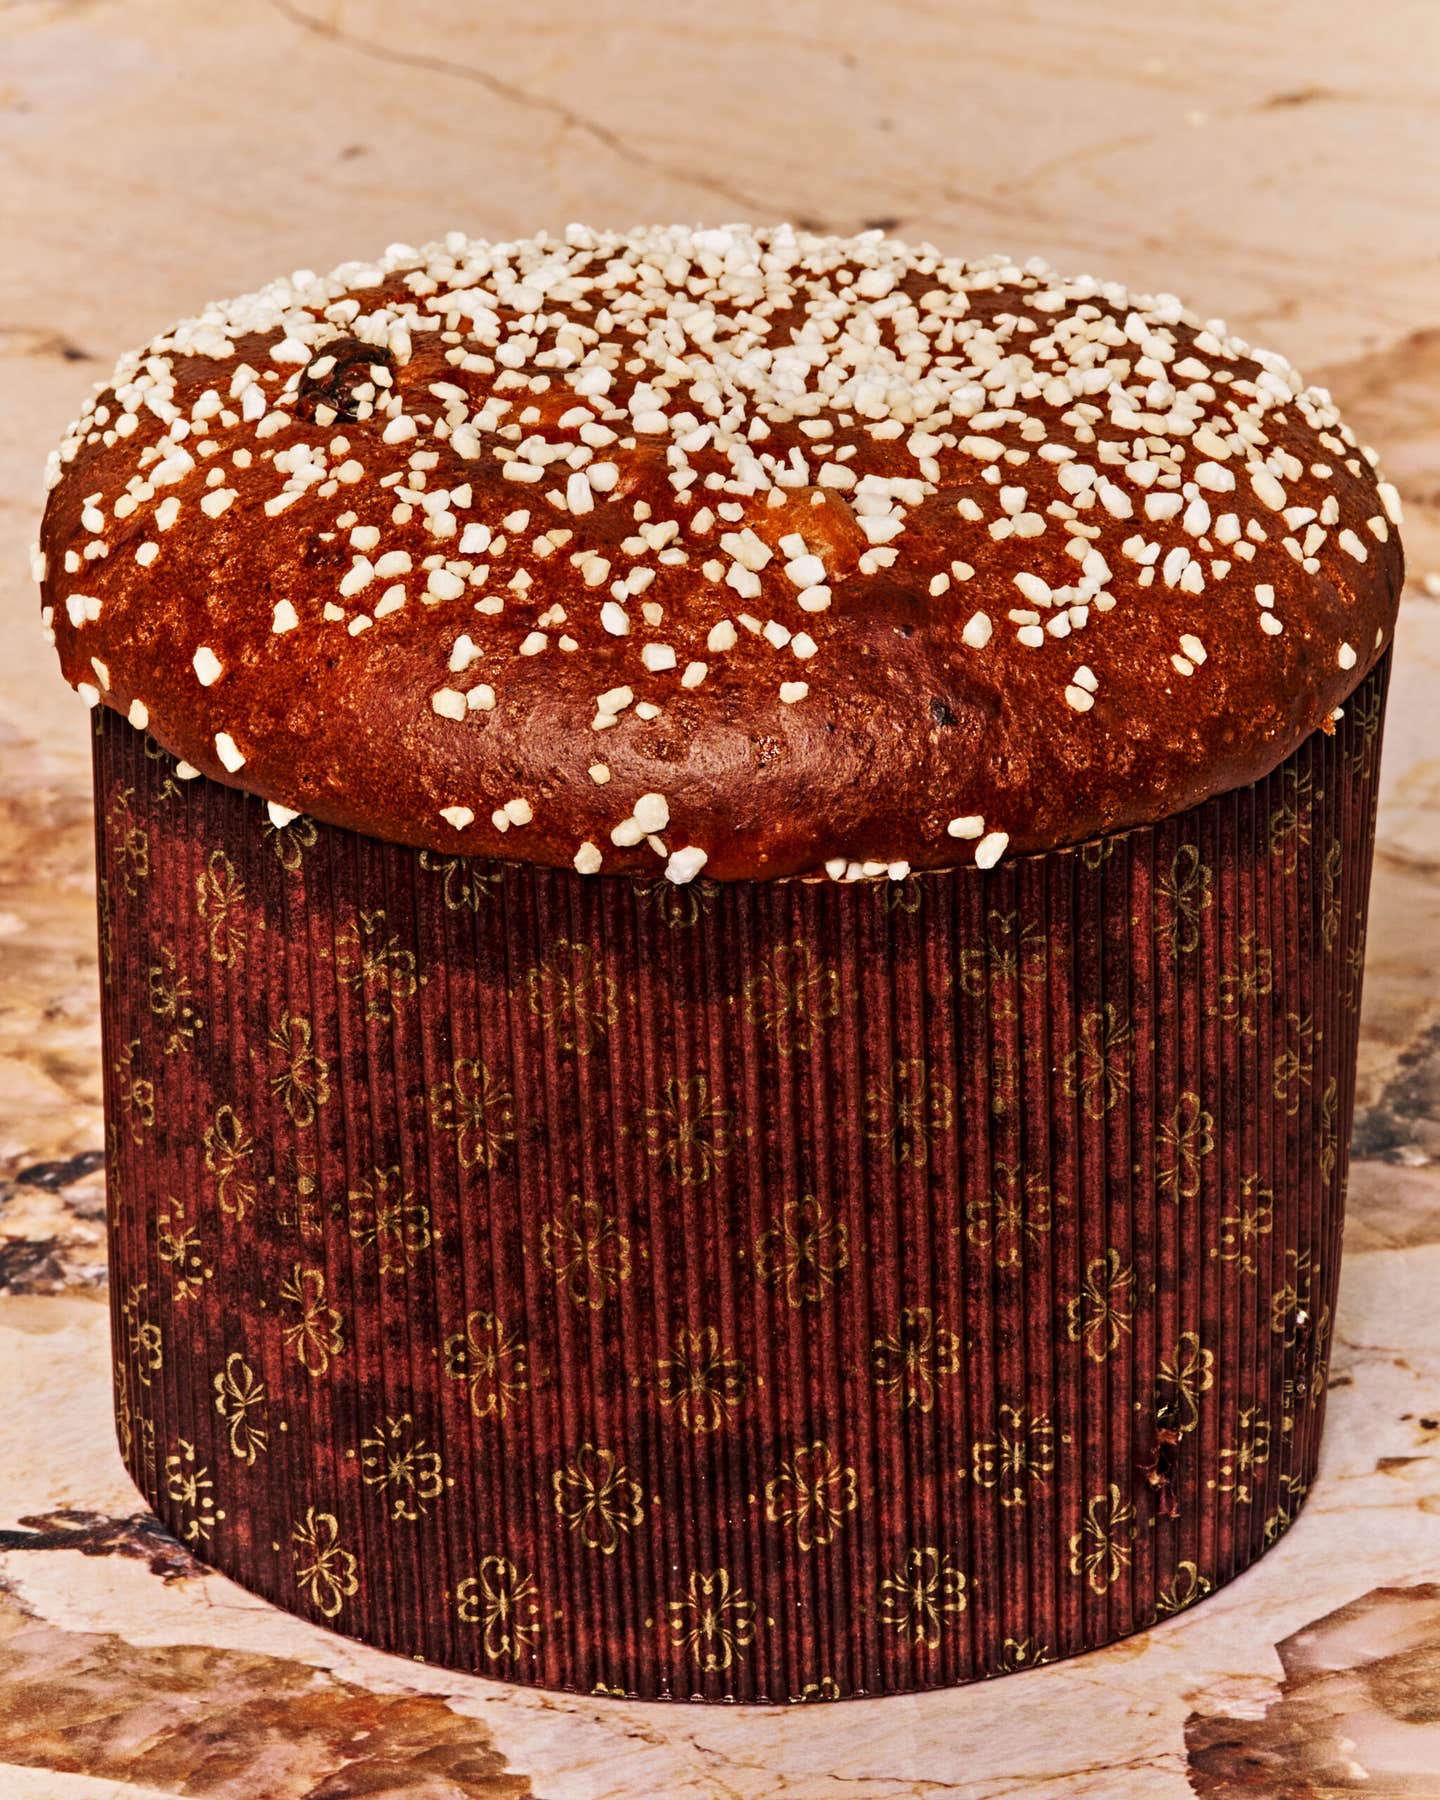

Bake for 20 minutes, then lower the temperature to 300°F. Resist the urge to open the oven to check on them; the panettoni are delicate at this stage, and the vibration of the oven door or the shock of cold air could cause them to fall. Continue baking until an instant-read thermometer inserted into the center reads 185°F, about 20 minutes (the panettoni are safe to check after15 minutes).
Step 7: 3:40 p.m.—Cool the panettoni
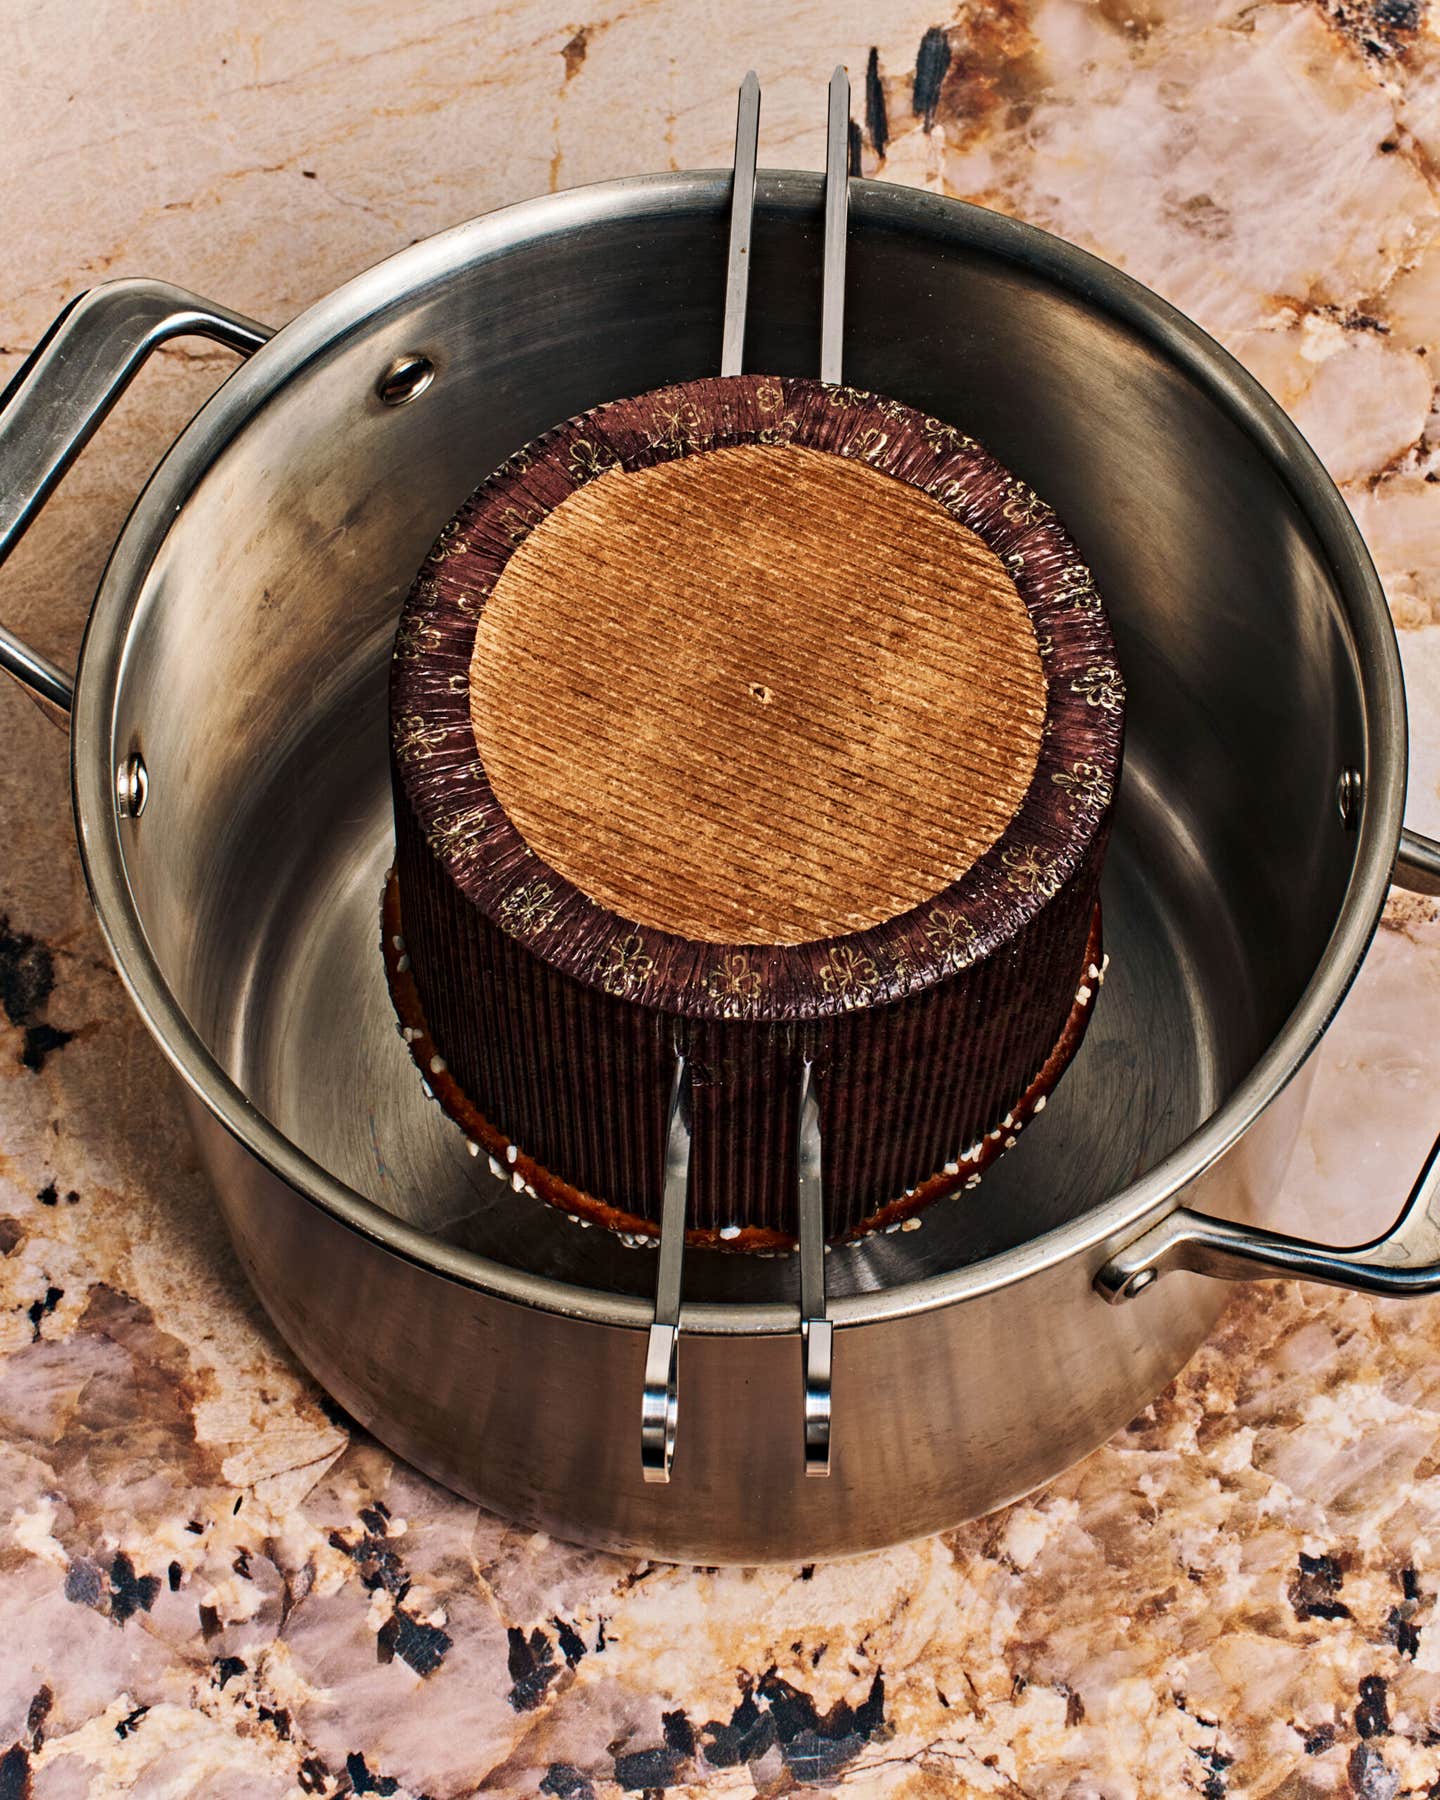

Despite the high-strength flour and generous time spent kneading, panettoni are more cakelike than bready; left to their own devices, they can’t support their weight while they cool. To keep all your hard work from ending up a dense brick, we’ll take another cue from the maestros and cool the panettoni upside down. You’ll need two large stock pots or bowls at least 6 inches deep, and four sturdy metal or bamboo skewers at least 12 inches long. Working quickly, as soon as the panettoni come out of the oven, insert two skewers into each panettone, about 1 inch from the bottom of the mold. Invert over the vessels and set aside to cool completely. Be careful, metal skewers can get hot as they pass through the panettoni!
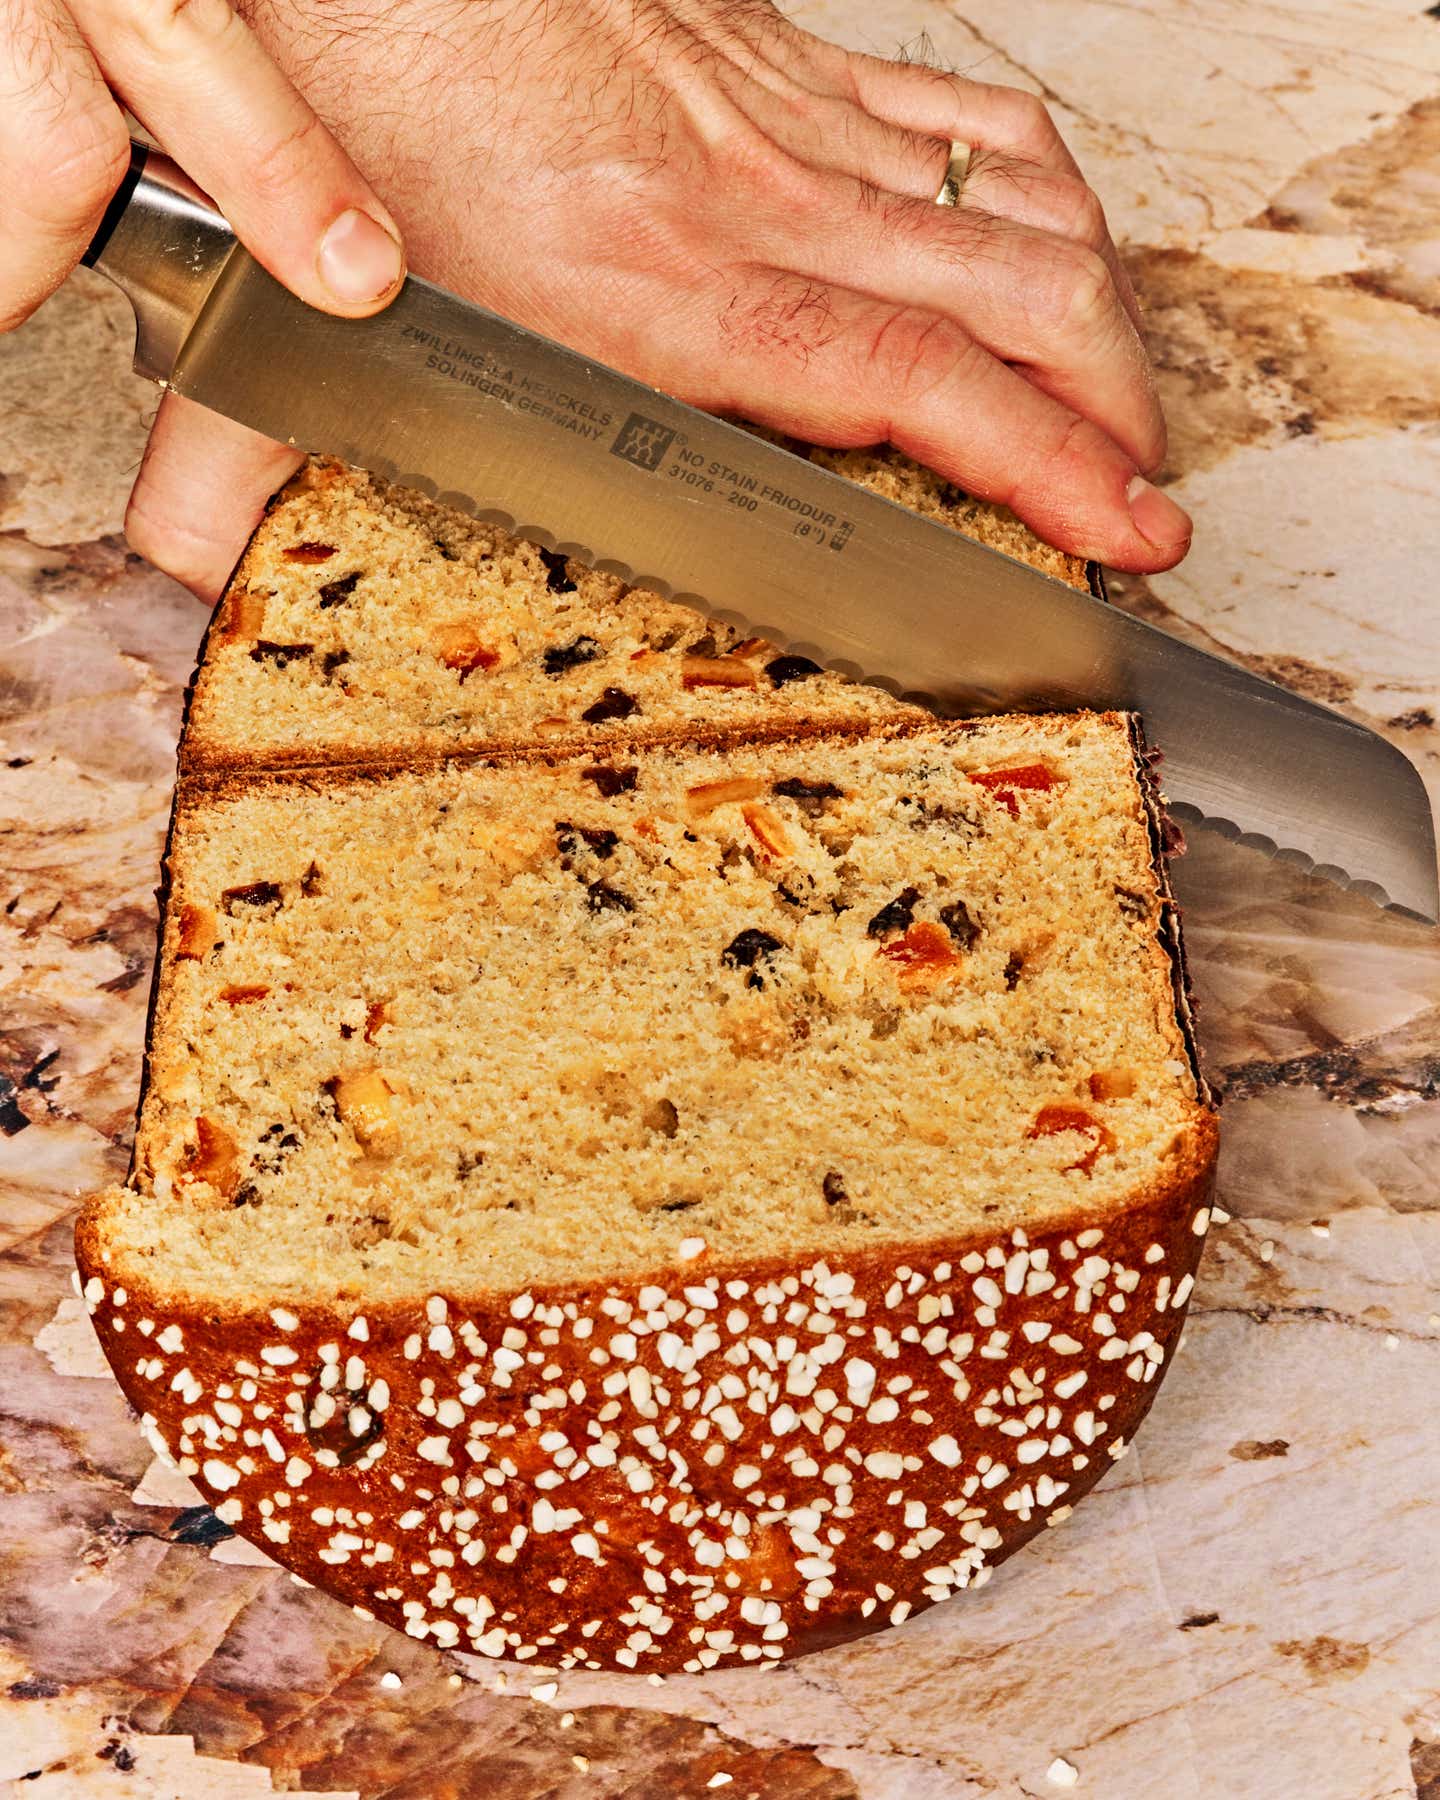

You can slice the panettoni as soon as they’re cool, but I recommend letting them age for a day or two to let the flavor develop. Store the cooled, unsliced panettoni in sealed plastic bags at room temperature for up to two weeks. Sliced panettoni are best enjoyed within a few days.
Recipe: Panettone

Keep Reading


")


Continue to Next Story
