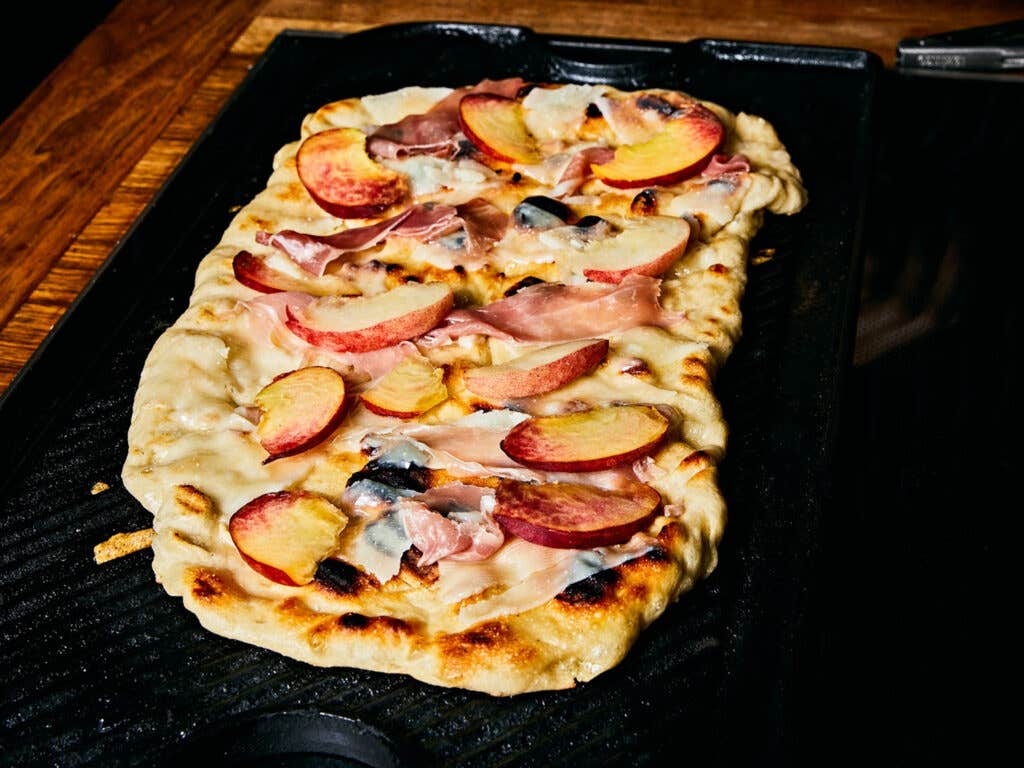
The Best Grilled Pizza, Inspired by Rhode Island’s Grilled-Pizza Mecca
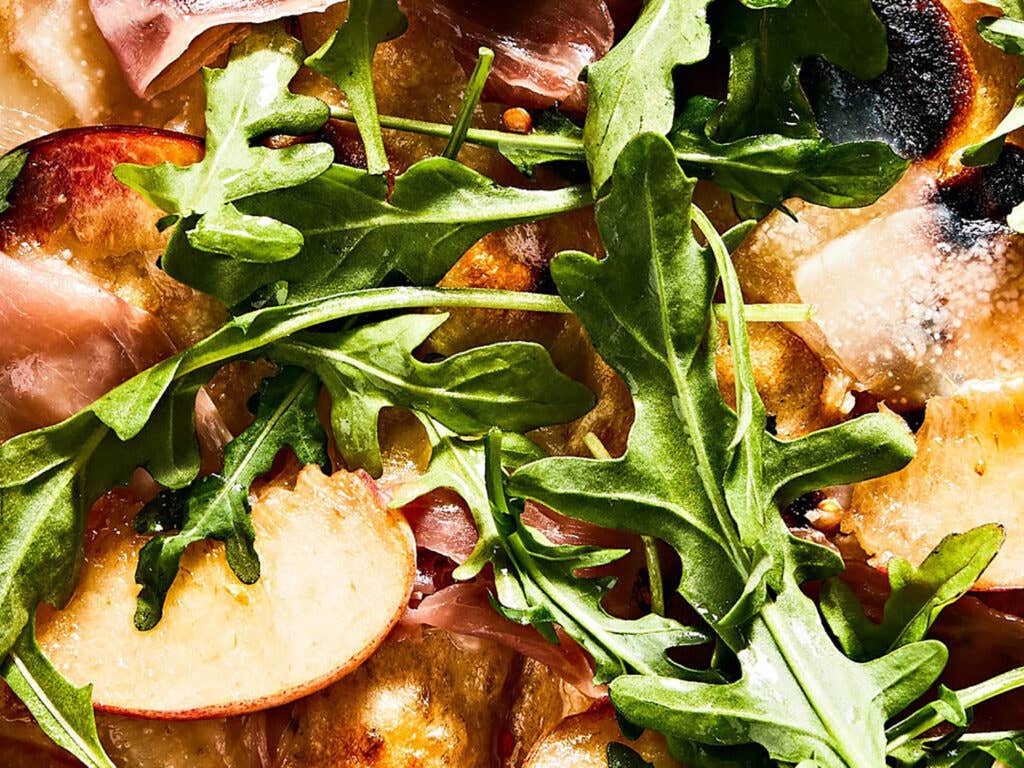
Top the crisp, chewy crust from Providence’s famed Al Forno with ripe peaches, salty prosciutto, and peppery greens
- Serves
makes four 16-by-9-inch pizzas
- Time
3 hours 40 minutes

For a state that's not known for pizza, Rhode Island has some surprisingly good pies. Take the "bakery strip," an appealingly greasy rectangle of room-temperature dough topped with red sauce and grated Parmesan that you can buy at gas stations, grocery stores, and the now-dwindling old-school Italian-American bakeshops. Or the thick and fluffy square pies that reflect the strong Sicilian influence in the state's Italian neighborhoods, or even the quick and affordable Greek pizzas you can find throughout New England. While these are all solid options, I wouldn't call any of Rhode Island's pizzerias destination-worthy, with one exception: Providence's legendary Al Forno.
The restaurant’s name is a bit of a misnomer, as Al Forno’s pizzas are not, in fact, baked in the oven. Instead, the thin, artfully assembled pies are cooked directly over an open fire. When I was a kid growing up in the 1980s and ‘90s, Al Forno was the hottest table in town. It was one of the first restaurants in the area that didn’t take reservations, and I remember my parents sipping California cabernet at the edge of the bar, waiting patiently for our table. While many restaurants of that era have gone the way of shoulder pads, Al Forno has endured, continuing to serve the grilled pizza that helped put it on the map. The husband-and-wife team behind the restaurant, George Germon and Johanne Killeen, are still the only Rhode Island chefs to have ever taken home a James Beard award in the Best Chef Northeast category, way back in 1993.
These days, grilled pizza is hardly surprising; but in 1980, when the two RISD-trained artists—a sculptor and a photographer—were starting out, the concept was pretty much unheard of. “We came to cooking from a completely different perspective,” says Killeen. “George got it into his head that he wanted to try grilling dough on the wood-burning grill that we had in the original kitchen. Our attitude has always been not ‘why?’ but ‘why not?’” The quick-cooking crust was a revelation—and proved to be an excellent canvas for testing innovative new flavor combinations. “I don’t think we ever really left the art world,” Killeen continues. “Our training is in every single thing that we do every single day. We brought a certain creativity to the restaurant…[we’ll never] lose that.”

In the almost 40 years since its opening, Al Forno has become renowned for its grilled pizza. Germon and Killeen even got the Italian stamp of approval at a conference in Rome. "They absolutely loved it!" laughs Killeen. "As much as I explained—in Italian—to the waiters who were passing it around that it was called pizza a la griglia—grilled pizza—they kept describing it as pizza americana. Which is funny, but kind of true. It is a uniquely American way...or Rhode Island way of cooking pizza."
Germon passed away three years ago, but Killeen still runs the show at the restaurant most days and is working on a third Al Forno cookbook. There's always a classic margarita on the menu, but otherwise the selection changes seasonally: nettle pesto in the spring, or sweet corn with garlicky pomodoro and red chile oil in the summer. A calamari pie, sauced with spicy arrabbiata and crowned with expertly fried squid, is also in the regular rotation, as is a recently added cacio e pepe pizza, topped with pecorino, black pepper, and mortadella.
Al Forno’s pizza is an excellent jumping-off point for home cooks, even if you don’t have a wood-burning grill (more on that later). We adapted the restaurant’s classic dough recipe to make our own seasonally driven pie, pairing sweet summer peaches and peppery wild arugula with pecorino, prosciutto, and chile oil. Master the crust using our grilled pizza primer, complete with tips from Killeen, then feel free to create your own market- and garden-inspired combinations.
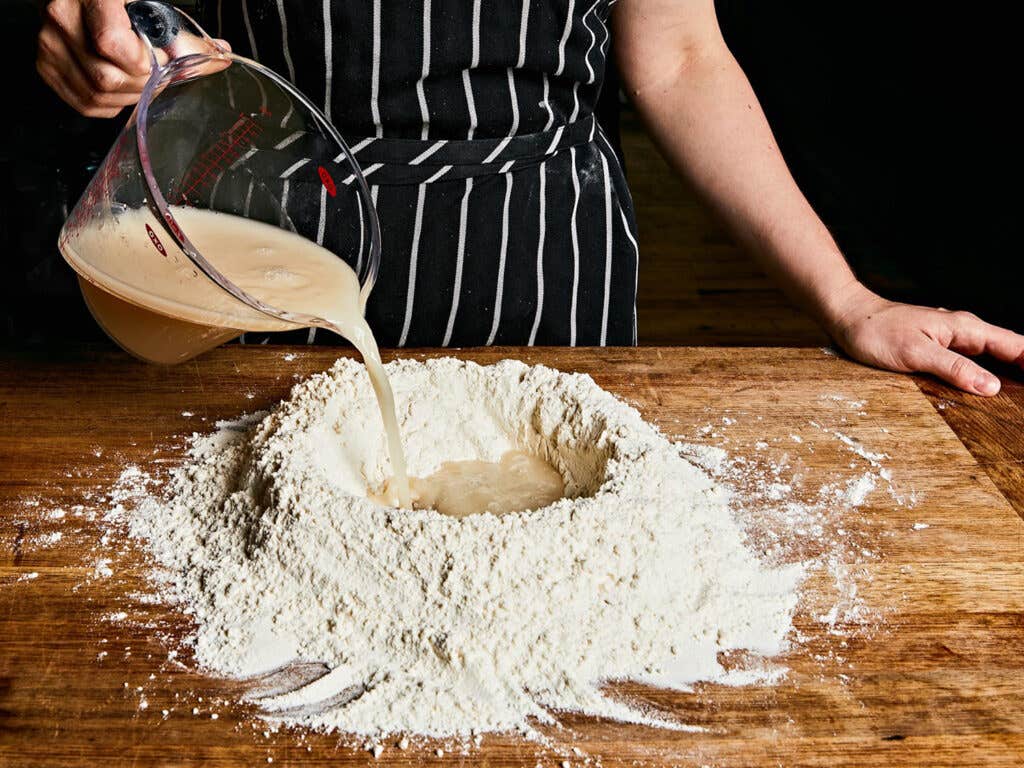

Mix the Dough by Hand
Al Forno’s simple pizza dough calls for four ingredients: flour, salt, yeast, and water. While you can use a stand mixer if you prefer, it isn’t necessary here, so save yourself some cleanup and get your hands dirty instead.


A Baker's Trick: Pâte Fermentée
At Al Forno, the kitchen team typically incorporates a small percentage of pâte fermentée, a portion of the dough from the previous day added to the mixture the next day for better flavor and extensibility. "The flavor that we achieve is through the slow fermentation of the dough," Killeen explains. Your first batch of dough will work just fine without it, but if you do get in the habit of making this pizza often, consider upping your game by saving a few ounces of pâte fermentée to knead into the next batch. It'll keep in the fridge for up to 3 days or in the freezer for up to 1 month.
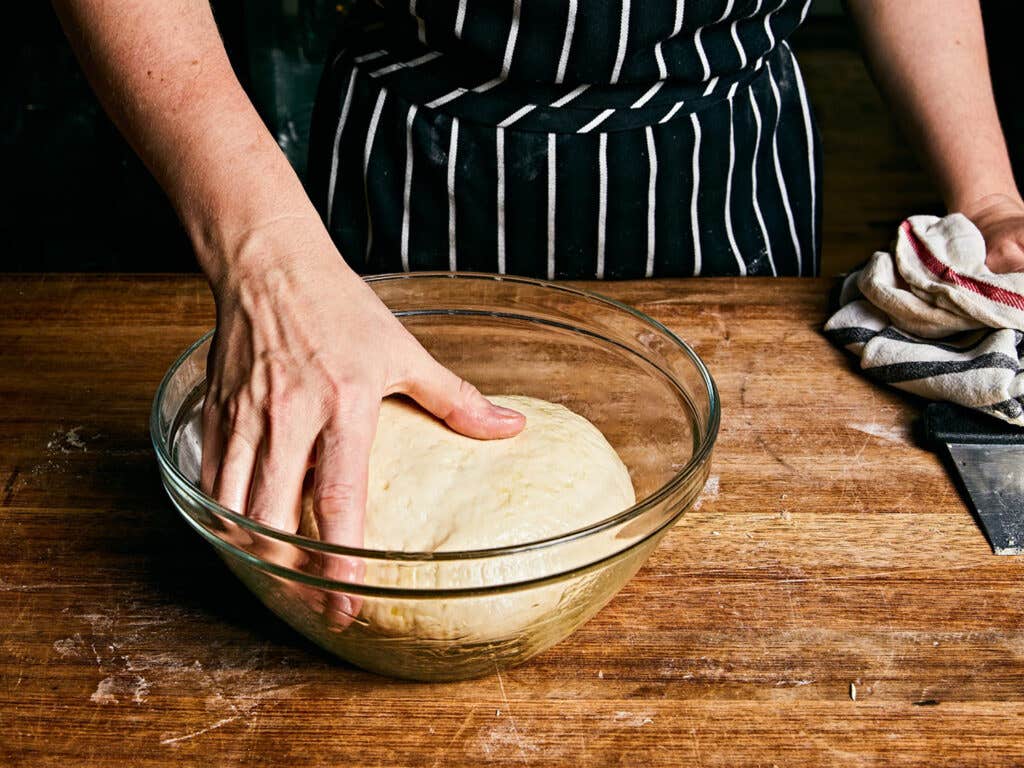

Slow Fermentation Is Key
After mixing, the dough will achieve the best flavor and extensibility if allowed to ferment slowly over several hours. Place in a well-oiled bowl and turn it over a few times to coat, then cover the bowl loosely with plastic wrap. Set aside at room temperature until it is very gassy and has nearly doubled in size. After the initial rise, punch the dough down, fold it in thirds, then lift and flip it over completely. (This step will encourage gluten development without tightening the dough, and also help mediate any differences in temperature throughout the mass of dough.)
Cover and set aside at room temperature until the dough puffs and has nearly doubled in size, 35–40 minutes more. (If making the dough ahead of time, the folding step is not necessary; just cover the bowl tightly after mixing and refrigerate until the dough has nearly doubled, at least 6 hours. The dough can also be refrigerated for up to 24 hours or frozen for up to 2 weeks.)
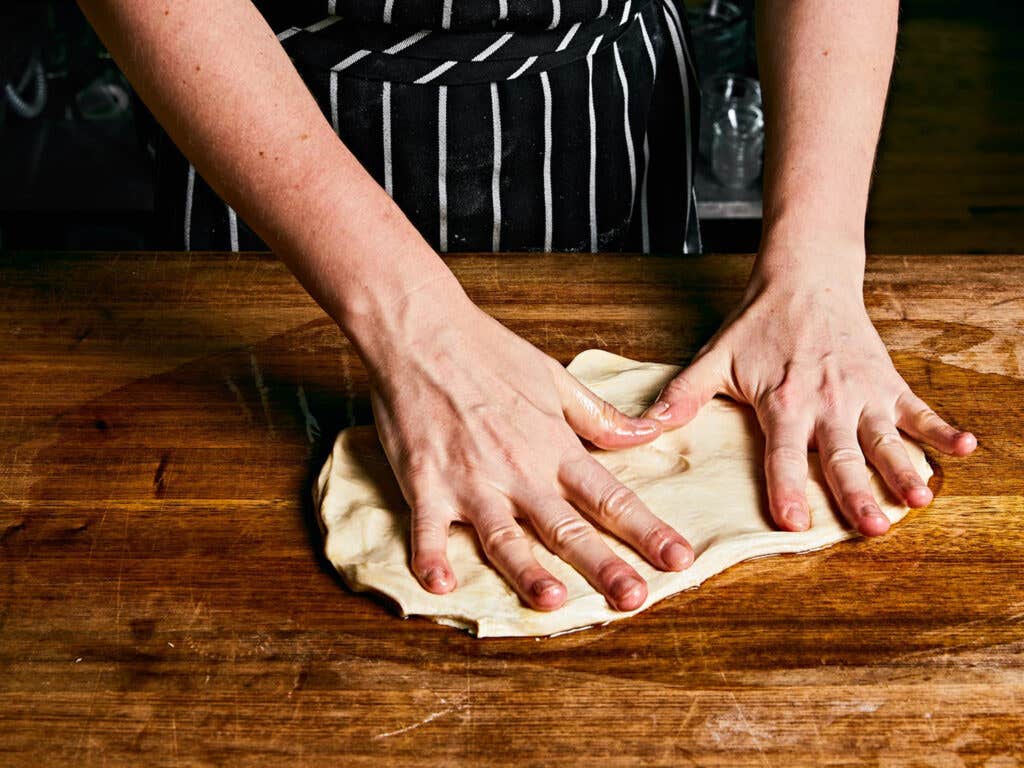

Go Freeform with the Shape
The size and shape of your grill should dictate the size and shape of your pizza. Divide the dough into portions, then on a liberally oiled work surface, press each portion out to a nearly paper-thin layer. “Since we’re spreading it out by hand, there are slightly thicker and thinner bits,” says Killeen, “so you get this combination of textures—crispy and chewy.”
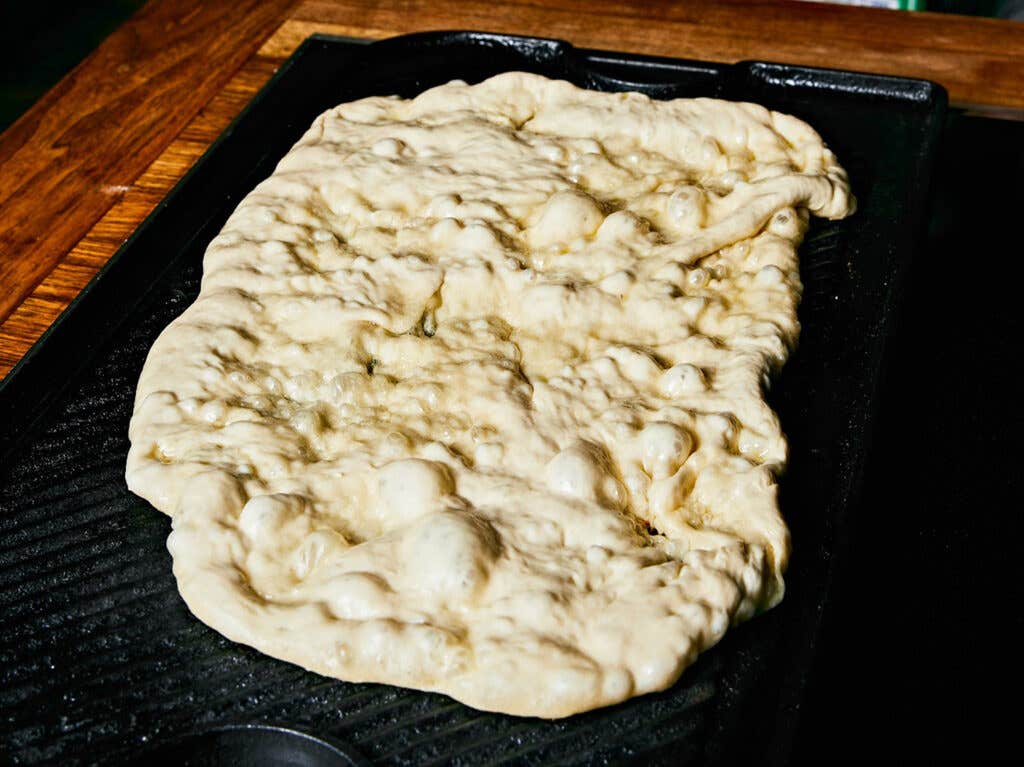

Parcook the Crust
Immediately after shaping the crust, it’s time to grill. For a true Al Forno-style pie, an open fire is preferred—Killeen uses Canadian hardwood charcoal. But don’t let the lack of a grill hold you back from trying this recipe. We tested Al Forno’s dough on a well-seasoned cast-iron grill pan to great results. Just be sure to preheat the surface well and open a window or turn on the exhaust fan, as the oily dough may smoke. Further keeping the gear to a minimum, this recipe doesn’t require a pizza peel. Just “pick it up, and throw it on the grill like you would throw a sheet on the bed,” advises Killeen.
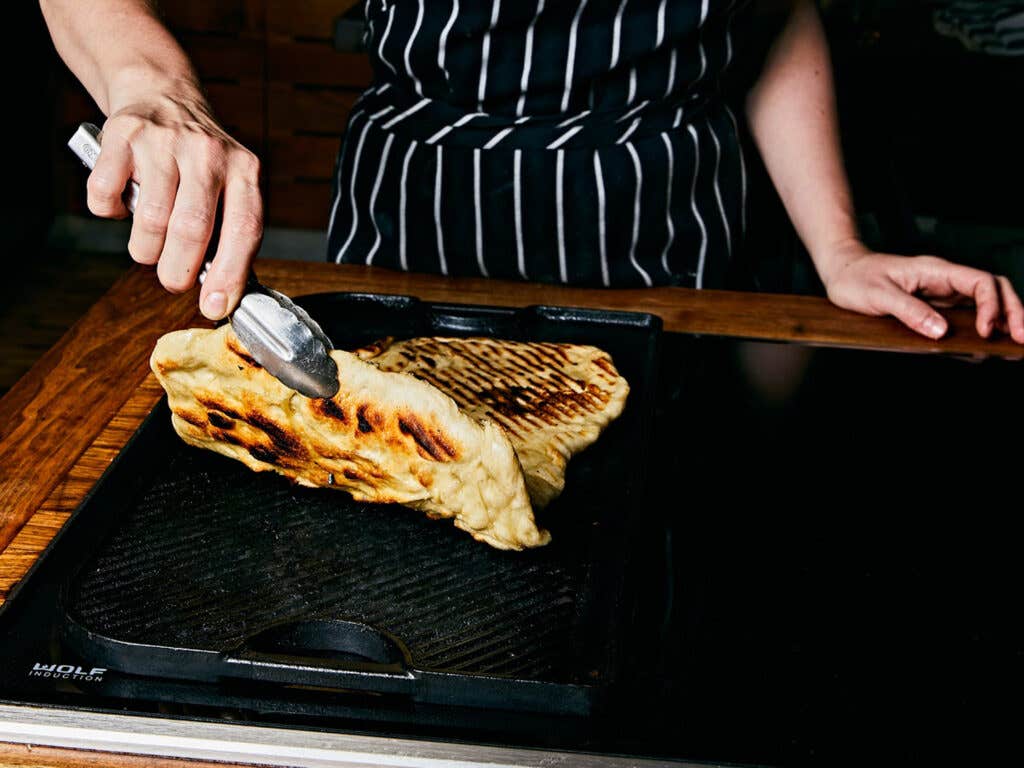

Al Forno only parcooks one side of the crust before adding the toppings. But since a grill pan doesn't come close to the high temperature generated by a charcoal grill, which can reach over a thousand degrees Fahrenheit, we deviated from Al Forno's method by parcooking the crust briefly on both sides. This ensures that the crust is cooked through but not tough or dry.
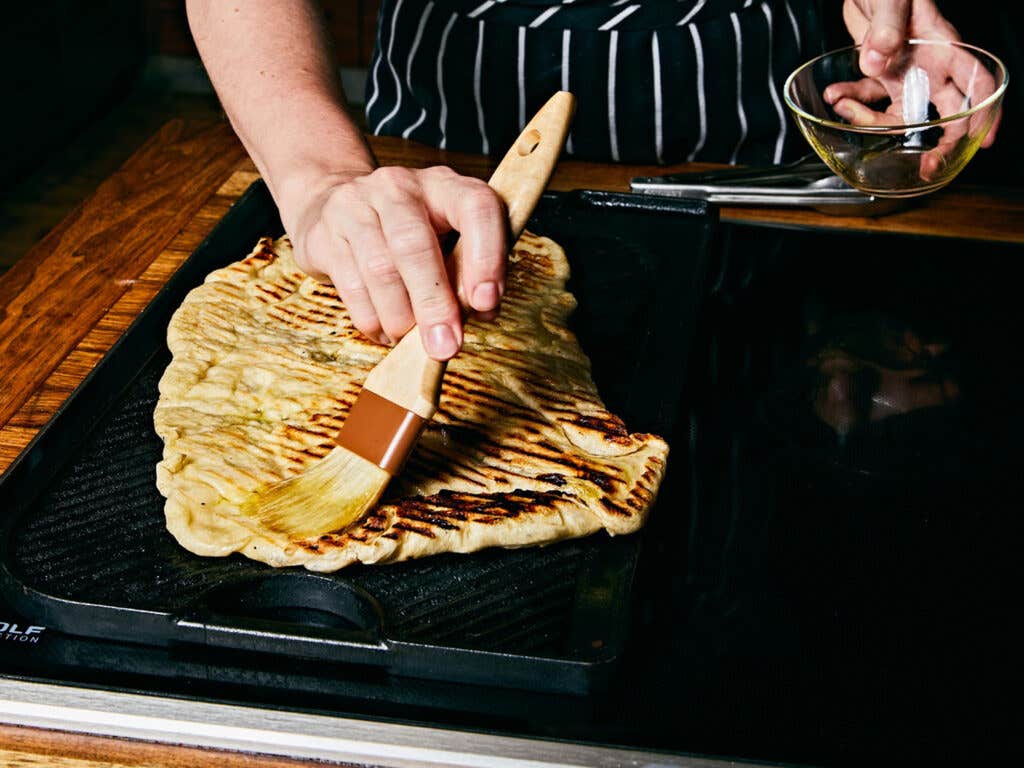

Baste with Olive Oil
Brushed onto the surface of the charred dough, olive oil acts as a barrier between the wet toppings and the crispy crust, while also rapidly conducting heat from the grill or pan up to warm the toppings. “The olive oil heats up quickly on the surface, almost like a sauté pan so it bubbles and cooks the other ingredients,” says Killeen.
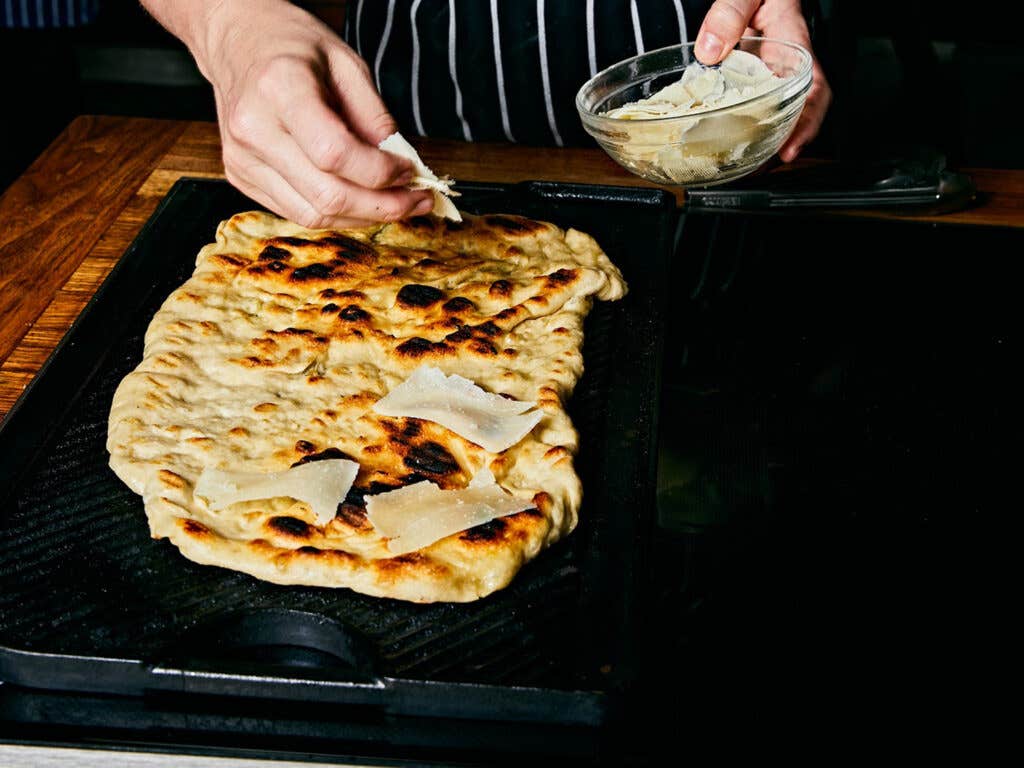

Keep the Toppings Minimal
If you’re cooking the pizza on a grill, slide the crust to the cool part of the grill before adding the toppings; if you’re using a grill pan, turn the heat down to medium-low. This will prevent the crust from burning while you artfully arrange the ingredients.
According to Killeen, the most important thing to keep in mind with the toppings is the quantity. “Pizza with ‘the works’ is not the thing you want to do on the grill,” she says. Sauces should be applied hot and used sparingly, if at all. Oil, cheese, and other ingredients should be at room temperature and thinly sliced. Uncured meats should be cooked ahead of time, while soft herbs and tender greens should not be added at this stage.

Lightly Cook the Toppings
Once the toppings have been added, return the pizza to high heat, either by using tongs to slide it back to the hot side of the grill, or by setting the grill pan over high heat. Continue cooking, rotating occasionally, until the cheese is melted and any other ingredients are warmed through, 1 to 3 minutes. Provided you have not added too much moisture with the toppings, the pizza should be easy to move around with tongs. Transfer to a platter or cutting board, top with fresh herbs or greens if desired, and serve immediately.
Ingredients
For the dough:
- 1 Tbsp. active dry yeast (10 g)
- 6 cups all-purpose flour (875 g)
- 2½ kosher salt (9 g)
- Extra-virgin olive oil
For the topping:
- ¼ cup extra-virgin olive oil
- 2 tsp. crushed red chile flakes
- 2 oz. young pecorino cheese, shaved into wide strips with a vegetable peeler (⅔ cup)
- 1 large firm-ripe peach, sliced ¼ inch thick
- 4 thin slices prosciutto, torn into shreds
- 1 cup arugula
Instructions
Step 1
Step 2
Step 3
Step 4
Step 5
Step 6
Step 7
- Make the dough: In a large bowl, add the yeast and ½ cup warm water (105–110°F); stir to combine. Set aside until the surface is very foamy, 5–10 minutes.
- On a large, clean work surface, add the flour and salt, stir to combine, and form into a tall mound with a deep well in the center. Add 1½ cups cool water to the yeast mixture, then pour the liquid in the well. Using a fork, slowly begin to mix the water and flour, a little at a time, moving your fingers in short, counter-clockwise circles around the border of the well, pulling in a bit of flour with every turn until a shaggy dough forms. When the dough is firm enough to hold its shape, use a dough scraper or wide spatula to scrape the remaining flour over the mass. Knead the dough until smooth and shiny, 7–10 minutes, then grease a large bowl with a drizzle of oil and transfer the dough to the bowl. Turn the dough over a few times to coat it in oil, then cover the bowl loosely with plastic wrap, and set aside at room temperature until nearly doubled in size, about 2 hours.
- Punch down the dough, fold it in thirds, then lift and flip it over completely. Cover loosely with plastic and set aside at room temperature until very gassy and nearly doubled in size, 35–40 minutes more. 8. Meanwhile, make the chile oil: In a small pot over low heat, add ¼ cup oil. Once the oil is hot and shimmering but not yet smoking, add the chile flakes, then turn off the heat, cover, and set aside to cool to room temperature.
- Turn the dough out onto a lightly floured work surface. Divide into 4 even pieces (about 10 ounces each) and roll each piece into a loose ball. Cover loosely with plastic wrap and let rest while you preheat the grill.
- Set up a charcoal grill for indirect cooking, or a gas grill for two-zone cooking (alternatively, preheat a grill pan over high heat). Set a small bowl of oil and a pastry brush by the grill or stove.
- Liberally oil a clean work surface. Working with one piece of dough at a time, use your fingers to dimple and stretch the dough out to a thin, even rectangle, about 16 by 9 inches.
- Grill the dough over direct heat (or in the hot grill pan) until the dough is evenly charred on the bottom and very bubbly and beginning to set on the top, 2–3 minutes. Using tongs, flip the dough, then brush the charred side lightly with oil. Continue cooking until the opposite side is crispy and charred in places, about 2 minutes more, then flip again and brush lightly with oil. Transfer the dough to indirect heat (or turn the heat under the grill pan down to medium), then top with ¼ of the cheese, followed by ¼ of the peaches and prosciutto. Continue cooking just until the cheese and prosciutto fat are softened and beginning to melt, and the peaches are warmed, 2–3 minutes more. Slide the pizza onto a cutting board, then top with a generous handful of fresh arugula and 1 tablespoon of the chile oil. Repeat with the remaining dough and toppings. Cut the pizzas into strips and serve immediately.
Keep Reading


Continue to Next Story
