

A Secret Technique Makes This Chef’s Samosas Perfect
British-Indian chef Romy Gill shares her grandmother’s recipe for the delicious fried parcels
While many chefs have a tendency to swagger and stomp through the kitchen, British-Indian chef Romy Gill was the picture of grace when she stopped by the SAVEUR test kitchen recently. It's not that she doesn't have a reason to show off—Gill was, after all, appointed a Member of the Order of the British Empire in 2016, an honor not many other chefs can claim—but she just has that cool auntie energy. From the get-go, it was clear that she had a lot of kitchen wisdom to impart.
At her restaurant Romy's Kitchen in Thornbury, a market town about 20 minutes north of Bristol, Gill serves an updated take on Punjabi and West Bengali cuisine, melding the way she grew up eating with unexpected ingredients. Cozy, satisfying dishes include tandoor-roasted octopus with pear and fennel, creamy spiced Punjabi-style dal, and venison curry with tamarind, chile, and tomatoes. "Being creative with the right balance of flavors is very important," says Gill. "For me, key for any cooking is seasoning and panch phoron."
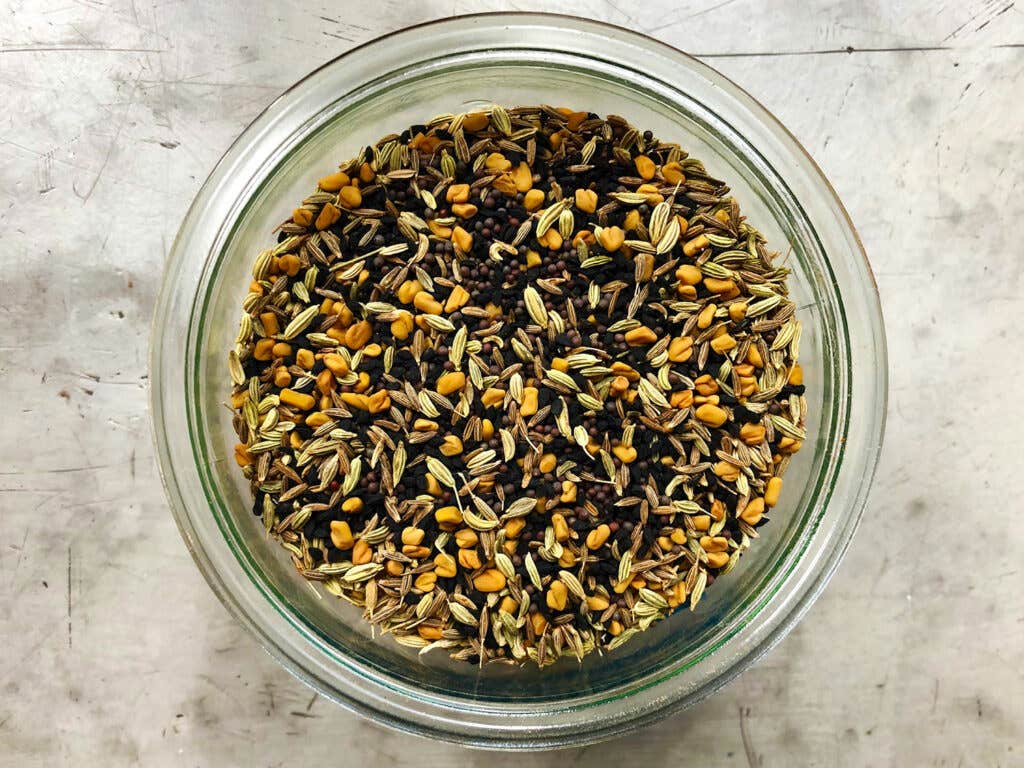

A traditional spice mixture made of equal parts whole black mustard, nigella, fenugreek, cumin, and fennel seeds, panch phoron is most often used in dishes from northeastern India, Bangladesh, and Nepal. Gill prefers to mix her own and brought a jar to the test kitchen that she had just blended herself that morning at New York's SOS Chefs, an industry-favorite boutique that specializes in sourcing hard-to-find ingredients. She uses the spice medley whole, incorporating it into tangy pickles, spicy paneer dishes, and vibrant curries like her "special chicken"—a comforting stew made with drumsticks and plenty of fresh turmeric, ginger, garlic, and lime.
Romy’s Special Chicken with Whole Spices and Turmeric-Ginger-Garlic Sauce
A generous helping of pureed ginger, garlic, and fresh turmeric, along with a sprinkling of toasted whole Indian 5-spice (panch phoron) adds plenty of color and fragrance to quick and simple braised chicken legs. Get the recipe for Romy’s Special Chicken with Whole Spices and Turmeric-Ginger-Garlic Sauce »
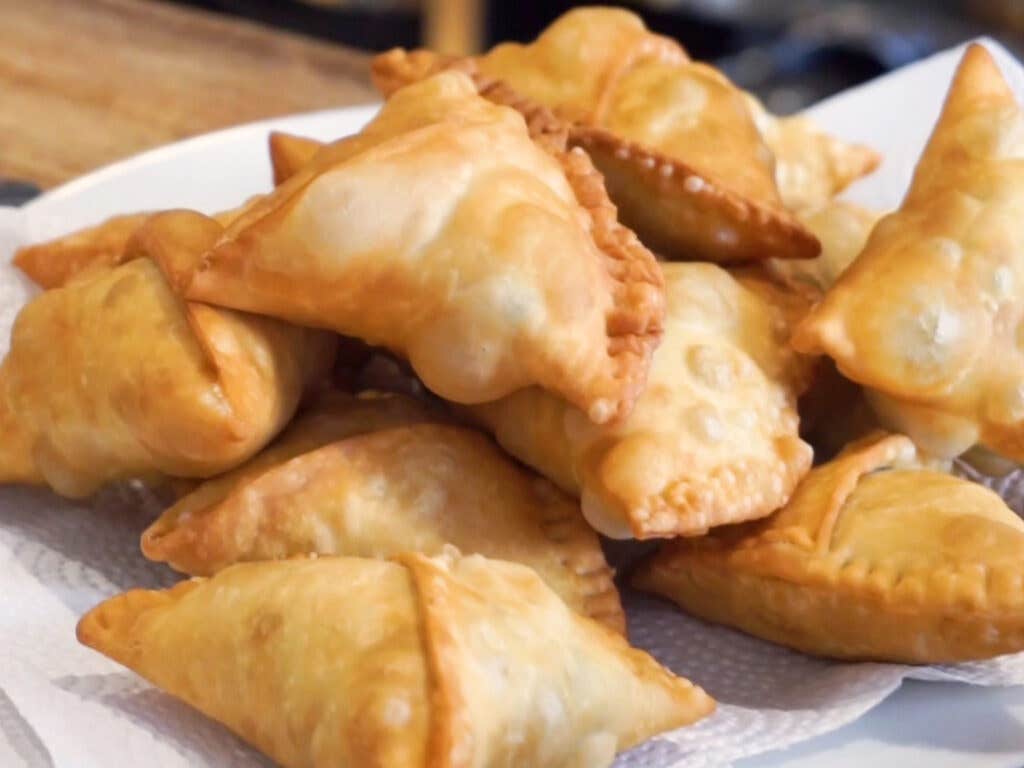
While we would happily eat that chicken for dinner every night, there was one dish that the test kitchen team was even more excited for Gill to make: crispy, classic potato-filled samosas. Romy’s Kitchen goes through hundreds of samosas in a single week, but thanks to a foolproof shaping technique she learned from her grandmother, Gill and her team are always able to stay on top of the ever-growing demand.

The secret is to parcook the dough before filling it. The heat seals the dough slightly, protecting it from moisture and allowing you to make samosas in advance, without worrying about them falling apart during shaping, or sticking to the pan, or turning gummy and soggy in the fridge. It’s a simple trick that adds mere seconds to the prep time but dramatically improves the finished results.
The technique is of course not limited to samosas and can be applied to countless other filled dumplings. Any lean (meaning lowfat), moist dough can be parcooked in this manner before being assembled into filled dumplings like empanadas, pierogies, or potstickers. Take note that laminated doughs, short crusts, and any other doughs with a high percentage of butter or lard do not take well to parcooking, as they have a tendency to disintegrate when the fat liquifies.
Here’s how to master Gill’s samosas—and that critical shaping technique.
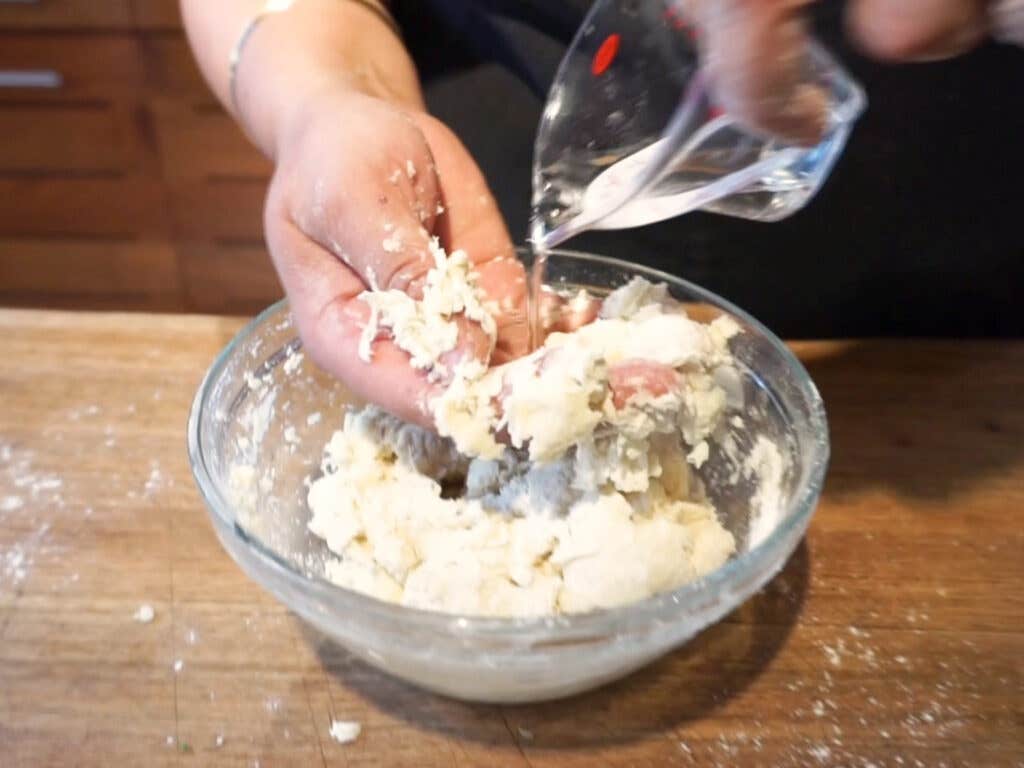

Make the Dough
In a large bowl, add the flour, oil, and salt. Rub the oil into the flour with your hands, then add the cool water. Mix with your hand until a dough forms, then turn it out onto a lightly floured work surface and knead until it becomes a smooth, soft ball.
Let It Rest
The lean dough gets its structure from well-developed gluten. When freshly kneaded, strands of gluten are particularly elastic. Allowing the dough to rest for at least an hour at room temperature—or even better, overnight in the fridge—allows the gluten to relax. This will make the dough much easier to handle and roll out into thin, even wrappers without springing back or tearing.
Divide Into Pieces
In bakeries and restaurant kitchens, doughs are typically divided up evenly before shaping to ensure consistency. Turn your dough out onto a lightly floured work surface, then use a chef’s knife or a bench scraper to neatly cut into the desired number of pieces. A digital scale helps with precision, but eyeballing it works too. Two-ounce pieces (about the size of ping-pong balls) are perfect for making medium-sized samosas. Once all the dough is divvied up, gently roll each piece into a smooth ball.
If your kitchen is very dry, prevent a skin from forming on the dough by loosely covering the pieces with a clean kitchen towel or a sheet of plastic wrap while you work.
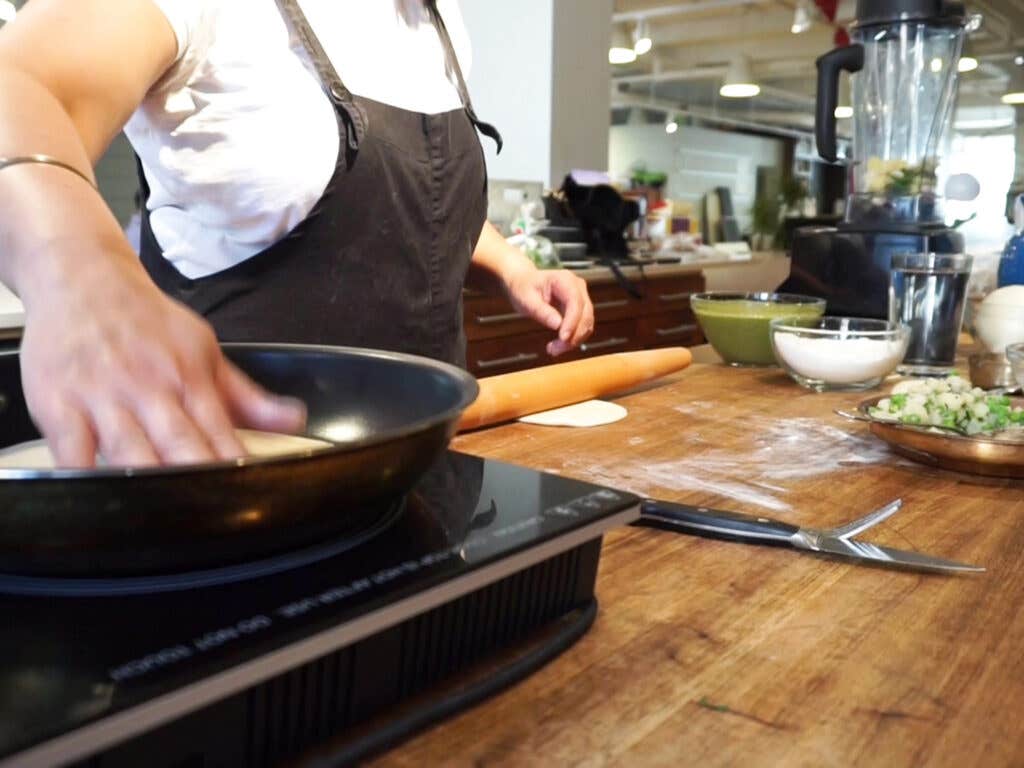

Roll and Parcook
Set a wide, dry skillet over medium heat. Lightly flour your work surface and rolling pin to prevent sticking, then roll one ball of dough out to an even 10-inch round. Slap the round back and forth between your hands two or three times to remove any excess flour, then gently place the dough in the hot pan. Almost immediately, it will form white bubbles on the surface. After 10 to 15 seconds, use a wide spatula or your fingers to quickly flip the dough. Cook 10 to 15 seconds more. The goal is not to brown or completely cook the dough, but rather to seal the exterior and leave the interior raw. Transfer the dough to the counter and cover with a dry towel while you continue rolling out and parcooking the rest of the dough.
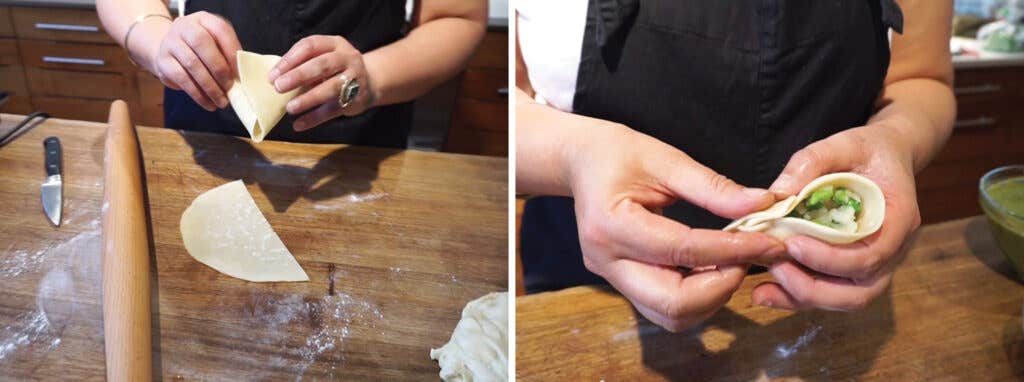

Cut and Shape
Once all of the dough is parcooked, you are ready to fill the samosas. Arrange the rounds in a tidy stack, then use a chef’s knife to make one cut straight down the center, splitting each round into two even half-moons. Each round will be used to wrap two samosas.
Next, use your dominant hand to shape one half-moon into a cone; the two flat edges should overlap slightly (about ¼ inch). Holding the cone in your non-dominant hand, center the seam along the front of the cone, then use the thumb and forefinger of your dominant hand to pinch all along the seam to seal. Using a spoon, lightly pack the filling into the cone, then pinch to seal the top seam, pressing gently to remove any air pockets as you go. Transfer the samosa to a baking sheet lined with lightly floured parchment paper while you fill the remaining cones.
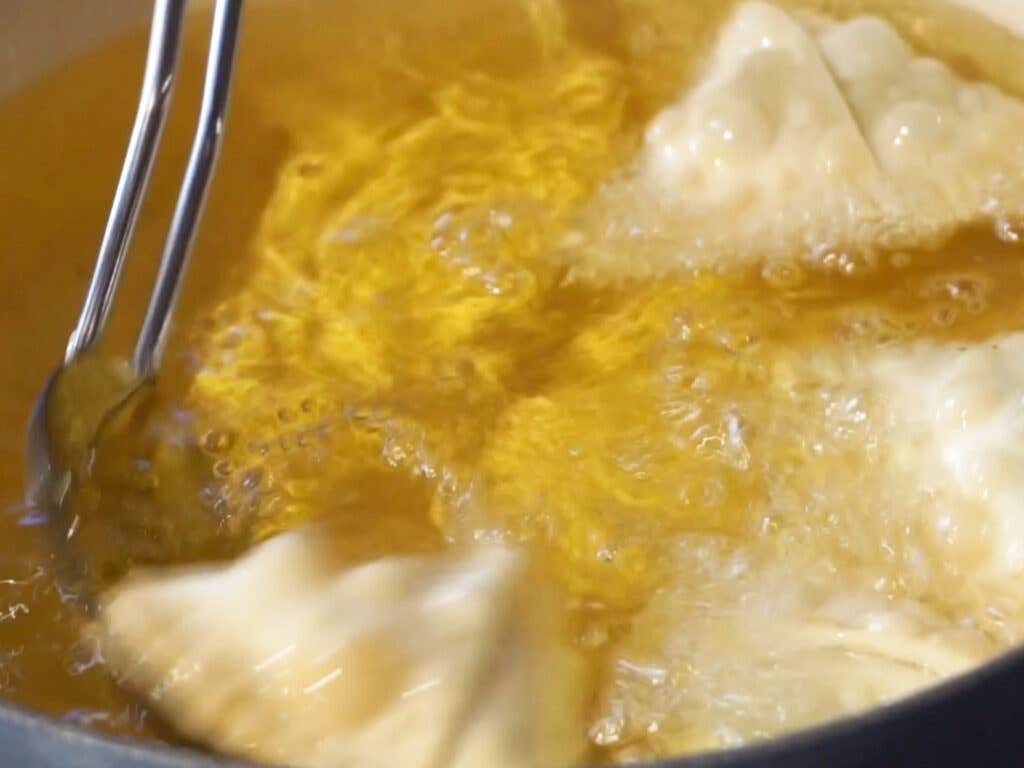

Fry and Enjoy
Fry immediately: Working in batches, drop the samosas gently into hot oil and cook, turning occasionally, until crispy and golden. Serve hot, with mint or tamarind chutney.
The best part about this parcooking method? Everything can be done ahead except the frying. After the samosas are assembled, they can be wrapped tightly and refrigerated for up to 48 hours before frying, or frozen for up to 1 month.
Keep Reading


Continue to Next Story
