How to Roast a Turkey
Our local butcher weighs in with his no-fail method for the juiciest, most flavorful, fall-apart-tender bird.
We get it: Thanksgiving can be stressful. If you’re not used to firing off large-scale roasts on a regular basis, the bird may be a legitimate source of anxiety. Should you use a wet brine or a rub? Leave it whole, spatchcock, or break into pieces? Fry, roast, or smoke? And what about stuffing and basting??
With everything else going on the Thanksgiving table, sometimes it’s best to strip the main event down to basics—after all, you can always mix things up with the side dishes and desserts. We asked Ted Rosen, executive chef at our go-to local butcher shop, Dickson’s Farmstand Meats, to walk us through his easy, low-mess, and totally painless method for how to roast a turkey. Once you cut through all the noise, we find most Thanksgiving revelers simply crave a fantastic, juicy bird with plenty of crispy skin. Rosen’s easy dry-brine technique achieves exactly that.
What you need:
- Whole Turkey
- Dry Brine (DIY or store-bought)
- Wire Rack
- Large, Rimmed Baking Sheet
- Instant-Read Thermometer
BEFORE YOU BEGIN
If you’re planning to whip up a batch of pan gravy to accompany the turkey, do yourself a favor: order some extra bones from your local butcher, and simmer up a batch of homemade turkey stock a day or two ahead of time. Find Rosen’s simple turkey stock recipe here.
STEP 1: Mix up a batch of dry brine.
“Dry brining,” Rosen explains, "is just a fancy way of seasoning your bird well in advance and letting the salt, sugar, and time (and thyme) work their magic.” It avoids the potentially dangerous mess caused by wet brine, and also helps to dry out the skin. This results in a crispier bird with all the same flavor- and texture-enhancing benefits of a wet brine.
Note: Rosen’s dry brine works well for all poultry, not just turkey. Spatchcocking? Cooking just a leg or a crown? No problem! For a 14- to 16- pound bird, he stirs together a mixture of 1 cup kosher salt, ⅓ cup sugar, 2 tablespoons dried sage, 2 tablespoons dried marjoram, 2 tablespoons dried thyme, 1 tablespoon paprika, 1 teaspoon freshly ground black pepper, and the finely grated zest of 1 lemon and 1 orange (about a teaspoon from each). The brine can be made ahead and stored in an airtight container at room temperature for up to one week.
STEP 2: Source and thaw your turkey.
Most of the “fresh” turkeys sold in supermarkets were, at one point or another, frozen. So if that’s where you’re buying your bird, you might as well get a frozen one. If, however, you’re buying a fresh, heirloom turkey from your butcher or farmers market, buy it no more than 3 days ahead of when you plan to cook it.
If starting from frozen, thaw the bird 2–3 days before you begin cooking. If you need to quickly thaw a turkey (or any frozen meat), position it, still in its plastic wrappings, in a large, deep container in the sink under cold, fast-running water. This will keep the exterior cold while rapidly pulling up the internal temperature. When the meat feels soft to the touch all over, remove the turkey from the water, discard the wrappings, and pull out the neck and bag of organ meats. The neck can be added to the bones for making turkey stock; if you like, save the giblets—the gizzard, heart, and liver—for adding to the stuffing, which Rosen prefers to make on the side. Rinse out any remaining ice crystals from the cavity, then pat the bird dry all over with plenty of paper towels.
STEP 3: Dry-brine the bird.
Here’s where the action begins. “Relax,” Rosen encourages, “Cooking a 14 (or 20, or 30) pound bird can be an intimidating endeavor, but you made a plan: You’re sticking to it. You’ve got this.”
Two days prior to cooking the turkey, cover your bird liberally inside and out with the dry brine. You will need to use more than you think—don’t worry: the salt will slowly penetrate the meat, and by the time Thanksgiving rolls around it will not be concentrated at the surface. Place the turkey on a wire rack and set in a large, rimmed baking sheet. (This is important because the turkey will continue to drip a bit as it rests). Refrigerate the turkey, ideally on the bottom shelf, which tends to be the coldest part of the fridge. Do not cover the bird; allowing the skin to dry out will result in lots of crispy skin to go around.
STEP 4: Bring the turkey to room temperature.
Pull the turkey out of the fridge at least an hour and up to two hours before you plan to cook it. Allowing the bird to warm up to room temperature will help it cook more evenly. If you like, you may add a cut-up lemon or orange to the cavity, but do not add any other stuffing, which has a tendency to block airflow and slow down cooking. Doing so can result in food-safety issues due to too much time spent in the “temperature danger zone.”
STEP 5: Roast the turkey.
Preheat your oven to 375 degrees Fahrenheit (or 350 degrees if using convection). Move the bird (on its wire rack) to a fresh, rimmed baking sheet, or just rinse off the one it was on in the fridge. This is important because you won’t want those briney turkey drippings salting up your delicious pan drippings—liquid pan gravy gold! Put the turkey in the preheated oven with its legs facing the back and the breasts facing the door. Cook until the breasts reach an internal temperature of 150 degrees Fahrenheit. (Multiply the weight of the bird by 12 minutes and start checking the temperature at that point—in other words, three hours for a 15-pound turkey.) “As tempting as it may be,” Rosen warns, “try to avoid opening the oven door too often. Each time you do so the ambient temperature will drop and the oven will need to work to bring the temperature back up, increasing your total cooking time.”
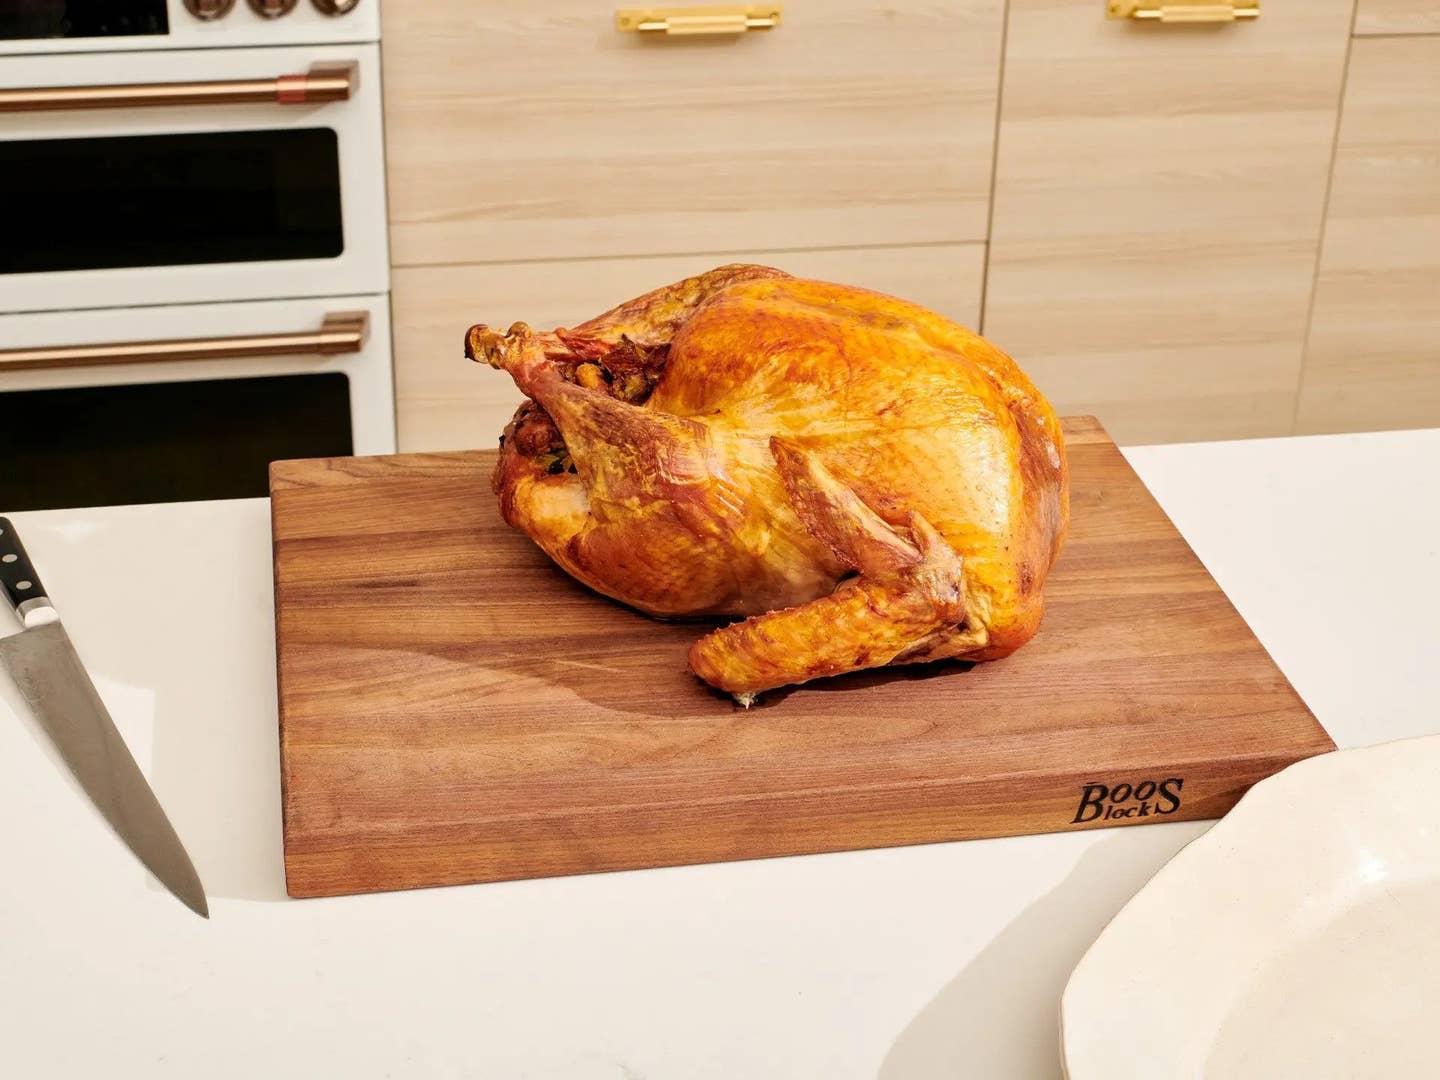
STEP 6: Rest the turkey.
Remove the turkey from the oven and set it aside to rest for 1 to 1½ hours. The target food-safe temperature for turkey is 165 degrees Fahrenheit and as the bird sits, the meat will continue cooking and reach this temperature from its own residual heat. “Resting the bird also helps it retain its juices and makes it much easier to carve,” says Rosen. “Be sure to leave the bird uncovered. Many recipes call for tenting in aluminum foil, but this just traps moisture which will lead to soggy skin and an only marginally warmer bird.”
While the bird rests, you can set the table and get started on a batch of pan gravy. (If you’d like to use the pan drippings for this, feel free to carefully move the bird to a second baking sheet or a heatproof platter to rest.)
Final Thoughts
That’s it! That’s the recipe. You may have noticed that Rosen doesn’t bother basting his roast turkey. He finds that doing so adds unwanted moisture to the skin that you’re just trying to dry out and crisp. Instead, use all that extra time you saved to whip up an extra side dish or pie.
Keep Reading
")


")

Continue to Next Story