How To Make Kimchi With Chef Esther Choi
Making kimchi the time-honored, traditional way produces flavor unlike anything you can find in a store

Three decades ago, when Esther Choi’s parents and grandmother emigrated from Korea to New Jersey, they set to work building a garden to make their own kimchi, the basis of most of their weeknight meals.“At the time, there was no kimchi at restaurants nearby,” she says, “and it was hard even to find any Asian ingredients in stores.” Choi’s grandmother began gathering neighbors and friends to make communal batches of kimchi in their local church basement. The fall batch was the most important because it meant their garden vegetables would be preserved through the winter.
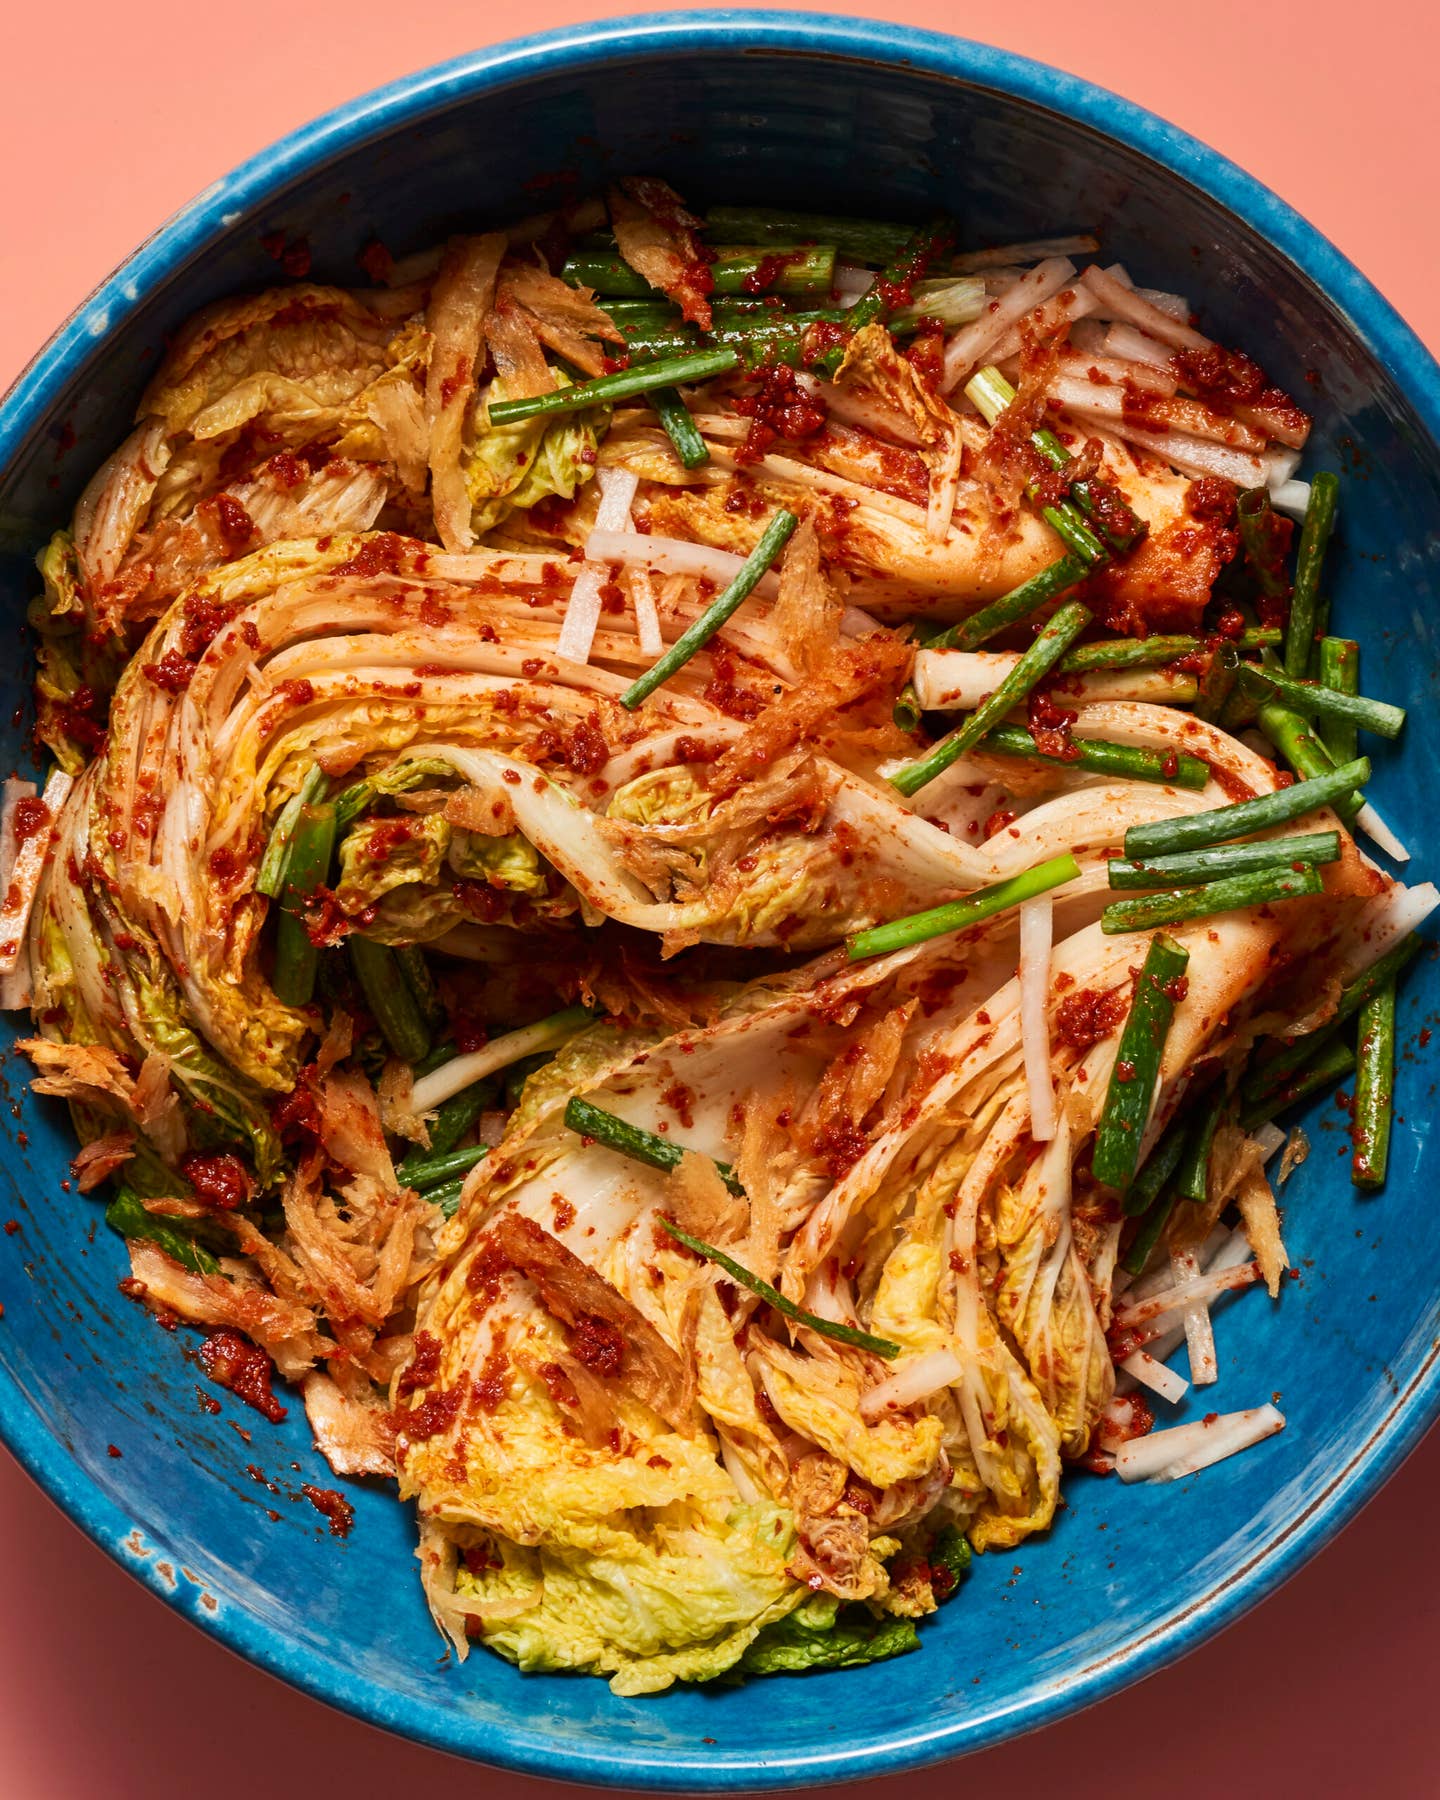
Making her grandmother’s recipe—an amalgam of thick cabbage spears, dried and fermented fish, sticky plum sauce, and a fire-engine-red chile paste left to ferment for a week or more—is still a steady ritual for Choi, who is now chef-owner of mŏkbar, a Korean restaurant with locations in Brooklyn and Chelsea Market.
“I’m obsessed with kimchi and always have been,” the chef says. “It’s in my blood.” Aside from being a staple side dish of Korean cuisine (which Choi eats alongside everything, even pizza), this spicy, fermented vegetable mixture is the main component in many Korean dishes. Today, Choi’s menu at mŏkbar features riffs on some, such as kimchi-jjigae, a comforting stew.
At her restaurant, Choi has at least 12 different types of kimchi in rotation. Beyond using the traditional Napa cabbage, she makes versions with daikon radish, perilla leaf, and ramps.
There’s no single perfect formula or recipe for how to make kimchi—every family has its own, something Choi likens to an Italian tomato sauce—nor will every batch turn out the same. The results might vary based on the water content of the vegetables or the time of year and the day’s weather, or the particular type of salt you use. But more than anything, Choi says, “It’s the person—it’s the knowledge that you bring to it and the lessons that you learn with each batch that make your kimchi your own.”
“It’s a slow, long process,” she continues, “which is why it carries a stigma of being difficult.” But if you like eating kimchi, try making your own. The flavors are more complex, and “it’s not that hard,” she says. “It just takes repetition, and then it becomes sort of like a memory.”
Making Kimchi Is Easier Than You Think
You just need a large jar, a couple of bowls, gloves (if you want them), and these four steps
Step 1: Salt The Cabbage.
Prepare the cabbage
"This is the number-one thing," Choi says about salting, a part of the process called joelim in Korean. Salting the cabbage and letting it rest draws out its water and gives it a lightly "cooked" texture, preparing it to be fermented. "Not every salt is the same and not every cabbage is the same, so even if you have an exact recipe, you will still probably have to improvise based on what looks and feels right." Eight to 10 hours of rest after salting is a good starting point, but check earlier to determine how much the cabbage leaves have wilted. "You want a little bit of crunch to remain, but when you lift up the cabbage, it should flop down," says Choi. Be sure to rinse vegetables at least 3 times in cool water after salting.
Step 2: Make The Paste
Don’t forget the sticky rice “glue”
“This is where people get creative—each region and household has their own recipe,” Choi says. Her take falls between the flavors of southern Korea, which is known for fishier versions, and Seoul style, which is spicy and sour. She swears by adding plum extract to the paste, but you can substitute puréed fruits like apple or kiwi if plum extract proves difficult to find. Other crucial elements include a sticky rice “glue” made from cooked rice flour, for thickening, and a combination of fish sauce, fermented baby shrimp, and dried pollock or cod—which gives the kimchi a refreshing brightness called shiwon. “It’s just not the same without it,” Choi says. You can make the paste a day ahead and refrigerate in an airtight container.
Step 3: Mix Thins Up
Mix the paste
The best way to mix the paste into the salted cabbage is with your hands. Because—particularly in traditional recipes—the cabbage is kept in large wedges before it’s seasoned, nothing else can do a better job of working the paste into the nooks and crannies. So wear gloves if you want, and focus on coating each piece. “Don’t overdo it, but don’t skimp either—get every leaf covered in some paste.” Then, see how the color looks. “I like kimchi that’s vibrantly red, which means it’s really well seasoned and the chile flakes are fresh,” Choi says. If your chile paste looks too dark or too brown, that means your chile flakes are old. Use them soon after buying, or store them in the freezer to retain their color and freshness.
Step 4: Let It Ferment
Once your chile paste is made, homemade kimchi is simply a matter of mixing everything together, sealing the jar, then just patiently waiting.
Traditionally, kimchi makers would bury their batch in the ground in earthenware pots to ferment. But since the neighbors will likely talk if you start digging holes in your backyard, a vessel on your kitchen counter will work just as well. Coil the cabbage pieces into a large airtight jar or crock, leaving at least 3 inches of space at the top to prevent the bubbly, fermented juices and gases from oozing out (something Choi says has happened to her countless times). After 2 days at room temperature—or more if you want it really sour and funky—transfer the jar to the refrigerator for another 5 days. After that, it’s ready to eat and will last up to a year. “The whole idea of kimchi is that it’s long-lasting,” Choi says.
Keep Reading
Continue to Next Story


