
How To Temper Chocolate at Home
For the snappiest, glossiest, prettiest finish, we asked an expert chocolatier and pastry chef.
To turn chocolate into the beautiful, glossy, dippable, moldable, smooth ingredient of your dessert dreams, it needs tempering. “Tempered chocolate has that nice sheen,” explains Alina Muratova, “It will snap.” The former pastry chef for the Washington State Convention Center quit her job in November 2019 to start a wholesale pastry company for hotels and restaurants. Months later, faced with the changing industry in the wake of the global pandemic, she opened a weekly pop-up in Seattle called Sweet Nothings and More, and now makes some 1,500 pastries each week—many topped with her chocolate decorations.
The tempering process changes the cocoa butter, Muratova explains, which is why the process remains the same across different types of chocolate. “Cocoa butter is capable of creating a variety of crystals,” she says, but tempering creates a very specific crystal called a beta, which is triangular, so they pack together more efficiently, creating a smooth texture and snapability. That also means it only works for real chocolate made of cocoa butter, without other added fats, so double check your chocolate’s ingredients list before getting started.
When chocolate isn’t tempered properly, Muratova explains, “It might not set up, or if it does, it will crumble.” To help you avoid this, Muratova shared her process and tips. “Tempering seems intimidating,” she admits. “But once you try it a couple times, it just clicks.”
Melt the Chocolate
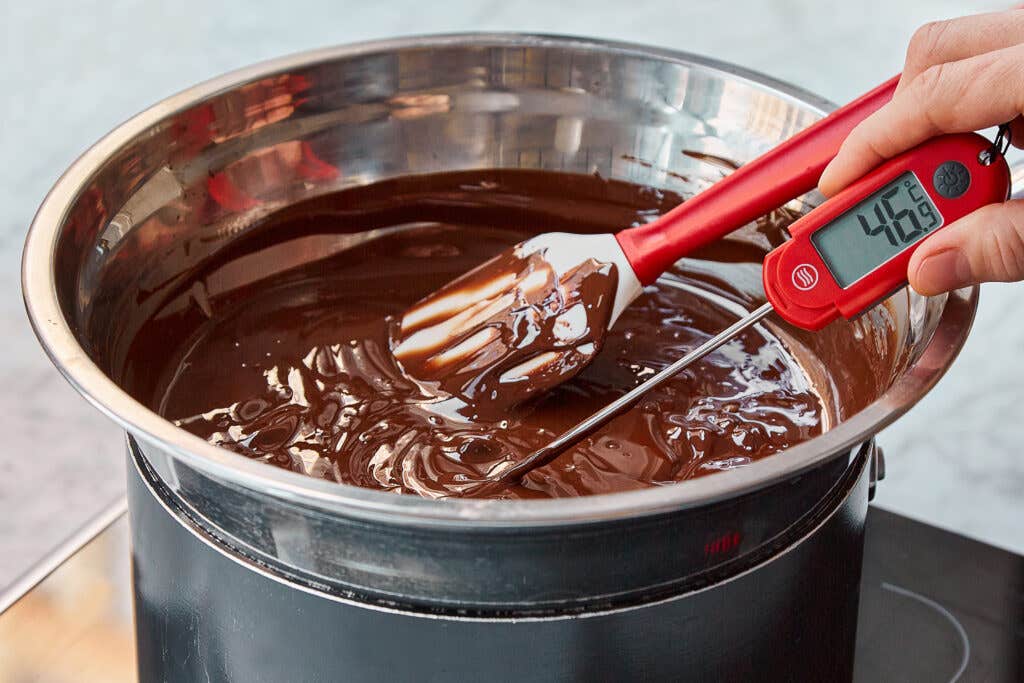

The first step in tempering chocolate is to melt it to 115 degrees Fahrenheit (46°C). “I do this in the microwave because it’s easy,” says Muratova. Microwaves have hot spots that can scorch your chocolate, so she recommends zapping for just 15 to 20 seconds at a time, stirring frequently at each pause.
If you don’t have a microwave, you can also do this in a double boiler over low heat. Make sure that the bowl doesn’t touch the water below, advises Muratova, because contact with the boiling water will create uneven heat. Timing will depend on how much chocolate you are melting, but it shouldn’t take more than ten minutes to reach 115 degrees.

Cool the Chocolate
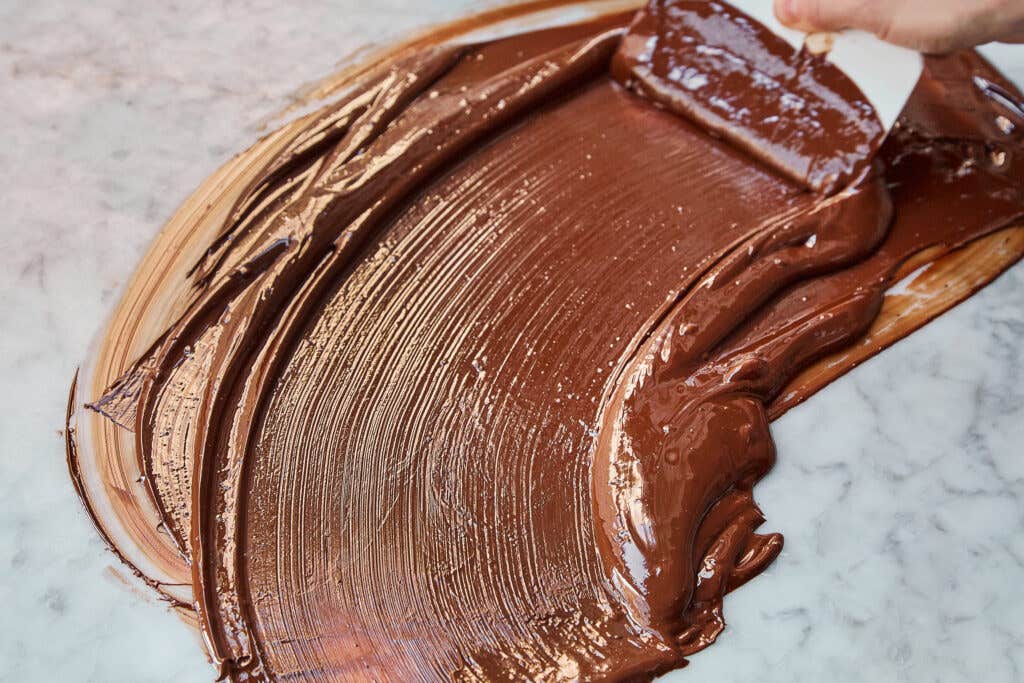
Muratova’s favorite method for cooling the chocolate is also the easiest, if you have a marble surface. For this “table method,” plop two-thirds of the melted chocolate onto a large marble slab or countertop and “just slosh the chocolate around” until it cools to 68 degrees Fahrenheit (20°C). Marble conducts heat well, which means that it cools the chocolate quickly and efficiently. Muratova uses a large putty knife from the hardware store to do her “sloshing,” but the straight edge of a sturdy plastic bowl scraper works well too. Spread the melted chocolate quickly over the marble, then slide the spatula beneath it, moving it around quickly to redistribute the heat before spreading the chocolate out again. Muratova suggests using an infrared thermometer to check the temperature, “because it is cleaner,” but a regular kitchen thermometer works fine—just pile up the chocolate and stick the probe right in the center. Just be sure to move quickly as chocolate will begin to seize up as it continues to cool.
Mix the Chocolate
Once the cooled chocolate reaches 68 degrees, scrape it up and return it to the bowl with the remaining third of fully melted chocolate. Stir quickly to warm the cooled chocolate back up to the proper “working temperature.”
The working temperature depends on the type of chocolate being used. When tempering bittersweet and semisweet chocolates, aim for 88 degrees Fahrenheit (31°C); when working with milk chocolate, go for 86 degrees (30°C); and for white chocolate, the sweet spot is 84 degrees (29°C). Once stirred together, the heat of the fully melted chocolate will warm the mixture to just the right temperature.
Check for Tempering
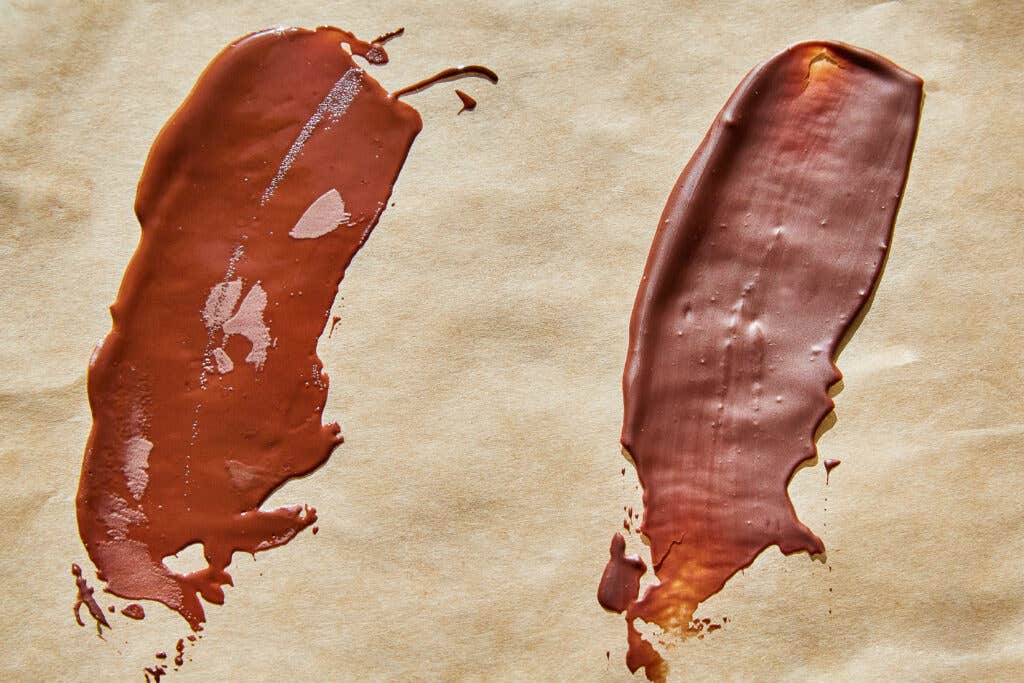

Always check the temper of your chocolate before you use it by smearing a little bit onto a piece of parchment or waxed paper. Tempered chocolate, smeared thinly, will set quickly and almost immediately turn velvety and somewhat matte. It will remain glossy and smooth, but will lose the “wet” look of fully melted chocolate. Within minutes, properly tempered chocolate should harden to the touch and snap when broken. On the other hand, chocolate that isn’t successfully tempered can take hours to set, and once it does, Muratova says, it will have white streaks and a sandy or crumbly texture.
Use the Chocolate
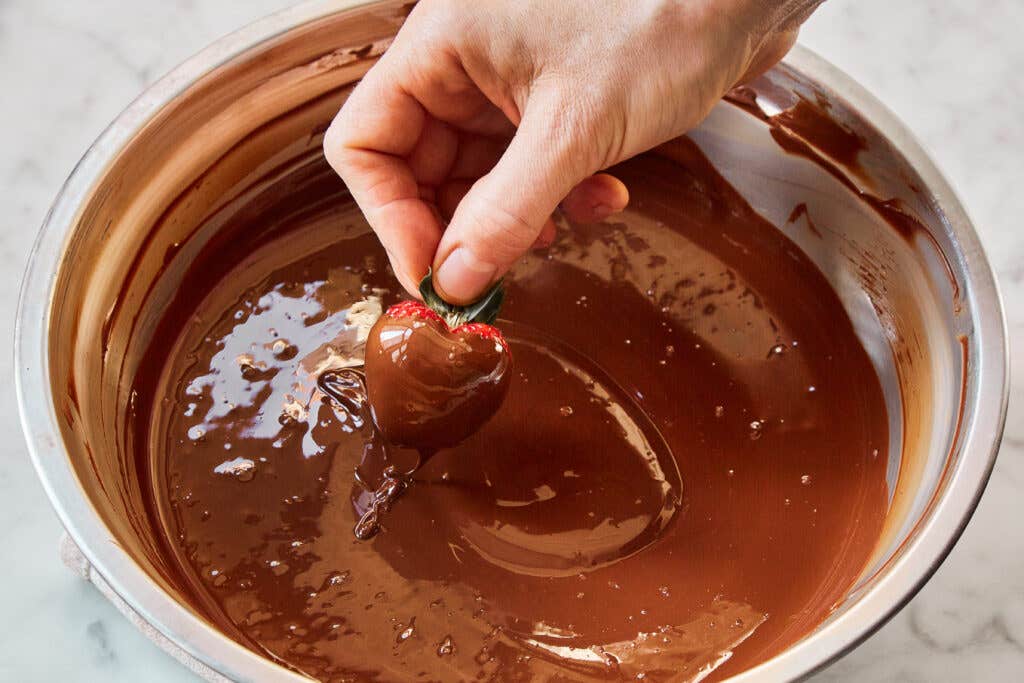

Once your chocolate is tempered, you can use it to dip, drizzle, pour into bonbon molds—even build elaborate chocolate sculptures if that’s your thing. If you’re working in a cool room, melted tempered chocolate will start to set up quickly. If it starts to seize up on you, pop it back in the microwave for a pulse—seven to 10 seconds should do it—to bring it back up to the proper working temperature. Don’t try to heat it much more than that, though, warns Muratova: If the chocolate goes back over the working temperature, you will have to start the tempering process all over again. Even then, it isn’t too big of a deal: chocolate can be retempered an infinite number of times.
Alternate Cooling Method
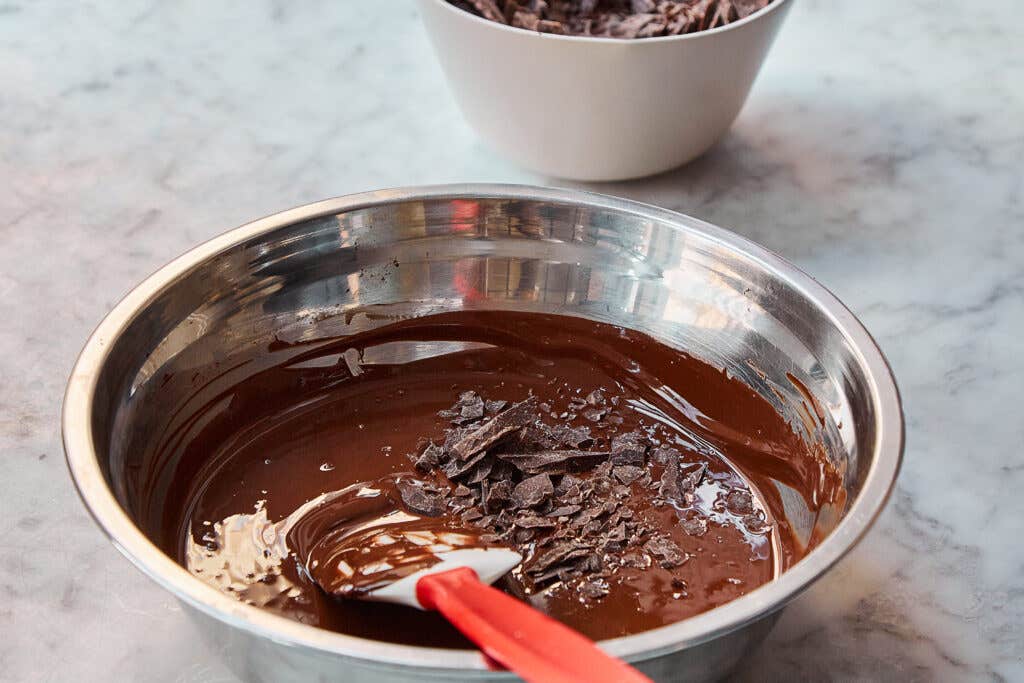

If you don’t have a marble surface, instead of the cooling and mixing steps above, you can use a tempering technique called “seeding.” To seed melted chocolate, stir in already tempered chocolate to bring it down to the proper working temperature. Muratova finds this method less precise and consistent than the slab method since you want the added chocolate to finish melting right as the chocolate hits the working temperature. “It’s hard to know how much to add.” For the best results, chop the chocolate as finely as possible before adding it to the mix.
Keep Reading

")


")


Continue to Next Story
