How to Assemble a Layer Cake
Because elegance requires less effort than you think, according to ‘More than Cake’ author Natasha Pickowicz.

Building a great cake is nothing to be afraid of.
I worked as a pastry chef years back and have made more birthday cakes than I can count (and a handful of wedding cakes I’d prefer not to), and when New York pastry chef Natasha Pickowicz’s gorgeous new cookbook, More Than Cake, arrived in the mail, flipping through it reminded me just how low-stress making a really great cake can be. Sure, layer cakes are high-stakes; they’re the centerpieces of some of the most special occasions, an on-display embodiment of the baker’s skill and style. But Pickowicz gets it. While the multi-component cake recipes in her book are involved, an overall sense of chill persists throughout, encouraging and inspiring the reader while alleviating our collective dessert-related anxieties.
The fastidious home baker will likely find More Than Cake a rewarding exercise in planning and time management; but jazzier readers will enjoy the open invitation to experiment and the lush series of highly-riffable prompts. Sure, you could make her elaborate fennel jam- and mascarpone-filled, pistachio buttercream-wrapped olive oil cake from scratch. You could also go at it a little more relaxed, borrowing an individual component or two from the book, then swapping in store-bought elements or your own creations for the rest. (When I spoke with Pickowicz on the phone, she eagerly encouraged either approach.) In addition to the recipes themselves, Pickowicz also provides a clear photo tutorial for how to assemble a layer cake like a pastry pro. I’ve often wondered why this smart and simple bakery method—which results in sharp edges, a level top, and a stable cake every time—hasn’t been the standard in home layer cake recipes, so I hopped on a call with the cookbook author to talk through the basics.
Check out her pro technique below, then get your hands on your own copy of the book here.
What you need:
BEFORE YOU BEGIN
Just about all layer cake components can be made well ahead of time; most can be stored in the fridge or freezer. But before you begin, be sure that all of your ingredients are at the proper working temperature (cool room temp is ideal).
Many home cake recipes suggest sawing thick baked rounds crosswise into fragile slices, which are then stacked freeform into teetering, icing-spackled towers. Pickowicz's pro method is simpler, sturdier, and far more precise. “My whole approach,” she explains “is to build the cake the way you might assemble a lasagna or a tiramisu. You assemble it in a deep dish so that the layers are supported as they rest in the pan.”
STEP 1: Bake the cake in thin sheets and cut to size.
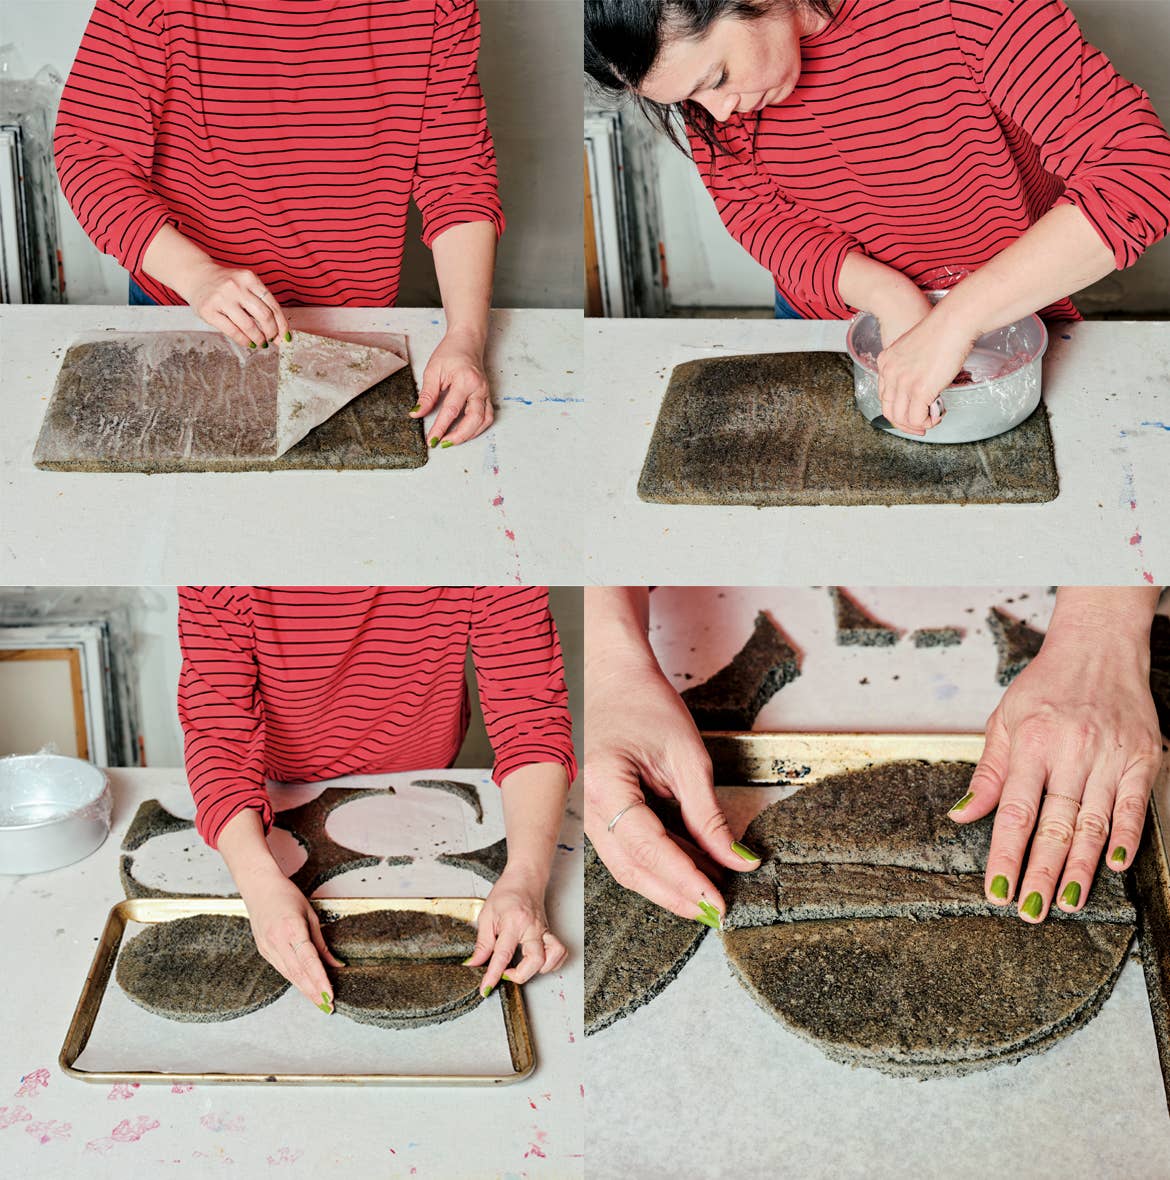
Rather than baking thick layers in a round cake pan, Pickowicz prefers to spread her cake batters into large rimmed baking sheets (aka sheet pans). These thin layers bake more quickly and evenly than thicker rounds, which have a tendency to dome and crack.
Pickowicz then uses a deep, round cake pan as a stencil to cut as many circles as she needs. Be sure to reserve two perfect circles for the cake’s top and bottom layers and use the trimmings to “Frankenstein together” additional circles for the center layers. (Don’t worry: the filling will help fuse any irregular pieces together.)
STEP 2: Line a cake pan with plastic wrap and insert a circle of cake.
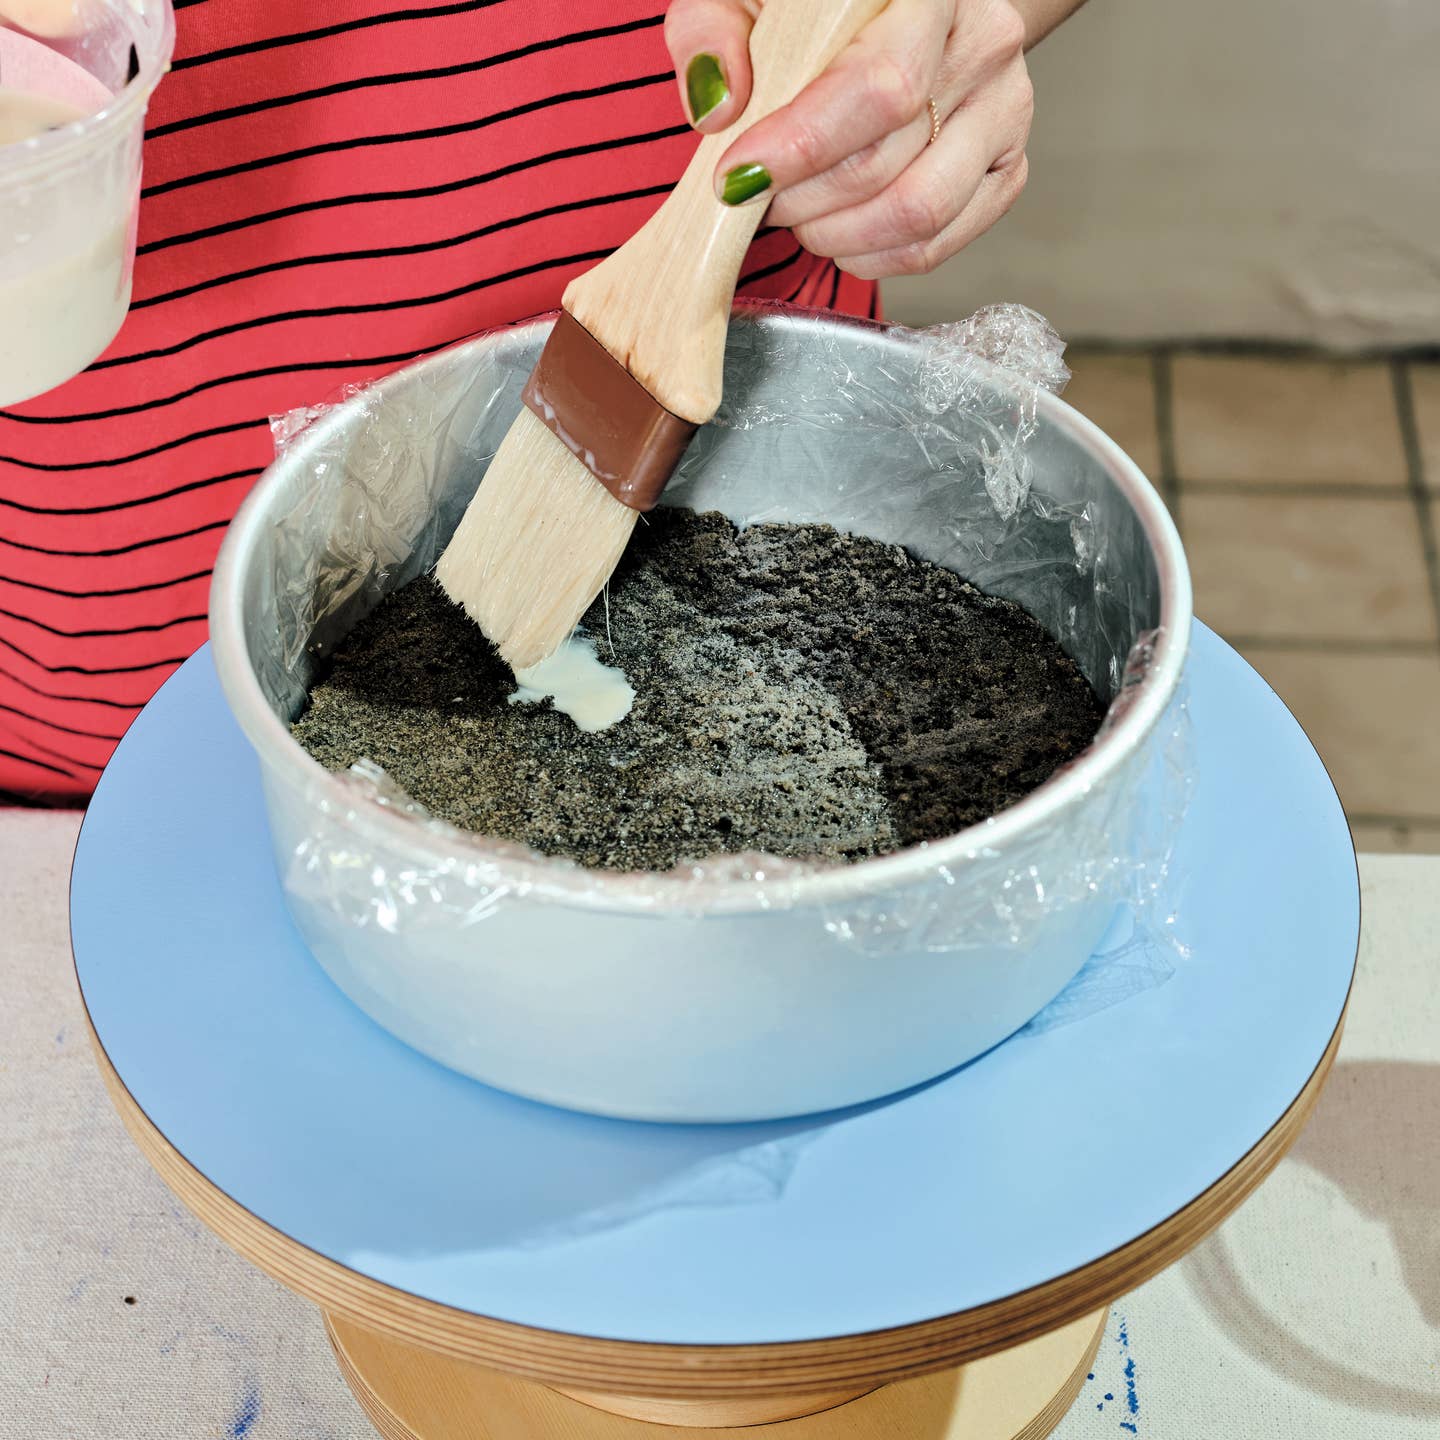
Line the inside of the cake pan with 2 or 3 large sheets of plastic wrap, making sure that the film reaches all the way to the corners of the pan while still leaving plenty of overhang along the edges. Carefully lower an intact circle of cake into the pan. If using a “soak,” brush the layer generously. While Pickowicz acknowledges that soaks are not always strictly necessary, she likes the added moisture and flavor that comes from adding a syrup or creamy liquid. “Soaks are another opportunity to build flavor into a layer cake,” she explains.
STEP 3: Add a layer of filling, another circle of cake, and repeat.
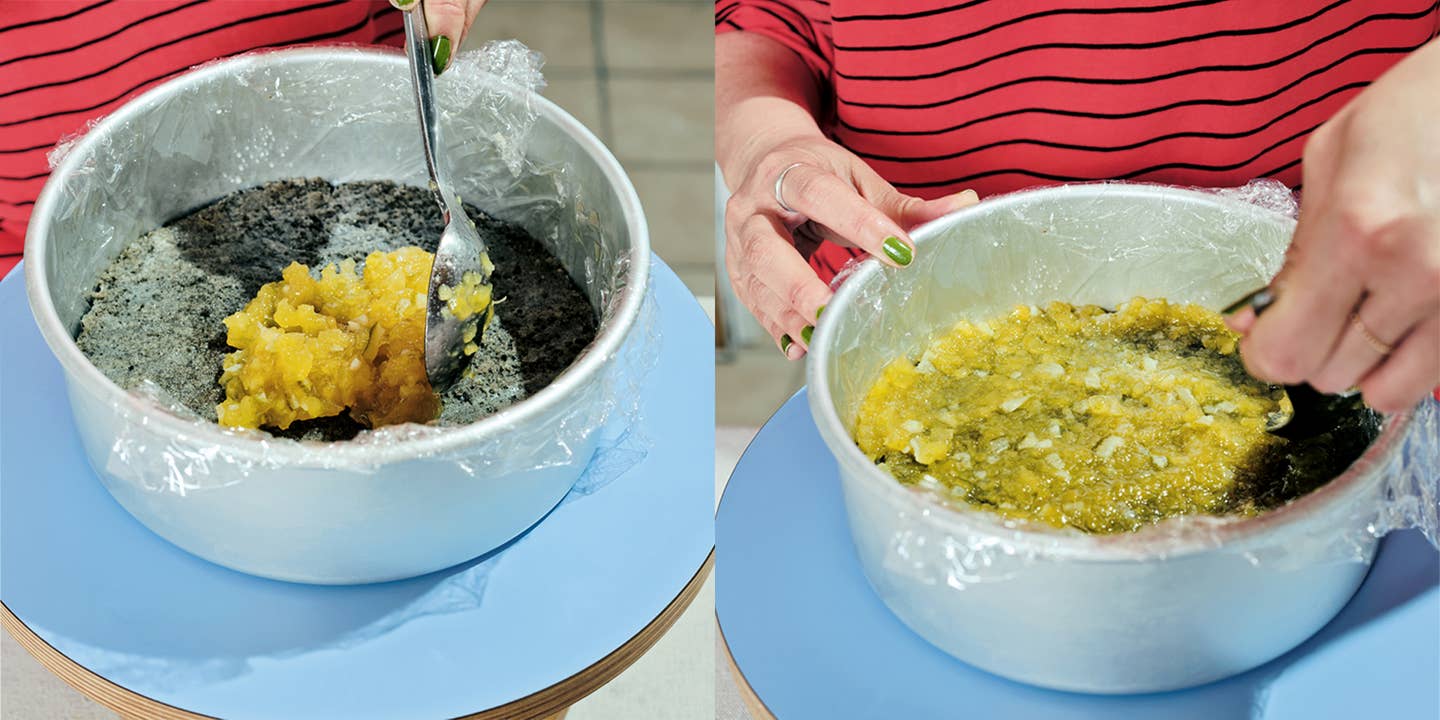
Old-fashioned American-style cakes often sandwich thick cake layers around modest swipes of the same frosting used to decorate the outside of the cake. Pickowicz prefers to play with more surprising textures, and a more balanced cake-to-filling ratio inspired by intricate mousse cakes popular in Korea and China. Spoon a generous layer of filling evenly over the cake layer: Try a layer of homemade or store bought jam, a curd, or even a nut butter or praline paste.
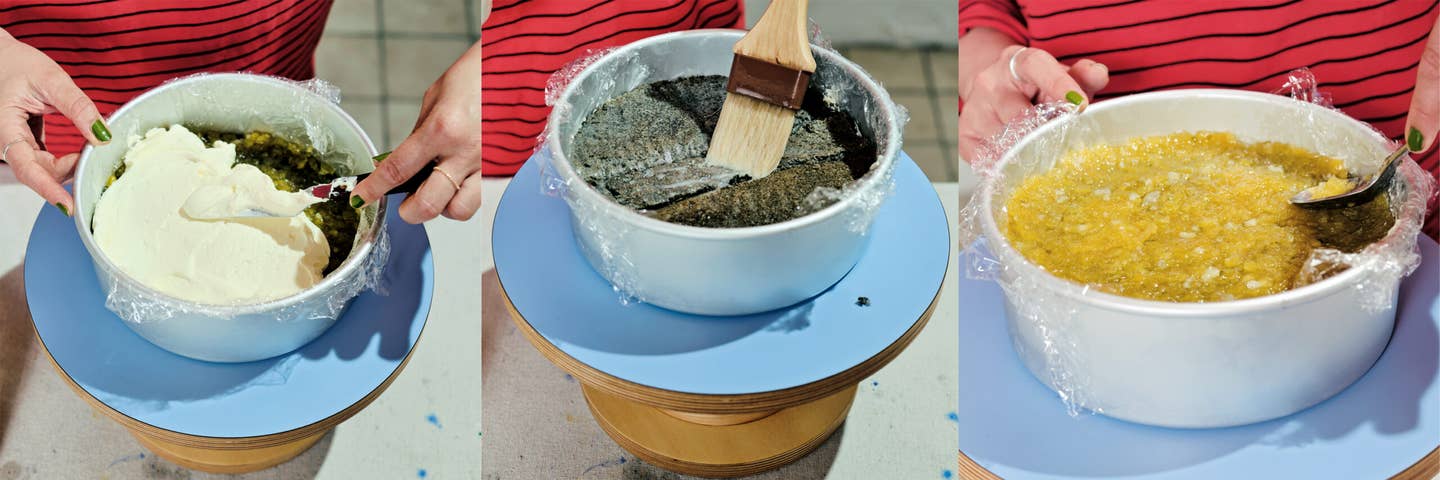
If you like, top with another layer of filling—variation in texture is key—then repeat the process, adding another cake layer, a bit of soak (if using), and another layer of filling. Repeat this process four or five times, or until the cake pan is nearly filled, reserving one unbroken circle for the final layer.

Top the final layer of filling with the unbroken cake circle, brush generously with your soak (if using), then fold the edges of the plastic up and around to cover. Press down gently to level the cake as needed. Wrap tightly with another layer of plastic wrap, then transfer the cake to the fridge for at least 8 and up to 72 hours, or to the freezer for up to a month.
STEP 4: Unmold the cake onto a platter or cake stand.
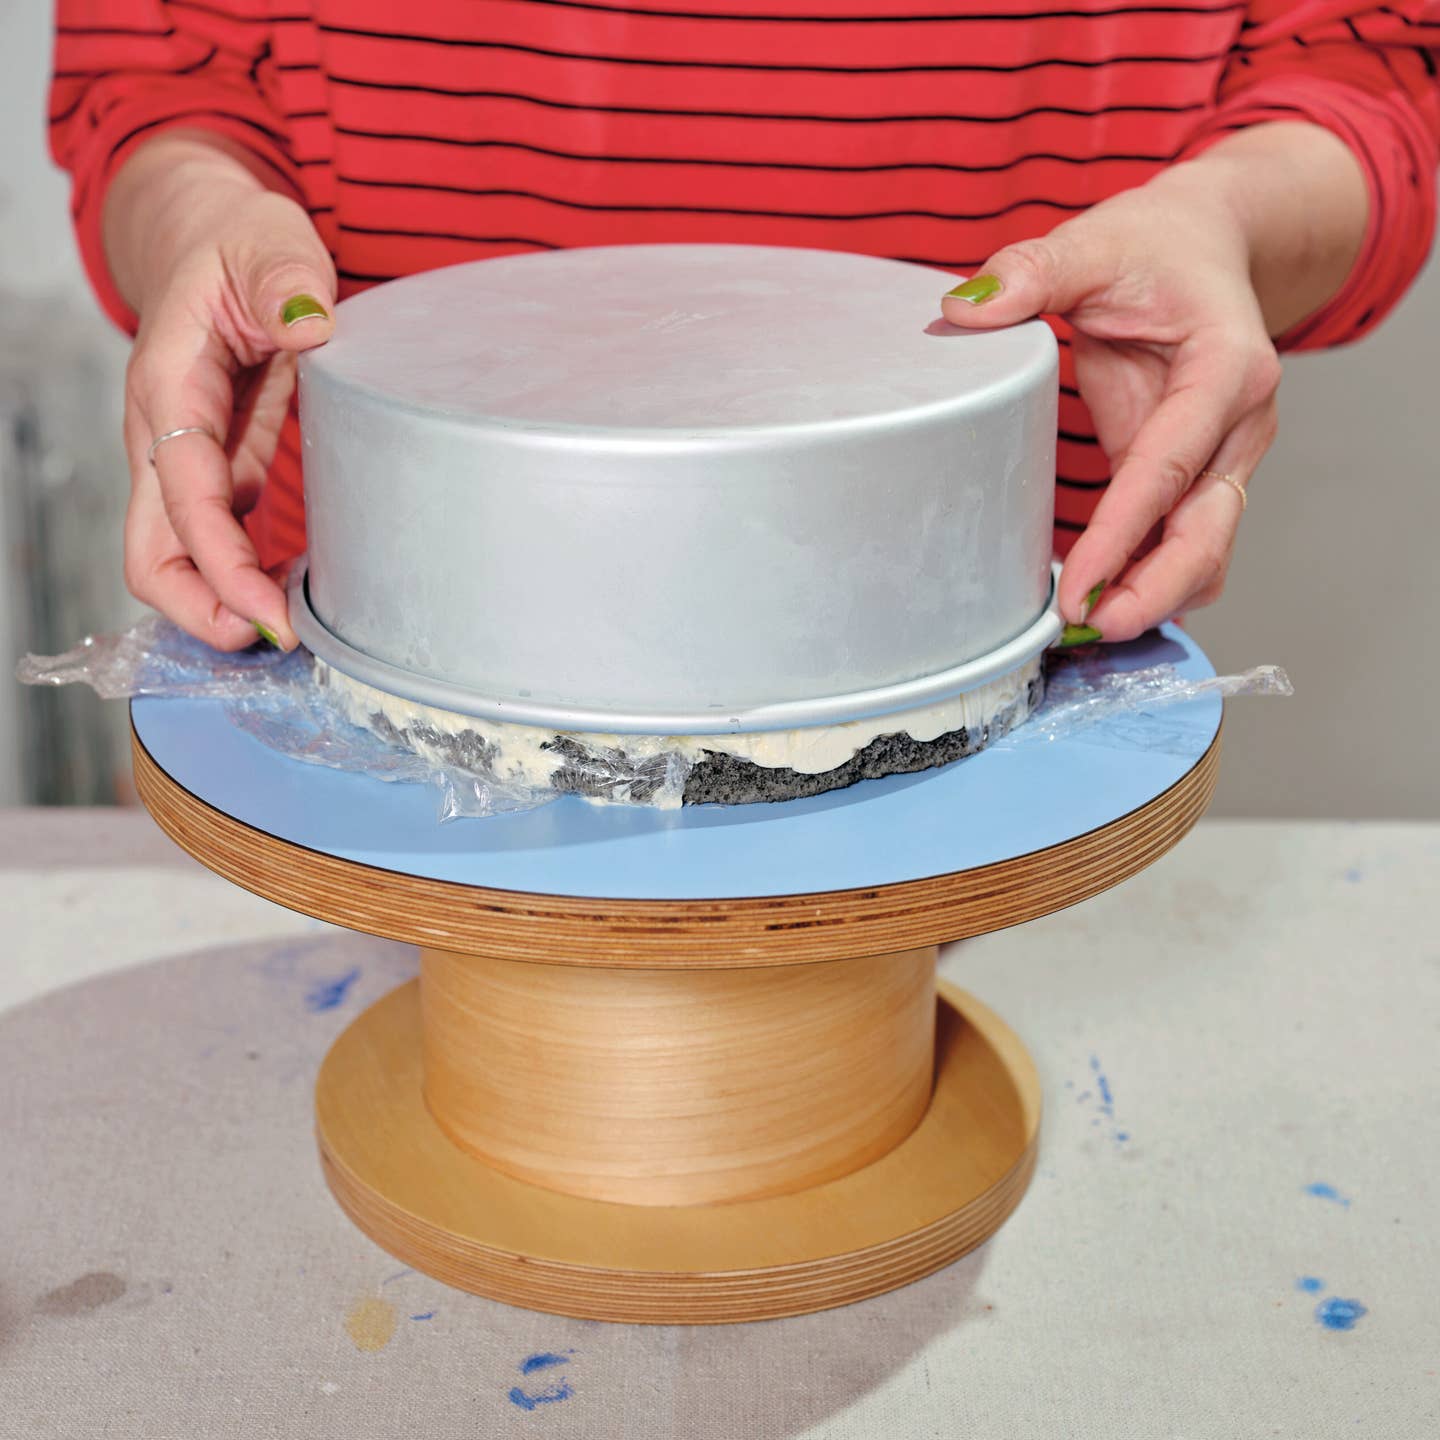
The day you plan to serve the cake, unmold and frost it. (If the cake is frozen, thaw it overnight in the fridge before unmolding.) Unwrap the top of the cake, then invert the pan over a cake platter, cardboard cake round, or cake stand. Lift the pan up and away so that the perfectly flat bottom layer is now the top. Discard the plastic wrap.
STEP 5: Using an offset spatula, coat the cake generously with buttercream.
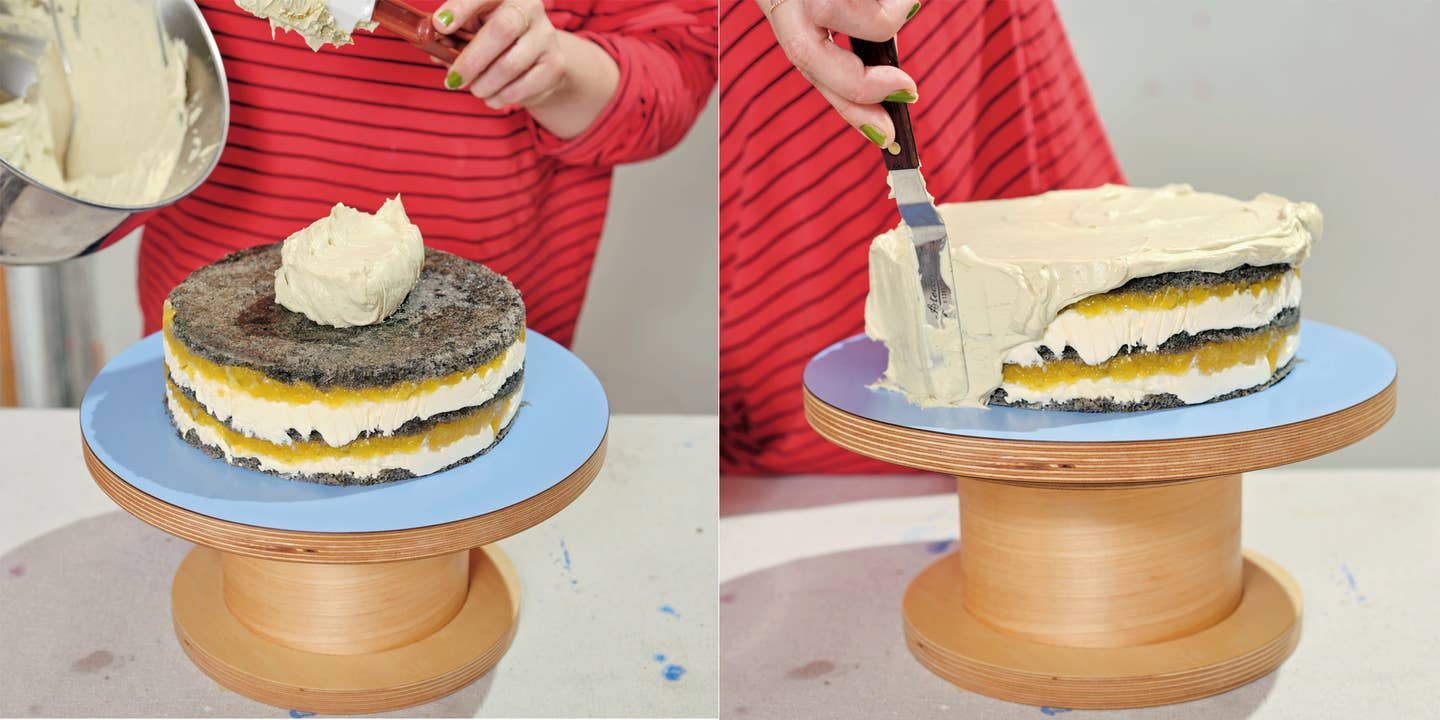
Ice the cake: Some folks like to use a rotating cake stand at this stage and you may certainly do so if you like, but Pickowicz shrugs off the added equipment as unnecessary. "You can frost the cake right on the platter, right on your cake stand, right on your whatever!" If using buttercream you have made ahead of time, be sure it is at room temperature and beat it well until very smooth. Using an offset metal spatula, she explains, scoop half of your icing onto the top of the cake. Spread the buttercream all the way to the edges, then dollop the remaining buttercream evenly along the sides, smoothing gently to avoid scraping the edges of the cake and the filling, until the sides of the cake are thoroughly coated. (Remember: A well-chilled cake will hold together far better at this stage than a warm or room temperature one.) Run the spatula once more along the surfaces to smooth, scraping away any excess buttercream from the edges.
STEP 6: Decorate the cake with a piping bag fitted with a pastry tip.
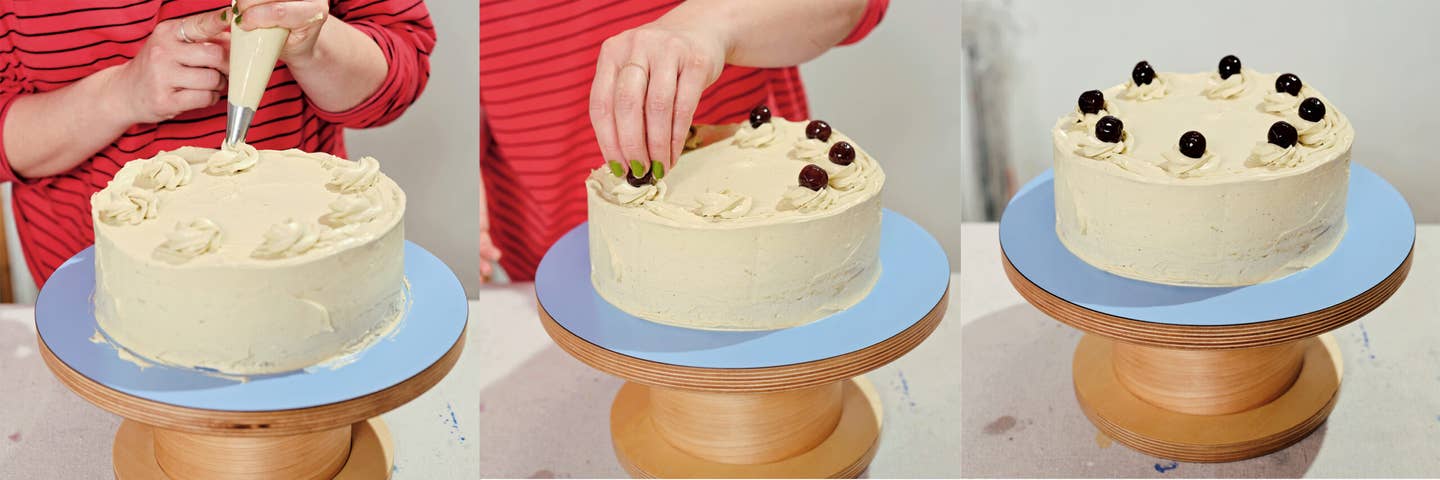
Once the cake is coated, you can consider it a blank canvas: Pickowicz’s decorating style is elegant, organic, and a bit freeform, but you can feel free to experiment with the many intricate cake decorating tools available online and in your local bakery supply shop. A pastry bag with or without a piping tip is an easy way to create sculptural designs with buttercream and other icings. Alleviate any pressure by making a bit more frosting than you need; that way, you can always scrape away any mistakes and start afresh.
STEP 7: Experiment with unconventional decor.
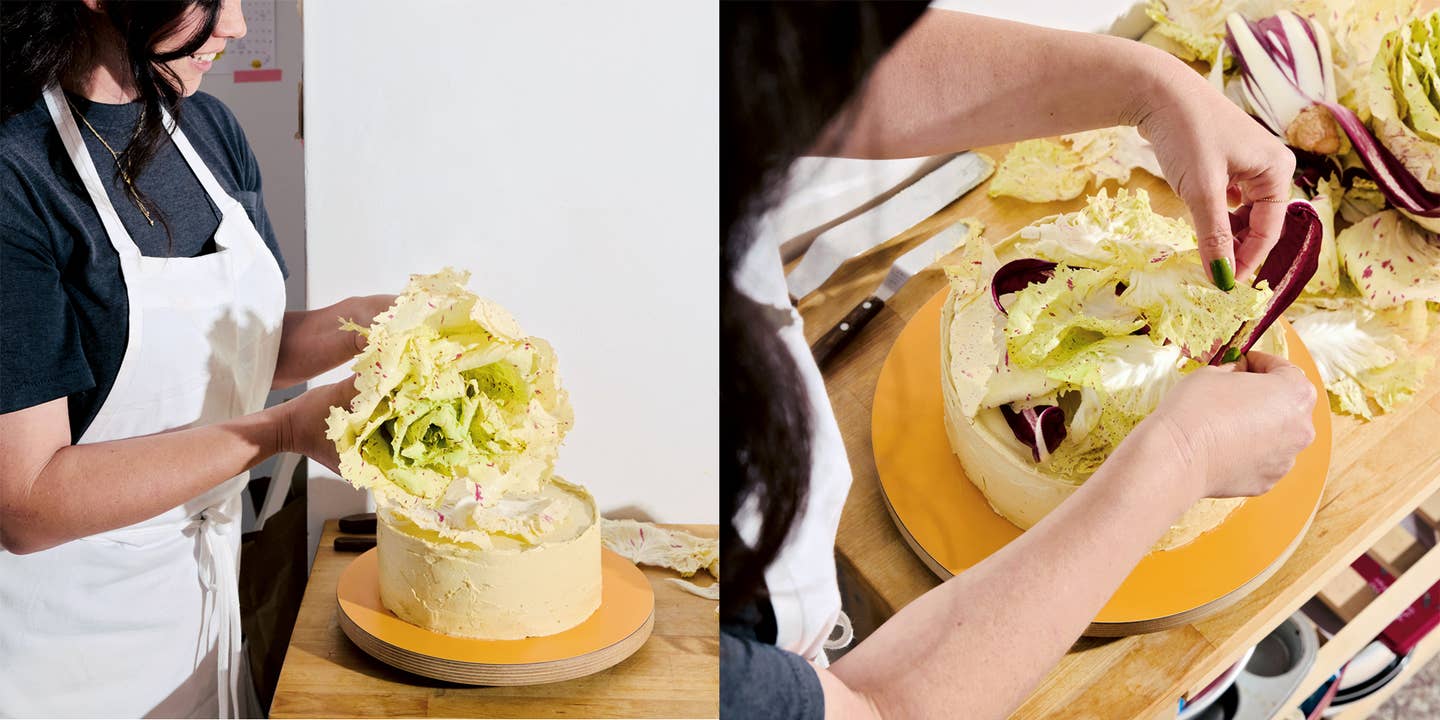
If piping bags and buttercream rosettes aren’t your style, that’s fine too! Some of Pickowicz’s most striking cakes are only very simply iced—then crowned with a few choice beauties from the farmers market. “When I'm decorating cake, I'm always looking at my pantry and fridge and wondering, ‘What do I have in here that I could use?’” she explains. “Maybe it's this beautiful bunch of basil or some tomatoes on a vine. Maybe it's whole nutmeg pods and cinnamon sticks. I like thinking beyond what we think ‘should’ be on a layer cake and instead just saying, ‘Well, what's around me? How can I make this personal?’”
Keep Reading


Continue to Next Story