
A Step-by-Step Guide to Waterbath Canning
Master preserver Camilla Wynne breaks down the traditional mason jar technique.
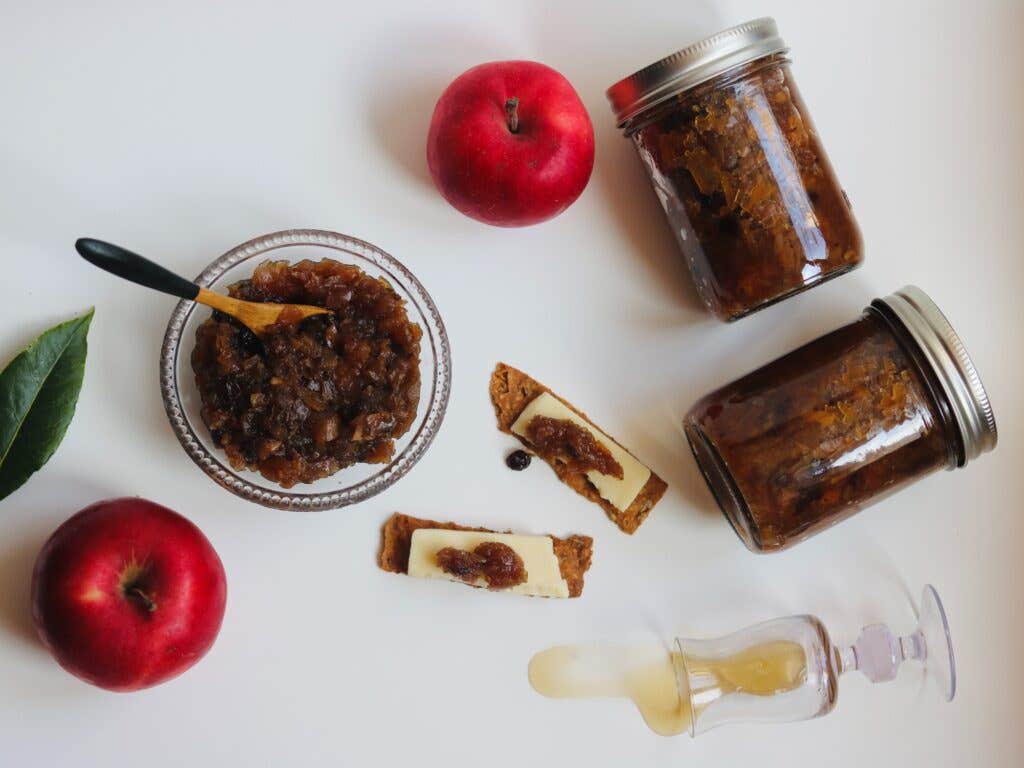
Preserving food in jars—otherwise known as “canning”—is one of the most rewarding cooking projects you can undertake. It helps you support farms and eat locally year-round, stock the pantry with delicious concoctions that act as shortcuts to super delicious meals, and ensure you always have a homemade gift to give on hand. In short, canning is an investment in your future.
I’m a cookbook author and master preserver, and I’ve been teaching classes on canning and preserving for a decade now. I’m passionate about changing people’s misconceptions about the process: You don’t need a bunch of specialized equipment; you don’t need to process a whole bushel of produce at a time; and canning certainly doesn’t have to take all day.
Classic water-bath canning is a simple process, and the best way to ensure preserved foods are safely sterilized. My easy method for canning jams, jellies and marmalades makes it possible to skip this process when putting up foods that reach high temperatures during cooking, but other naturally high-acid foods, like fruit in syrup, or acidified foods, such as pickles and relishes* require a dip in a hot water bath to properly preserve. That said, some of the traditional steps—pre-sterilizing the jars and simmering the snap lids—are unnecessary. Just fill clean jars, seal with new lids, and heat-process!
The whole point of water bath canning is to get the very center of your filled jars to 212 degrees Fahrenheit. Botulism—a potentially deadly toxin that can develop in improperly canned food— can’t survive in a high-acid environment, but it is still important to destroy or halt the propagation of any bacteria, yeasts, molds, and enzymes that can cause spoilage. For this reason, different foods require different processing times, which vary based on jar size, acidity, starting temperature, and viscosity. Always follow a recipe from a trusted source exactly to ensure that the food being canned is safely acidified and has a sufficient processing time. You can, however, customize recipes to some extent—either by swapping out different vinegars, as long as the percentage of acetic acid remains the same or higher; or replacing spices with others, as long as the total quantity isn’t increased.
I believe it’s high time we normalize making a few jars of pickles after work! When you’re making a sandwich months from now, you’ll be so glad you did.
*Safety note: Low-acid foods like soups, fish, and meats must be processed in a pressure cooker, which reaches temperatures higher than that of boiling water, to fully eliminate the risk of botulism.
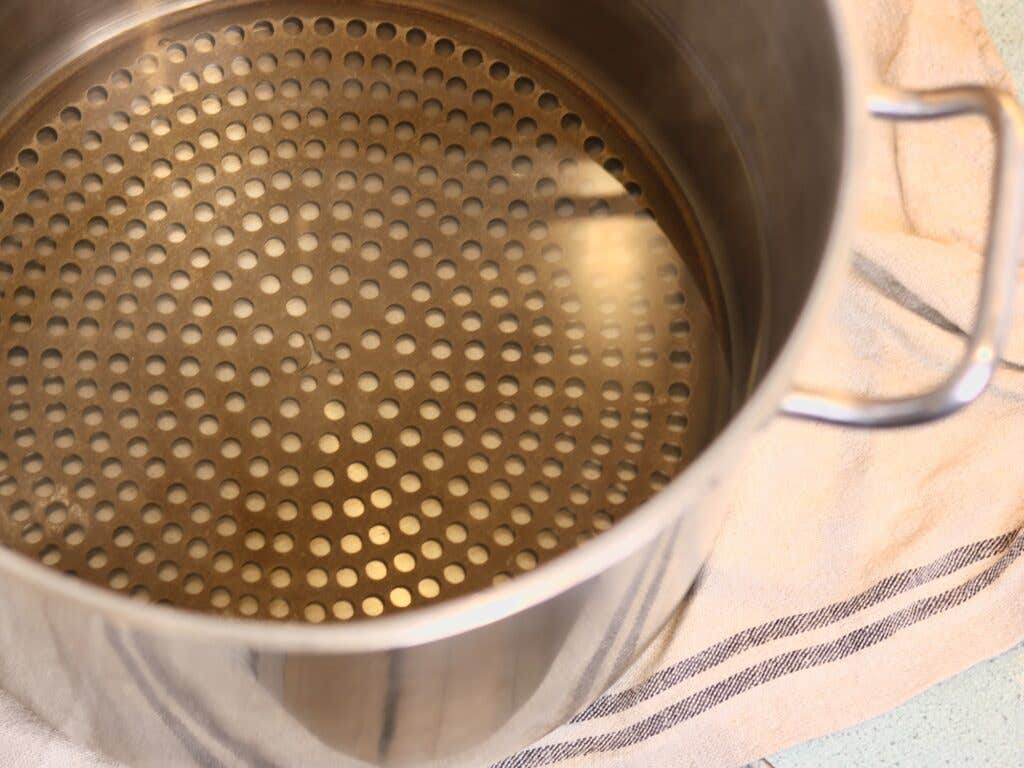

1. Bring a large pot of water to a boil, then turn off the heat. There should be enough water in the pot that once the filled jars are placed inside they will be covered by at least one inch of water. Cover the pot so the water stays hot but not too hot (you don’t want to put jars straight into rapidly boiling water, as this can cause thermal shock, breaking the glass). There should also be something on the bottom of the pot to protect your jars from the hot metal—a tea towel, a silicone mat, or even a perforated pizza pan that fits perfectly in the pot all work well.
2. Wash your jars with soap and hot water and have ring bands and new (unused) snap lids at the ready.

3. For hot foods, such as chutney, salsa, or hot pack pickles, use the “hot packing” method. When your recipe is ready to pack, fill the jars to within half an inch of the rim; use a bubble remover to release any air pockets, then, if the ingredients have dropped below half an inch from the rim of the jar, add a bit more. Use a clean paper towel to wipe down the rims as needed. Place the snap lids and rings on the jars and seal them “fingertip-tight” (just until you feel resistance; do not firmly tighten). This is necessary to achieve a good seal.
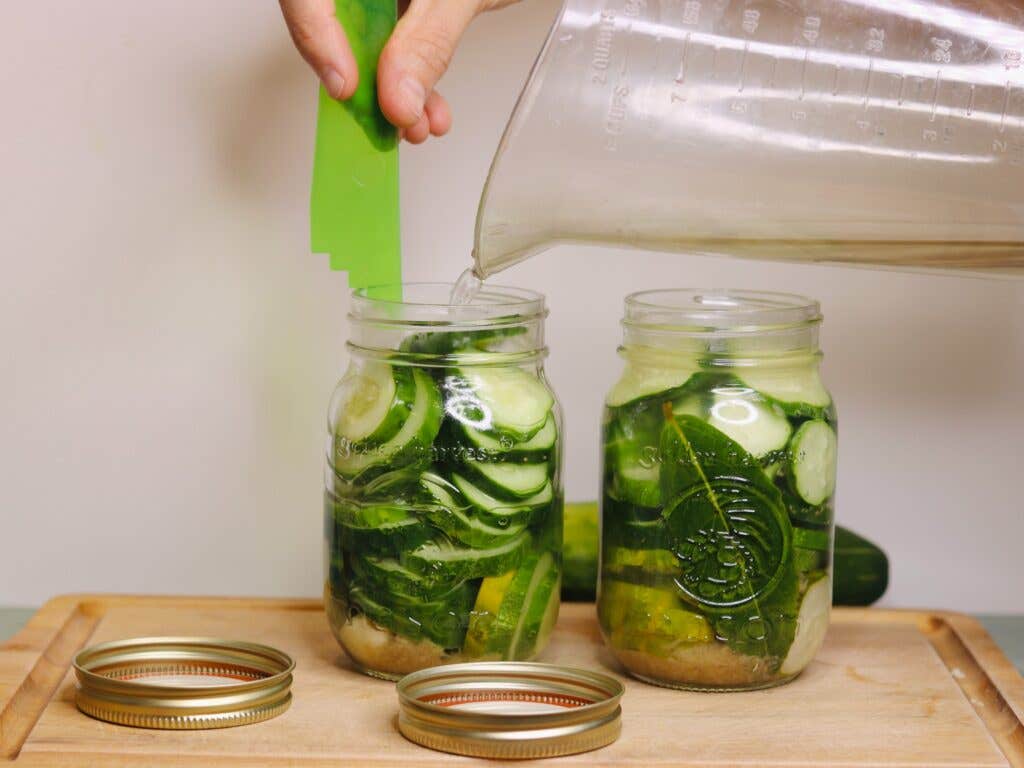
For raw pickles and some canned fruits, use the “raw packing” method: Fill jars to within a generous half an inch of the rim with the raw ingredients, then cover with hot brine or syrup to within half an inch of the rim. Remove any air bubbles, readjust headspace to ensure that the jars are still filled within half an inch of the rim, and wipe down as needed. Place the snap lids and rings on jars and seal them, fingertip-tight.
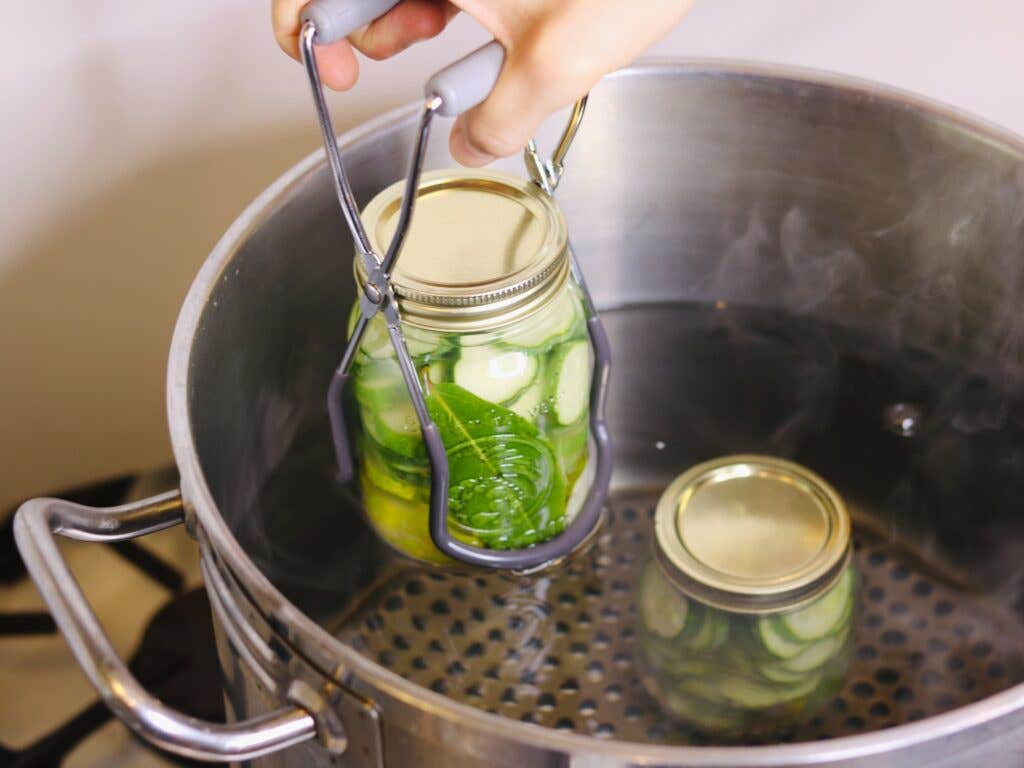

4. Place the jars in the pot. They must be covered by at least one inch of water. Replace the pot lid, bring to a boil over high heat, then set a timer for the heat processing time indicated in the recipe. (You will need to adjust for altitude if you live on high ground—conversion charts abound online). Turn the heat down to cook at a strong simmer.
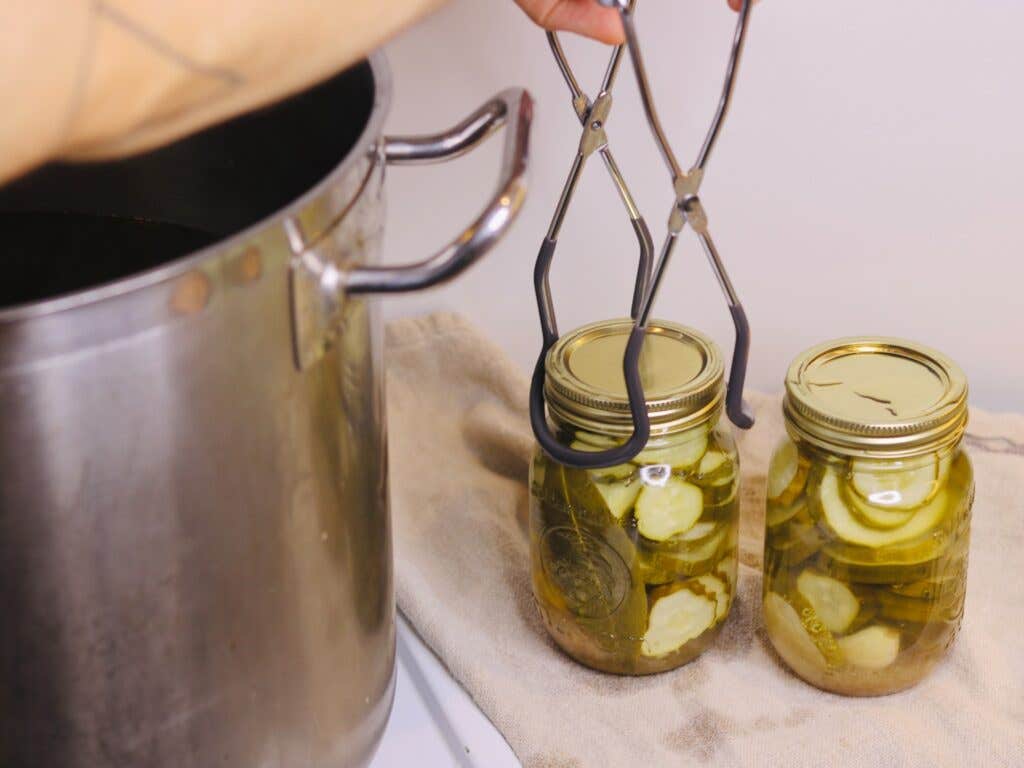

5. When the timer goes off, turn off the heat and remove the pot lid. Wait just a few minutes, then use a jar lifter to transfer the jars to a tea towel, wooden board, or wire rack (not a marble or stainless steel countertop, once again to avoid thermal shock). Set aside at room temperature, undisturbed, for 24 hours.
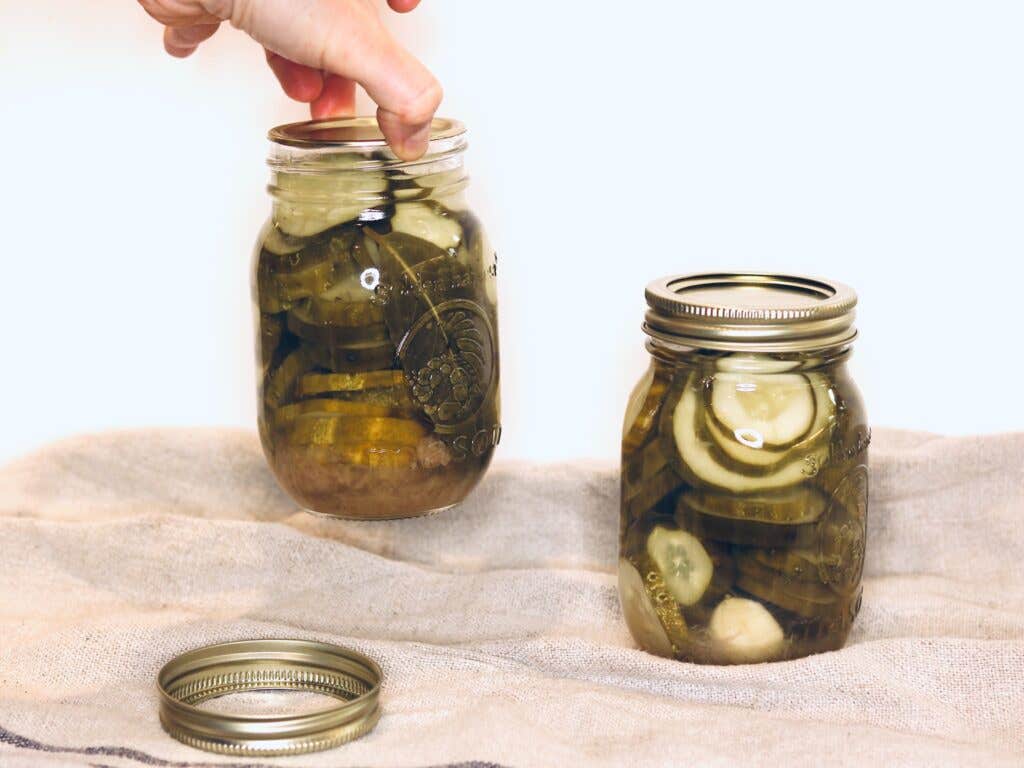

7. Whether or not you hear the jars make that satisfying popping sound, check that they are sealed. The best way to check is to remove the ring band and then pick the jar up by the snap lid. Gravity doesn’t lie! If you’re feeling confident, you might also turn the jar upside down, which I call the Dairy Queen Blizzard Test. The vacuum is real. I carry jars around near and far with no ring bands and have yet to be sorry about it. In fact, leave that ring band off when you store the jar—it will prolong the ring band’s life by preventing rust, and on the off chance that something goes wrong it will be all the more apparent if the snap lid isn’t being held on. Just remember to put it back on when you give away a jar as a gift.
8. Put any unsealed jars in the refrigerator (it happens sometimes in spite of our best efforts). Label then store your sealed jars in a cool, dark, dry place like a cupboard, pantry, or cellar.
Camilla Wynne is a Toronto-based cookbook author, writer and recipe developer, and preserving teacher. Her new book, Jam Bake: Inspired Recipes for Creating and Baking with Preserves, teaches readers how to make incredible jams, jellies, marmalades and fruit butters, and how to use them in delectable pastries. This text is adapted from the book.


Keep Reading

")


")


Continue to Next Story
