
Recreate That Buck-a-Shuck Happy Hour At Home
How to shuck oysters, with pearls of wisdom from a pro.
Whether it’s getting that crispy skin on your salmon or wondering how to steam mussels, seafood prep takes practice. Shucking oysters in particular can seem a daunting task. At their freshest, the little molluscs are sealed shut, seemingly impenetrable to all but the most skilled raw bartender. But all it takes is the right tool and a little elbow grease to enjoy the salty slurp of oysters in your own home.
Last month, the whole SAVEUR team traveled down to South Carolina for the Charleston Wine and Food Festival. In advance of one of our favorite annual events—Shucked, a celebration of all things oysters on the banks of the Ashley River—we met up with one of the participating chefs, Trey McMillan, founder and owner of Charleston’s Lowcountry Oyster Company and vice president of the South Carolina Shellfish Growers Association. McMillan obviously knows his oysters, so I asked him to show me his favorite way to shuck the shellfish of the hour. His method is thankfully also the safest, and he assures anyone nervous about the process: “Don't be intimidated by shucking oysters at home. It's a fun learning experience and a tasty reward.”
Gather Your Tools.
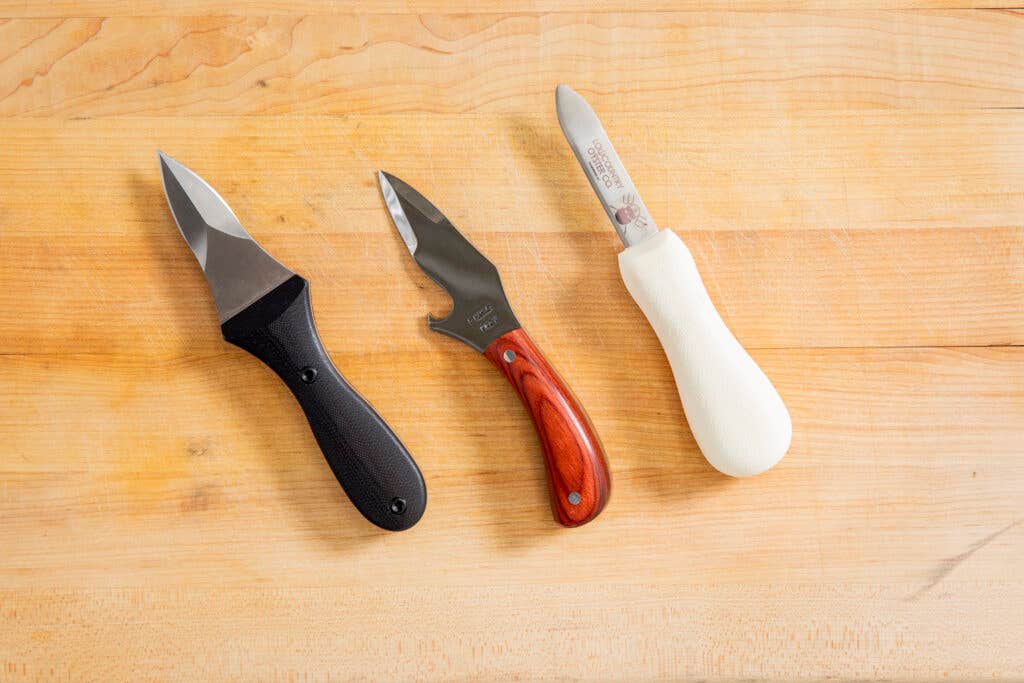

There are a few different styles of knives made specifically for opening oysters. Some are designed for opening steamed oysters clusters, while others are better suited for live, raw oysters. McMillan recommends a single implement that can do it all: the New Haven oyster knife. Its dull, thick blade won’t bend under pressure and McMillan loves the stubby, slightly rounded tip. “It's got a little curve to it to where it's kind of like a pry bar,” he says of the New Haven, which makes easy work of popping the shell open with just a twist of the hand. The angled tip also protects the user from injury in the event their hand slips during shucking. McMillan suggests seeking out a knife with a plastic handle, which is easier to clean and more sanitary than wood-handled versions.
There are also plenty of gadgets and tools out there designed to protect beginner oyster shuckers (think chainmail and cut resistant gloves) but McMillan believes a simple kitchen towel is all the protection you need.
Set Up Your Serving Station.
Once your oysters are cracked, you’ll want to serve or eat them right away, so get your platter and any accompaniments ready before you begin. If you’re making any of your own condiments like mignonette or cocktail sauce, prep them ahead of time, or keep things simple with a platter of lemon wedges, bottled hot sauce, or prepared horseradish. Fill a wide, deep dish with crushed ice.
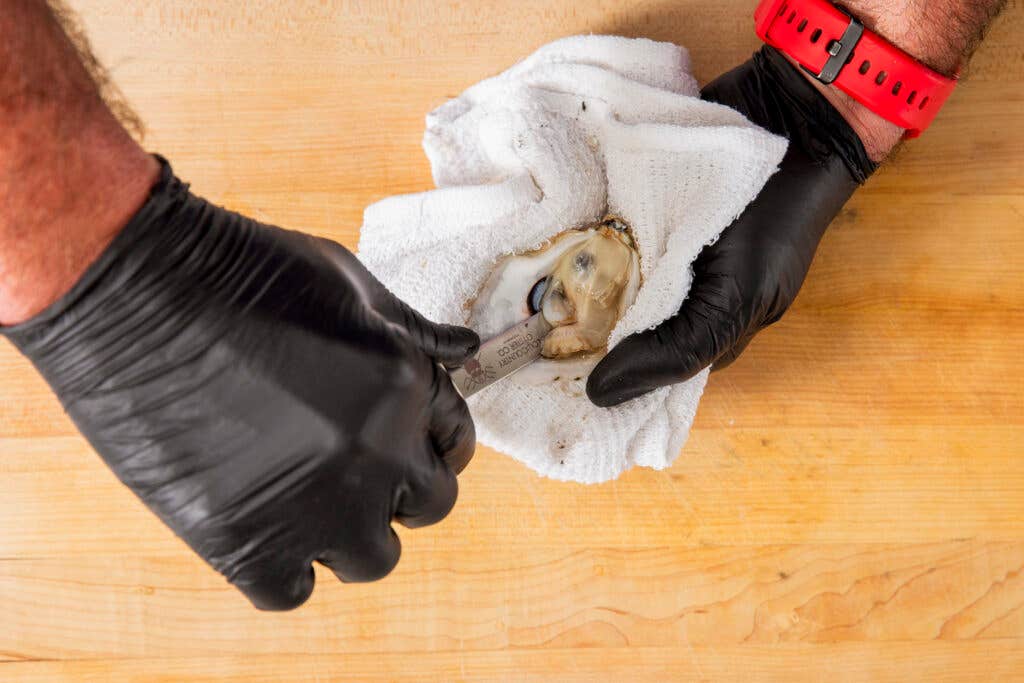
Grip the Oyster.
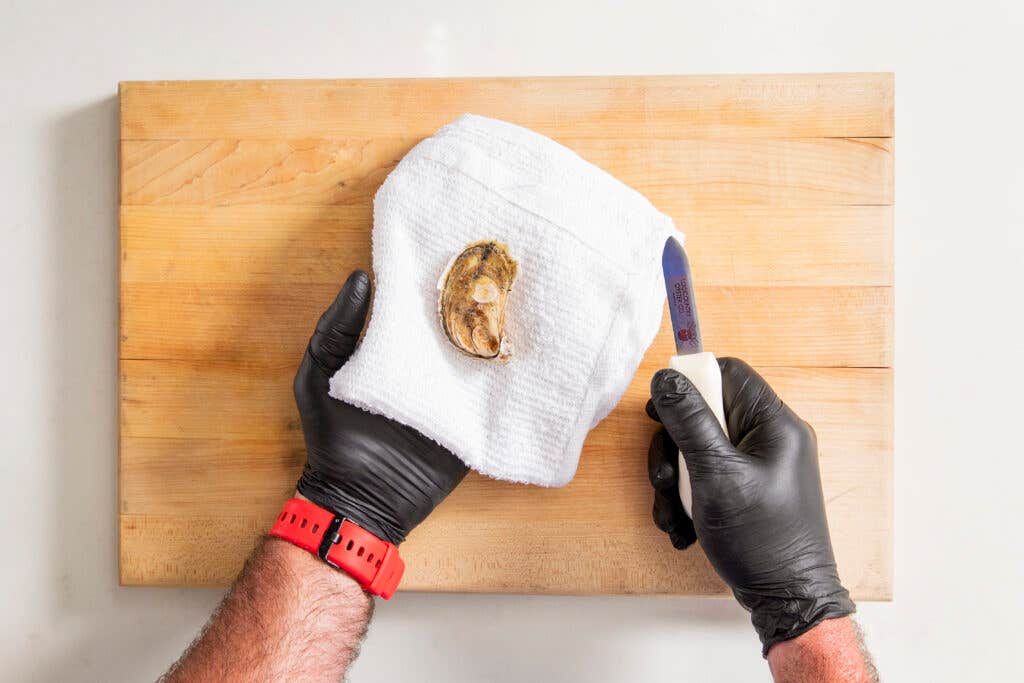

Fold your kitchen towel into a square, then place the oyster on top of the towel with the flat side of the shell facing up. With your non-dominant hand, fold the towel halfway over the oyster, with the hinge side facing out.
Make a “Lollipop.”

Hold the oyster down firmly with the heel of your non-dominant hand; grip the knife in your dominant hand and position the flat side of the blade parallel to the shell. With your elbow angled upwards and using firm pressure, wiggle and press the tip of the knife into the hinge. You’ll feel a soft spot, where, with a little more pressure, the blade will pass through. “Once I stick the blade into the hinge of the oyster and hold it up,” McMillan describes, “it should look like a lollipop.”
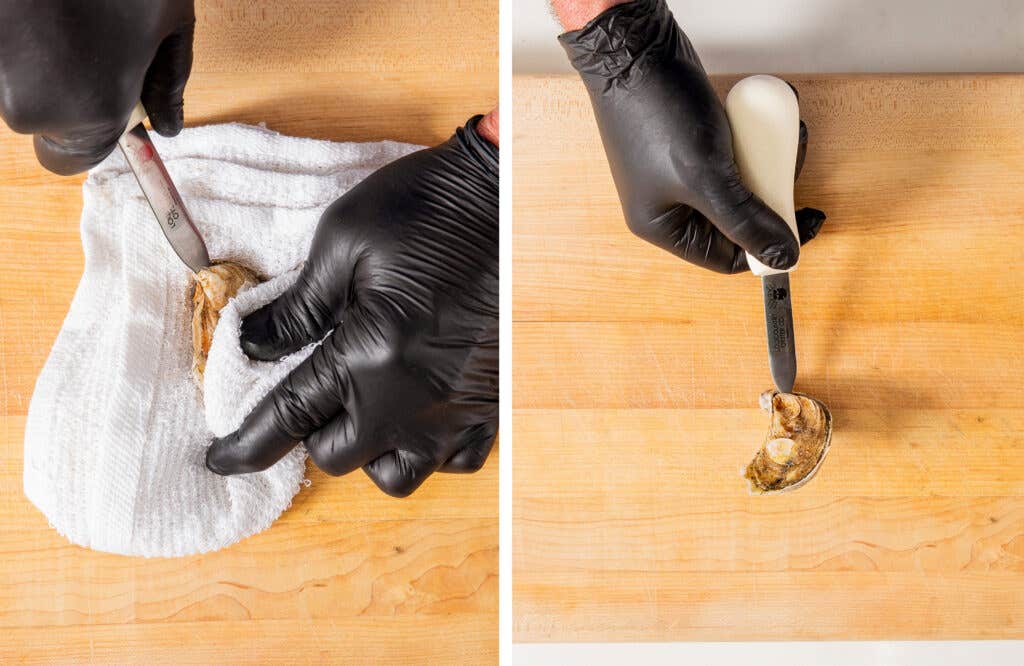
Remove the Top Shell.
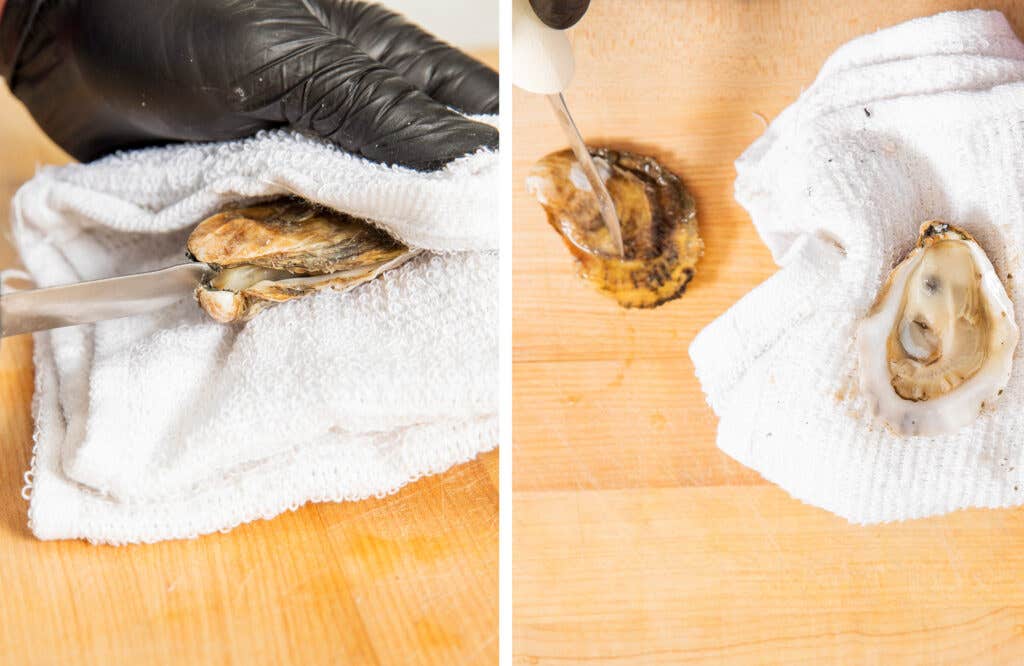

The hardest part is over! Now, gently twist the knife until the shell pops open. The abductor muscle is attached to the top and bottom of the oyster. Run the tip of the blade along the inside of the top shell to detach the muscle, then remove the top shell.
Set the Oyster Free.

Next, slide the tip of the knife under the meat of the oyster to detach the abductor from the bottom shell, making sure not to spill any of the briny liquor. Check for any sediment or broken shell, which can easily be removed with the tip of the knife or the kitchen towel. Now you’re ready to enjoy! You can either eat the oyster immediately, or transfer it, open-side-up, to the ice as you continue shucking.
Enjoy!
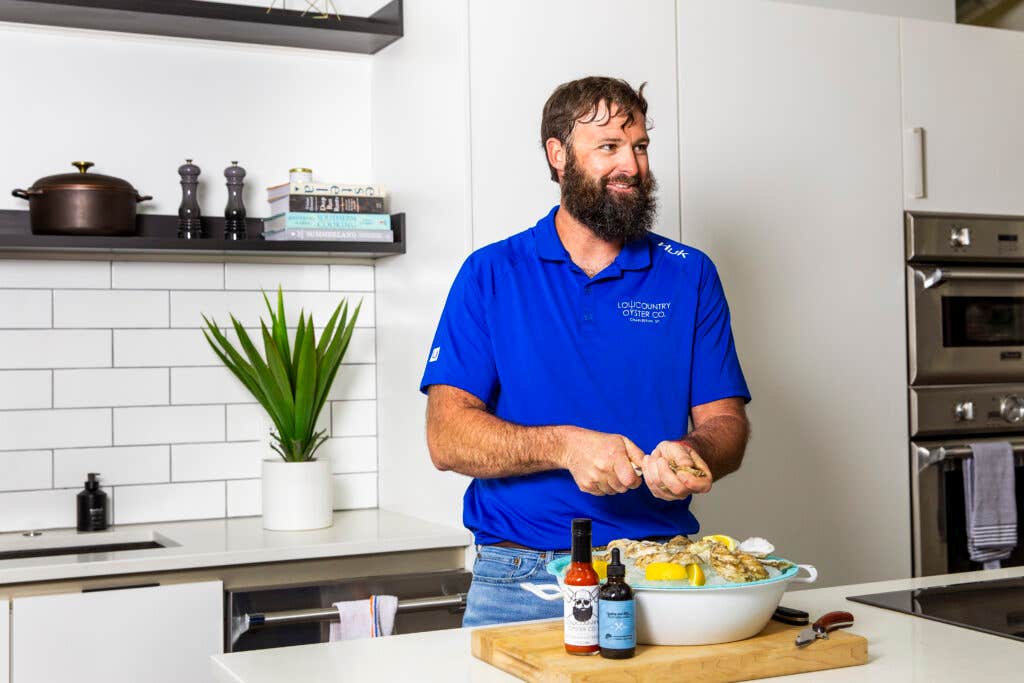

Once your dish is filled with oysters, you don’t even need plates to serve. “It really is like a little perfect food,” McMillan says. I can’t say I disagree! Serve your freshly shucked oysters immediately, and let your guests top them to their own tastes.
Keep Reading

")


")


Continue to Next Story
