
10 Expert Tips for the Perfect Summer Fruit Pie
A pie whisperer shares her secrets to making a bakery-level crust and filling


Pie lovers, rejoice. We have arrived at the intersection of summer fruit's peak quality and bounty. Now is the time for sweet, juicy peaches to bubble through lattice tops, for toasty crumble to cozy up to a jumble of berries. Sassy plums and sweet cherries, smooth-skinned nectarines and pinky-yellow apricots are vying for our attention while farmers' market tables groan under the weight of perfectly ripe, late-summer fruit. The choices are dizzying, the time fleeting.
As a professional pie baker responsible for nearly 100 pies a week, I find myself swimming against the tide of summer fruit. Up to my oven mitts in circles of buttery dough and stacks of aluminum pie tins, my days are spent as a fruit and crust liaison, stone fruit analyst, berry emissary, and pie whisperer. In the evenings, I research and test recipes at home for my pie-centric blog.
My daily challenge is to stay one step ahead of production. On a much smaller scale, many of the strategies implemented in a professional bakery are worth bringing home. As you reach for your apron, consider this: pie is not perfect. It is forgiving. It wants you to succeed and with each pie that exits the oven, you are honing your skills. With all the bounty at farm stands right now, there’s no better time to start. Here’s everything you need to know to make the ultimate summer fruit pie.
RELATED: Our Favorite Summer Pies


1. Keep It Simple
Allow the fruit to take the lead, while giving your crust the critical supporting role. Ripe fruit boasts a natural sweetness and requires just enough sugar to enhance the flavor. Add the gentlest hint of spice—you want the fruit to taste like summer, not a pumpkin latte.
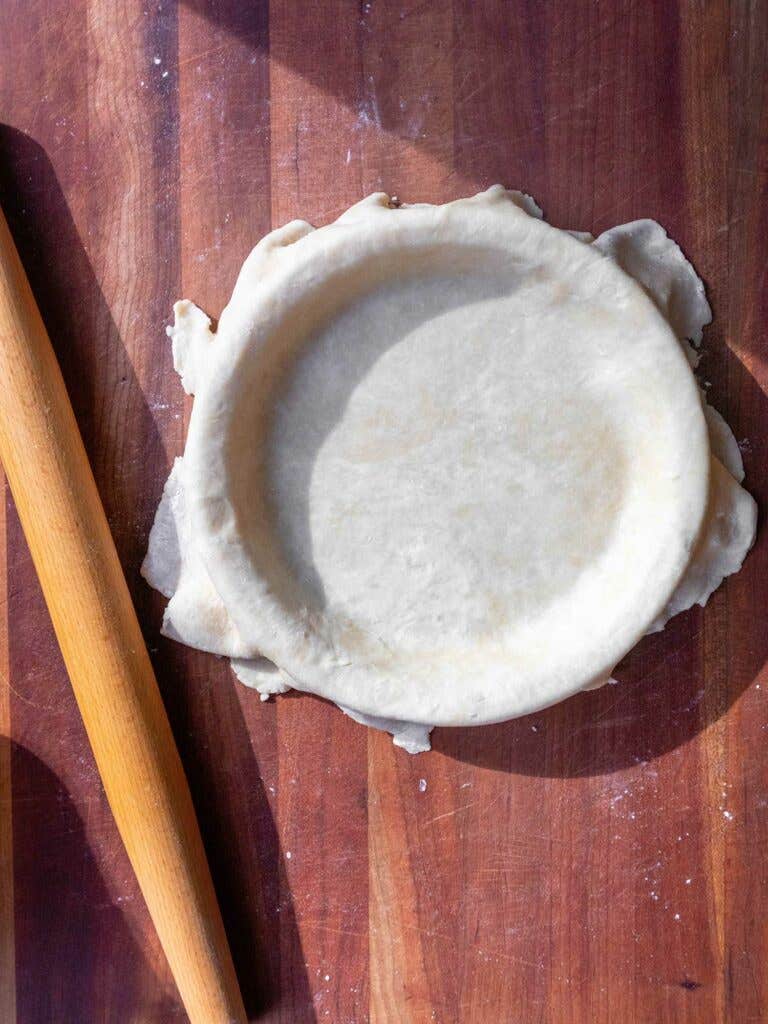
2. Start with the Right Pie Plate
It's also a good idea to get acquainted with your pie plate. You may be tempted by the array of pretty pie dishes out there, but it is far more important to select one that is right for the job: A no-frills 9-inch glass Pyrex pie plate makes a fine pie and will look generous when filled with 6 cups of fruit. (It also provides a glimpse of the bottom and sides of the pie as it bakes.) Deep-dish pie plates require closer to 8 cups of fruit, extra pie dough, and more time in the oven. (Save the deep-dish extravaganzas for cooler days.)

3. Plan Ahead
Good pie takes time. Think like a professional baker and plan ahead; ask yourself, "When am I going to serve this?". If you want to serve pie for dessert on Saturday evening, you should start at 10 a.m. that morning at the latest.
And remember: pie crust keeps well in the fridge or freezer. This time of year, it is wise to keep a few batches on hand for when inspiration strikes.

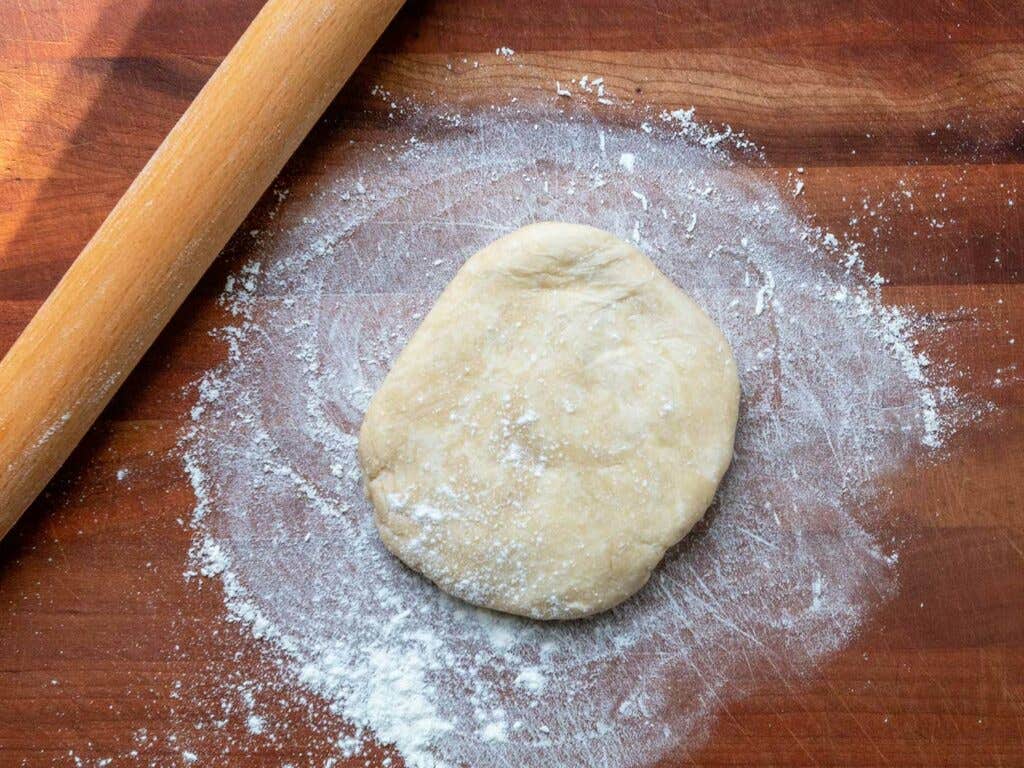
4. Stay Cool
Everything involved in the pie process should be cool: your hands, bowl, and rolling pin; the butter, flour, and water going into your dough; and even your surroundings. If your kitchen is too hot, bake early in the morning or after the sun goes down.
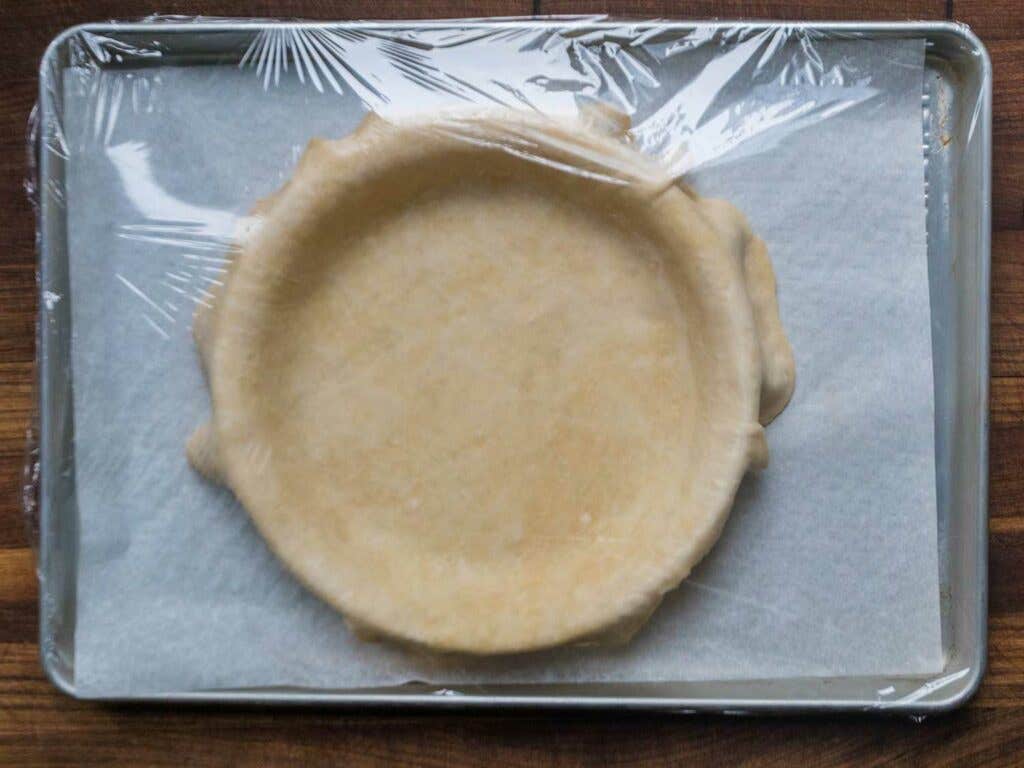

Once your dough is ready, be sure to keep it cool while you work on the filling. Place the pie shell and and top crust on separate baking sheets, cover with plastic wrap, and refrigerate.
5. Be Gentle with Your Fruit
Stone fruits like peaches, plums, and nectarines are delicate, so take care not to overhandle them. Thickeners are a source of hot debate among bakers, but just remember you’re striving for a filling that is both sliceable and juicy. Cornstarch is readily available and provides consistent, somewhat gelled results. You can also use instant tapioca for slightly more gelatinous results, or tapioca flour if you prefer a softer filling.
It is important to have everything in place before you assemble your pie; once the fruit is introduced to the sweetener, it will exude juice, so be ready to move quickly. Having your pie shell and lid rolled out and waiting in the wings is critical. Bonus points if you have room in the freezer or fridge for the assembled, unbaked pie to chill thoroughly before you transfer it to the oven.
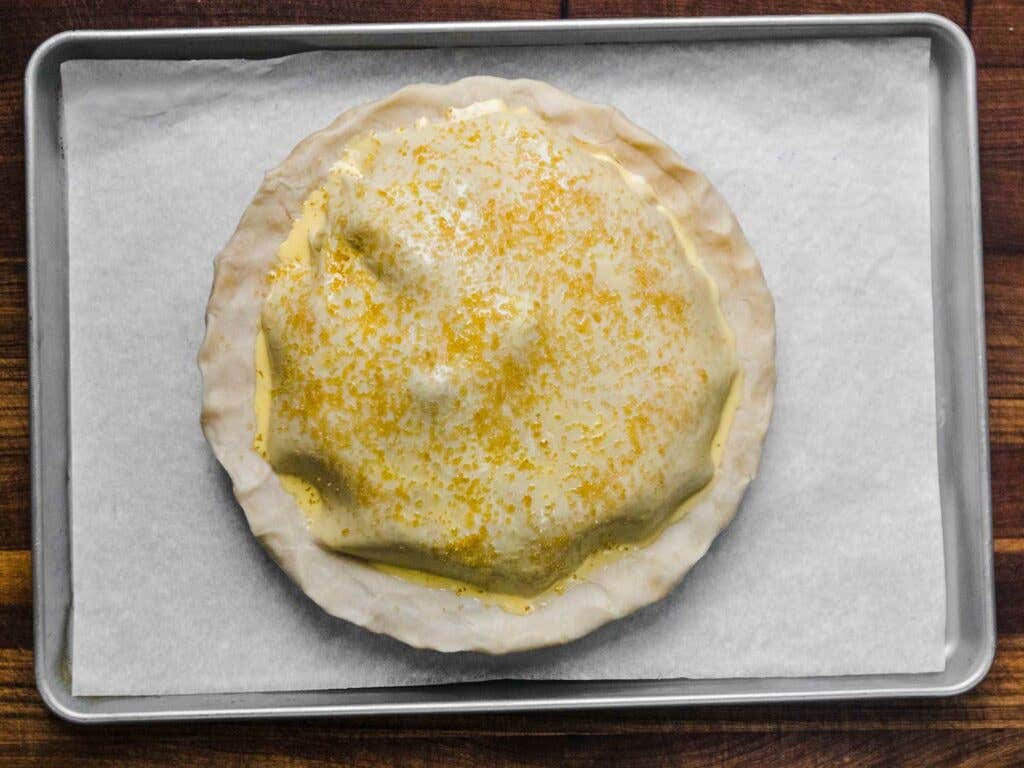

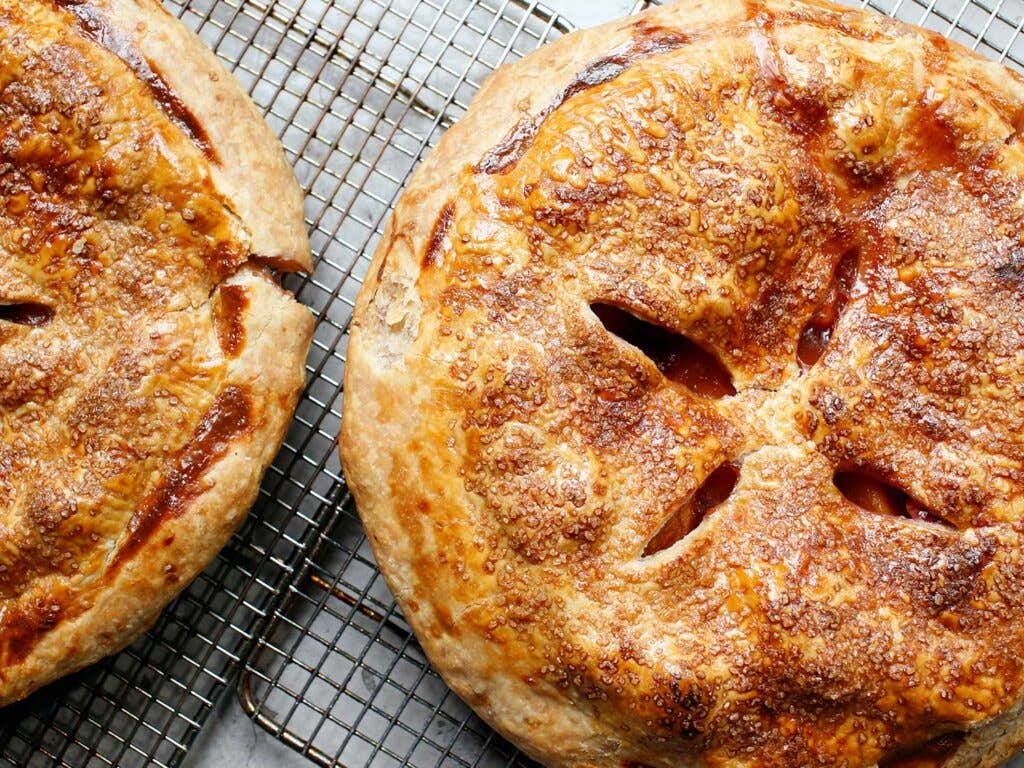
6. Don't Forget the Finishing Touches
In pie-making, small details make a big difference. Egg wash and a final sprinkling of sugar are simple additions that gild the lily, enhancing the crust with a glossy, golden finish.
7. Babysit Your Pie
A baking pie requires attention. Start it on a rack set in the bottom third of the oven, in a fully preheated 425°F oven. This will kickstart the cooking of the pie shell by giving it access to the most direct heat, preventing the dreaded soggy bottom.
The next phase of baking should happen in the center of the oven, with the temperature turned down to 375°F. This allows the fruit filling to get good and hot, the thickener to stabilize the juices, and the top crust to catch some rays.
Your job is to rotate the pie periodically and to keep an eye on the edges. Every oven tends to have a different “hot spot,” so rotating 180° once or twice during the bake helps the pie bake evenly. As for that outer rim, make sure that the crust has fully set, then cover the edges with foil strips to prevent overbrowning. If the top is also browning too quickly, tent the whole pie with foil.
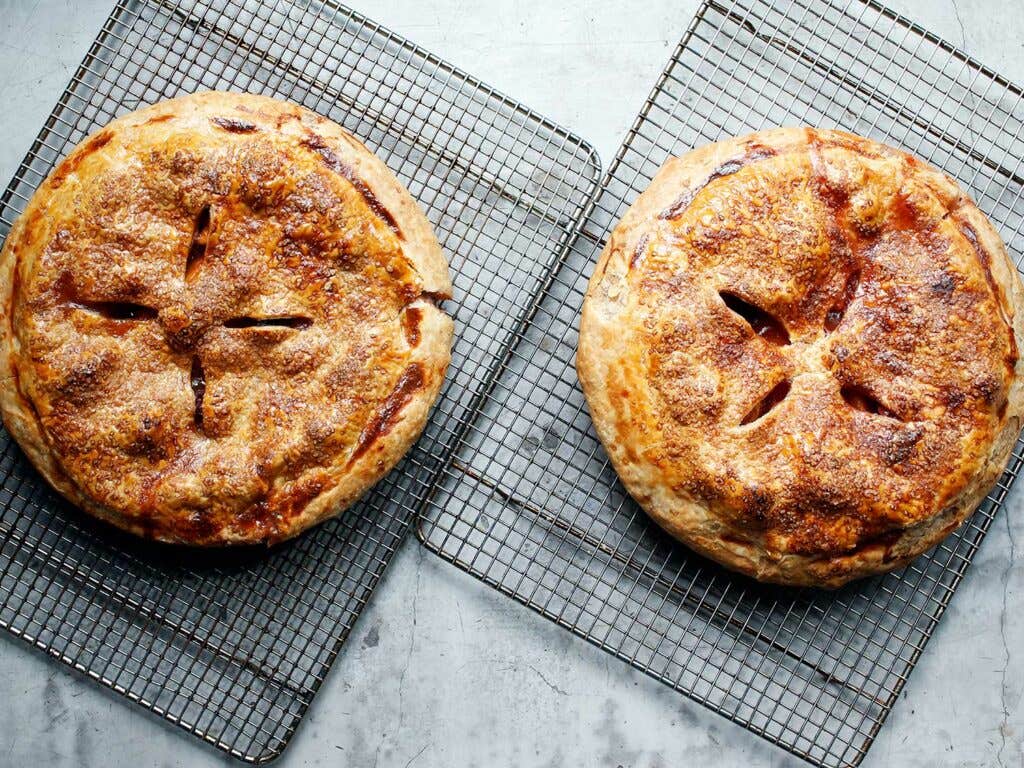

8. Let It Rest
There are a few things I look for when determining if a pie is ready. First, the juices around the edges of the pie and in the very center should be thickened, syrupy, and bubbling with gusto. When I remove a pie from the oven, it almost looks like it’s breathing; the top crust (or lattice) moves ever so slightly, and is deeply golden. If the center of the pie is not bubbling but the crust is to your liking, cover loosely with a sheet of parchment or foil and continue baking for an additional 5 to 10 minutes. Underbaking is a common pie flaw, but one that is totally avoidable.
Once you have removed your pie from the oven, carefully transfer it from the baking sheet to a cooling rack. Now comes the toughest challenge yet: waiting for at least 2 hours before tucking in. This will allow the interior crust to finish cooking, and the sugars and thickener in the filling to fully gel for easier slicing, so exercise restraint!
9. Use the Proper Tools to Slice and Serve
Always slice fruit pies using a serrated knife—it makes a clean cut through the thick outer edge and all the way down to the bottom crust. A triangular pie server is best for transferring slices to dessert plates.
10. Make It Last
In the event there are any leftovers, you can store the pie in one of two ways. In the summertime, when your kitchen is ghastly hot, it’s best not to take a chance with fragile summer fruit. Cover the entire pie with plastic wrap and store in the fridge for up to 5 days. Otherwise, store your well-wrapped pie at cool room temperature for up to 3 days.
Reheat a whole pie in a 300°F oven, or cut it into slices, transfer them to a cast-iron skillet, and gently warm on the stovetop over low heat. The cast iron does a beautiful job of heating the filling and recrisping the bottom crust.
Keep Reading


Continue to Next Story
